This document provides a general user's guide to managing devices from the RM device management tree.
General Description of the Device Management Tree
The device management tree of RM, available after successful login to RM, is placed in the Device Management view of the console dashboard. It shows registered devices of different types arranged in groups (if needed) within the Devices root. The components of a specific device are shown as its descendants. It is also possible that a device's component contains one or more sub-components.
To open the Device Management view, click the button at the top, or from the navigation bar go to Dashboard and select there.
On selecting a component from the device management tree, the right pane shows different information, depending on whether you have selected a group, a device or a specific functional component of the device.
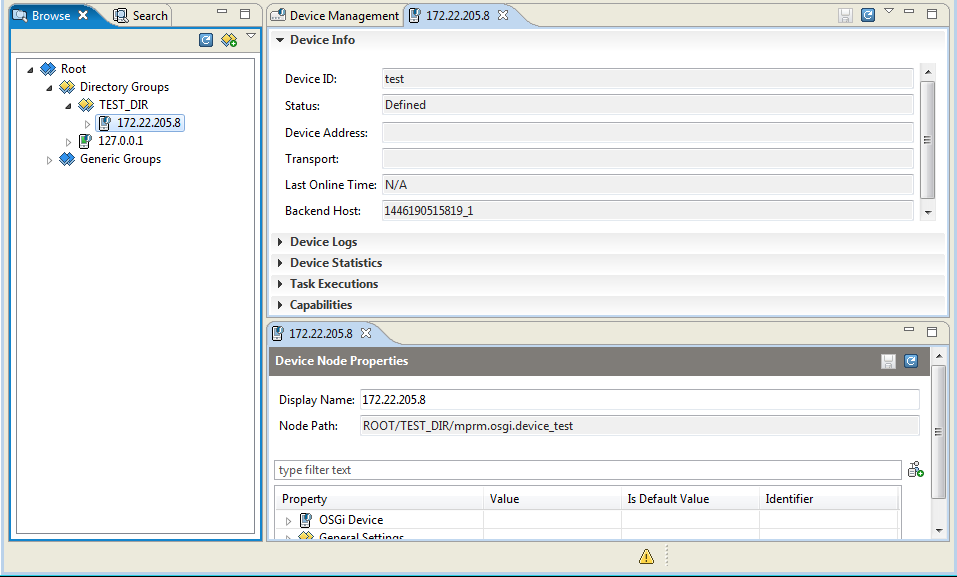
Device Properties
In general, for a selected device there are several expandable sections on the right:
Device Info, showing general properties of the device with regard to its interaction and integration with RM;
Device Logs, showing the logs generated for the device;
Device Statistics, showing the statistics of the deice;
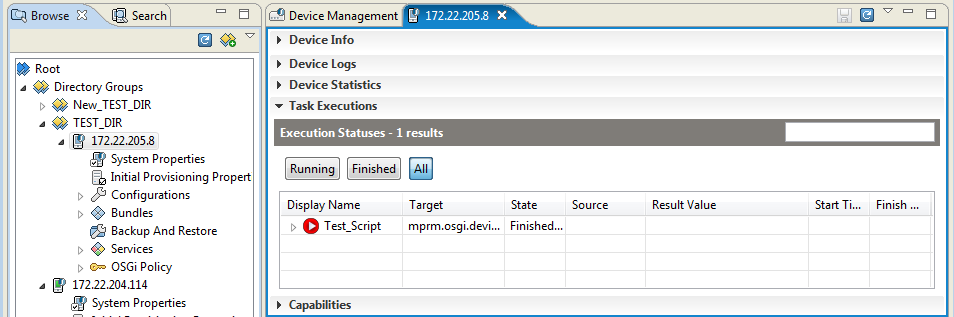
Task Executions, showing the execution status of tasks as Running, Finished and All with their Display Name, Target, State, Source, Result Value, Start Time and Finish time;
Capabilities, showing the platform properties of the device.
General
The Device Info expandable section shows the following properties for the selected device:
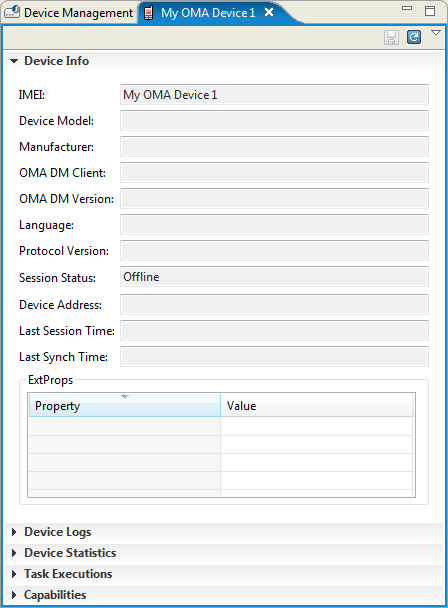
State Properties – Indicate the state of the selected device. They are placed at top of the device properties list. For example, for the demo device on Figures 1 and 2.1 such properties Device ID, Device Display Name and Switched State.
In particular, state properties stand for the state variable for the device root control unit. Their number and type depend on the concrete device type.
Capabilities
The Capabilities section contains the platform properties of the selected device. Currently, its functionality is used in the RM Software Repository for checking if a device is suitable to run a specific application. Capabilities might be automatically filled by the corresponding Device Control Unit Provider or by the RM system. The Capabilities device section allows you to add and modify manually certain capabilities according to your needs. See the "Device Capabilities" section from Control Units and Device Representation for details on the concept of device capabilities.
To add manually a capability (key-value pair), use the
 button - an empty row will be added at the beginning of the capabilities table. In the Property cell, select a capability from the list of ready platform properties or type it. Then, specify its value in the Value cell.
To edit a property, double click the key or value cell to make it editable and make the change.
To save persistently the changes in a device capabilities, use the Save button.
The figure bellow shows the capabilities of an OSGi-enabled device running the Bosch IoT Gateway, handled by RM's OSGi Device Management system.

Device Logs
The device management tree representation in the console allows you to get the logs for a specific device directly from the tree. The information displayed is similar to the System Logs view of the console dashboard, which provides a central access to all logs in the system. For general details on log information in console, refer to the System Package documentation. In this section are provided general instructions only.

Generally, for a log entry selected from the Device Logs section the console shows the time, severity level, device type, device ID, backend host ID (usually having the MS role) and text of a log message.
To refresh the list of device logs, use the  button.
Node Properties
On selecting a device from the device management tree, besides its properties there is a Device Node Properties pane on the right. It contains the attributes of the device as a node in a tree structure as defined by the Generic Device Manager and a collection of settings, exported by the relevant Device Control Unit Provider, for configuring miscellaneous management features specific to the device type.
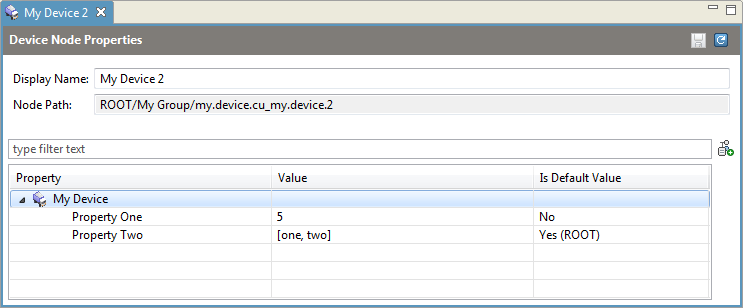
Tree Hierarchy Properties
Display Name – Defines the user-friendly name with which the device will appear in the device management tree. Its support depends on the corresponding Device Control Unit Provider. If you have modified the Display Name, click the Save button to save it persistently.
Node Path – The path of the selected device node in the device management tree. This property is internally generated by RM and has the format <path_to_parent_group>/<device_type>.<device_id>.

Node Settings
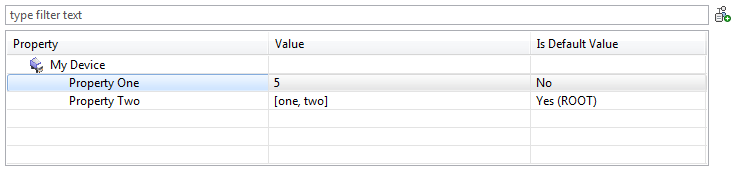
Node settings of a group or device allow the user to configure specific aspects of the management of a specific device(s), such as setup data, communication and authentication parameters, etc. Node settings are inheritable - the node settings defined to a device group are inherited by its sub-group and to its descendant devices unless you explicitly set the node settings of a descendant node. The node settings, scoped for a device, are with higher priority than the ones defined to its parent group.
Node settings can have metadata and can be grouped in device types. To set a node setting, double click over the value of the property you want to edit and enter the new value. After filling the necessary property, you can submit its value by clicking the Save button.
Commands over a Device Root
Registering a Device
The action of registering a device of a given type in RM is carried out by the constructor(s) of the associated Device Control Unit Provider. The name of the command(s) for registering a device of a specific type and the command's arguments depends on the control unit's metadata exported by the Device Control Unit Provider.
To register a device, select the group from Directory Group type to register the device in and invoke the appropriate command from the popup menu or from the toolbar at the top (e.g. Register Device Action in the figure at the top). If the provider defines an icon for the device registration (i.e. for a provider's constructor), this icon will appear in the toolbar in front of the constructor name and the device registration menu item in the popup menu will have this icon as well.
After the registration command is issued, its execution is passed to the Device Control Unit Provider.
Searching for Devices
The RM console allows you to search for a particular device or a group of devices matching specified criteria, defined as a script control unit filter of device conditions.
To perform a search over devices, go to the Search tab on the right of the Device Management view.
Search by Name, Tree Node and Type
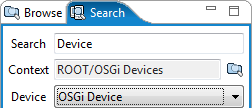
In topmost part of the Search tab, fill in the string to look for in device names in the Search field, select the target node from the device management tree in Context and in Device choose the device type. Click the Search action to launch the search. You can save the filter and apply it again from the Custom Filters section.
Advanced Search
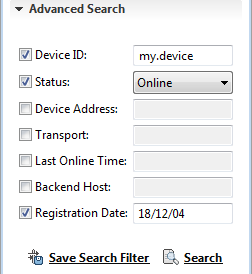
The RM console offers the option to find devices by using special attributes like ID, display name, value of a state variable (for My Device from the figure below this is Switched State) or registration date. The criteria will be added to the general filter in the topmost part of the Search tab discussed in previous section (see the figure above).
Click the Search action to launch the search. You can save the filter and apply it again from the Custom Filters section.
For more complex searches with even more specific criteria visit Advanced Device Search.
Getting All Devices of a Certain Type
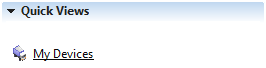
You can quickly get all devices of a certain type within the device sub-tree specified in the Device box at the top. From the Quick Views section select the option named after the friendly name of the device type as specified in the relevant metatype, e.g. My Devices.
Saving a Filter for Further Use
The console gives you the option to save a filter and then apply it again on available devices therefore saving you the efforts in defining complex search criteria again and again. To save a filter:
Define the filter attributes in the Advanced Search section.
Apply the filter by selecting the Search action.
Once the search is complete and results displayed, click the Save Search Filter action.
Name the search filter and click OK.
The filter will be added to the Custom Filters expandable section. To apply it, simply click on it.
Moving a Device to Another Directory Group
To move a defined device to another Directory group:
Select the device from the device management tree.
Right-click the mouse and use Move Device from the popup menu or press the F6 key.
In the displayed Browser, select the group you want to move the device to and click OK.
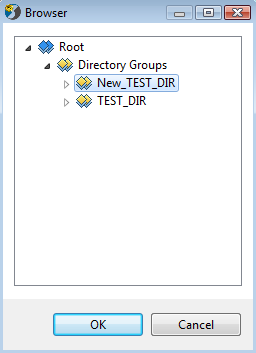
As a result, the device will appear within the specified group.
Invoking a Command on a Device
In the console, the commands that a device supports are mapped to the actions of the control unit of the corresponding type. The console shows the device commands by action name.
Device commands are available in the popup menu with items of the actions of the control unit, representing the device. If the provider defines an icon for a device command, this icon will appear in front of the item in the popup menu.
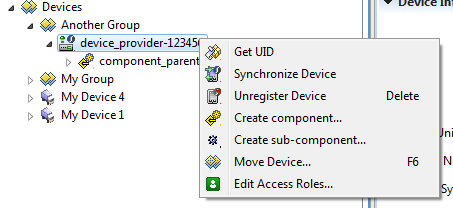
According to the action's metadata, the console will show a convenient dialog for specifying actions input arguments.
To invoke a command on a device, select it and call the proper command from the popup menu.
Executing Script Action
The Devices tree allows you to execute a script over a device or group of devices.
To execute a script:
In the Devices root, select a device or a device group.
Click Execute Script Action action.
The Action Execution wizard stars.
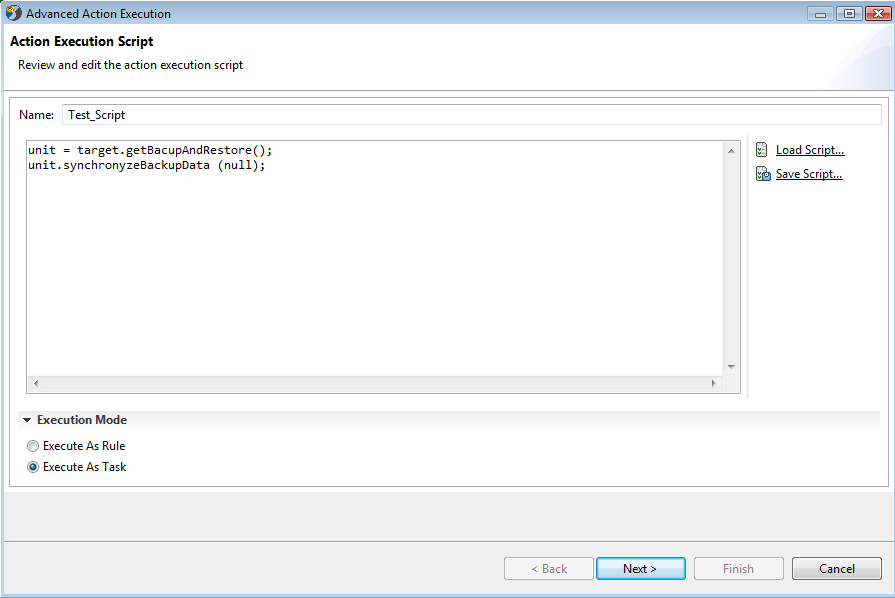
In the Action Execution Script dialog, specify Name and load a predefined script stored in Script Inventory (use "Load Script" action) or enter such in the field and use the "Save Script" action.
Then click on "Execution Mode" expandable section and choose "Execute as Rule" or "Execute as Task" action.
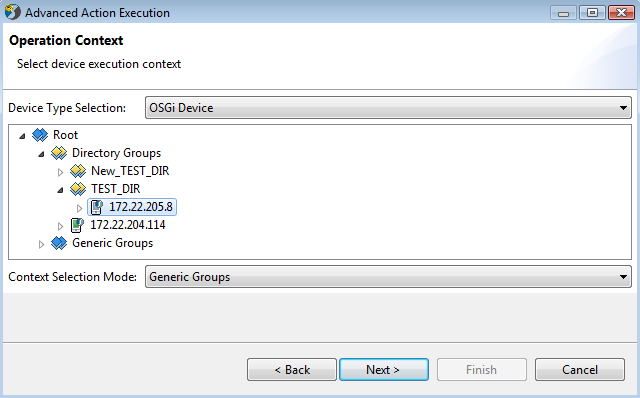
Select device execution context and click Next.
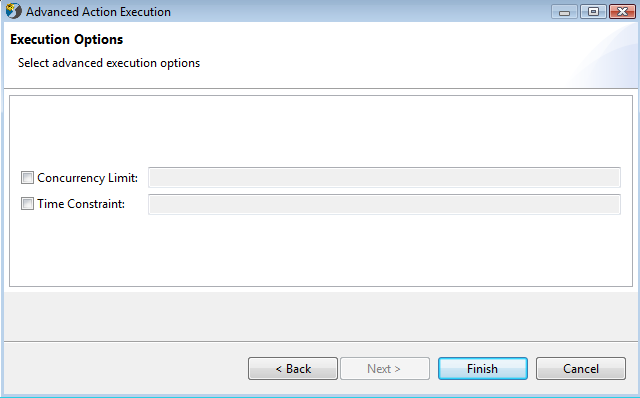
In the Execution Options dialog specify:
Concurrency Limit – whether the script has a maximum size of devices concurrently executing the script
Time Constraint
As a result, a Task will be created and executed. It will appear in the Task Executions section of console dashboard view.
Removing a Device
The action of removing a device of a specific type is carried out by the destructor of the associated Device Control Unit Provider. The name of the command for removing a device of a specific type from RM again depends on the metadata exported by the Device Control Unit Provider.
In general, select the device from the management tree and call the command for removing the device from the popup menu. If the provider defines an icon for the device removal (i.e. for the provider's destructor), a device removal button with this icon will appear in the device removal menu item in the popup menu.
After the device removal command is issued, its execution is passed to the appropriate Device Control Unit Provider.
Access Roles
The console provides an option for handling user access rights on the nodes of the device management tree. The Generic Device Manager allows only to users having specific roles in the form Device-View(<node_path>) and Device-Manager(<node_path>) to access the node (group or device) identified with <node_path>. For more details about access control on the device management tree, refer to the "Access Control" section from Device Management System Architecture.
To model access rights on a specific node of the device management tree:
Create in advance all users and groups that will be provided with access rights to a node, e.g. by using the Users Management dashboard view of the console.
Right-click on the node from the Devices tree in the console and select Edit Access Roles from the popup menu.
As a result, a dialog Access Roles appears, showing the roles that currently have "view" or "modify" rights on this node.
In the Access Roles dialog, specify the roles which will be allowed to access the node as well as the access type for the roles and click OK. Defining user access rights on a specific node is shown below:

To add a new role, which will be allowed to access a specific node, click the Add button, and select user(s) and/or group(s) from the RM user management system.
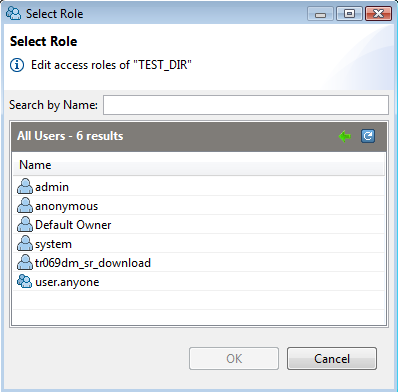
After the new role appears in the access roles dialog, check the box for the roles' access type – Read for only viewing the node and its sub-tree or Write for viewing and modifying the node and its descendants.
To change the access type of a role which has access to the node, select the role and check the relevant access type box (Read or Write).
To remove the access rights of a role on the node, select the role and click the Remove button.
As a result, each of the specified roles will become a member of the user group related to the access type you have set for it. In particular, roles which have access type Read will participate in the Device-View group allocated for the node, and roles which have access type Write will participate in the Device-Manager group allocated to the node.