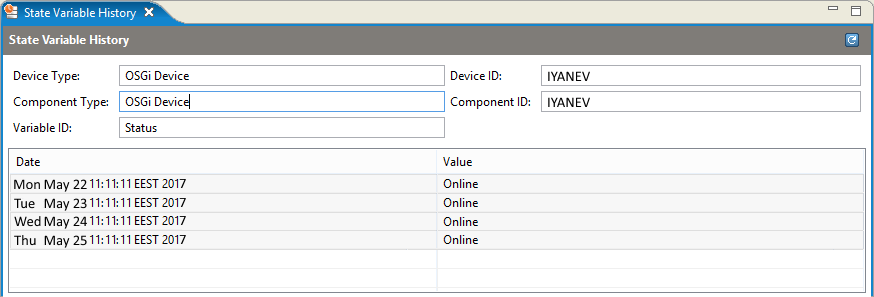
This document describes how to enable and use the State Variable History.
Recording History Data
Recording requests can be added in three distinct ways:
Selecting a group node – this adds a recording request for this group which will handle events for all devices in the group and optionally for all descendants of the group.
Selecting a device node – this adds a recording request for a control unit belonging to this device limiting the possible control unit types to the ones provided on the device.
Selecting a control unit node – this adds a recording request for the concrete control unit.
In order to start recording History Data select the node that you want to monitor (e.g. the Directory Group as shown on the screenshot below) -> Persistent Data -> History Data -> Record.
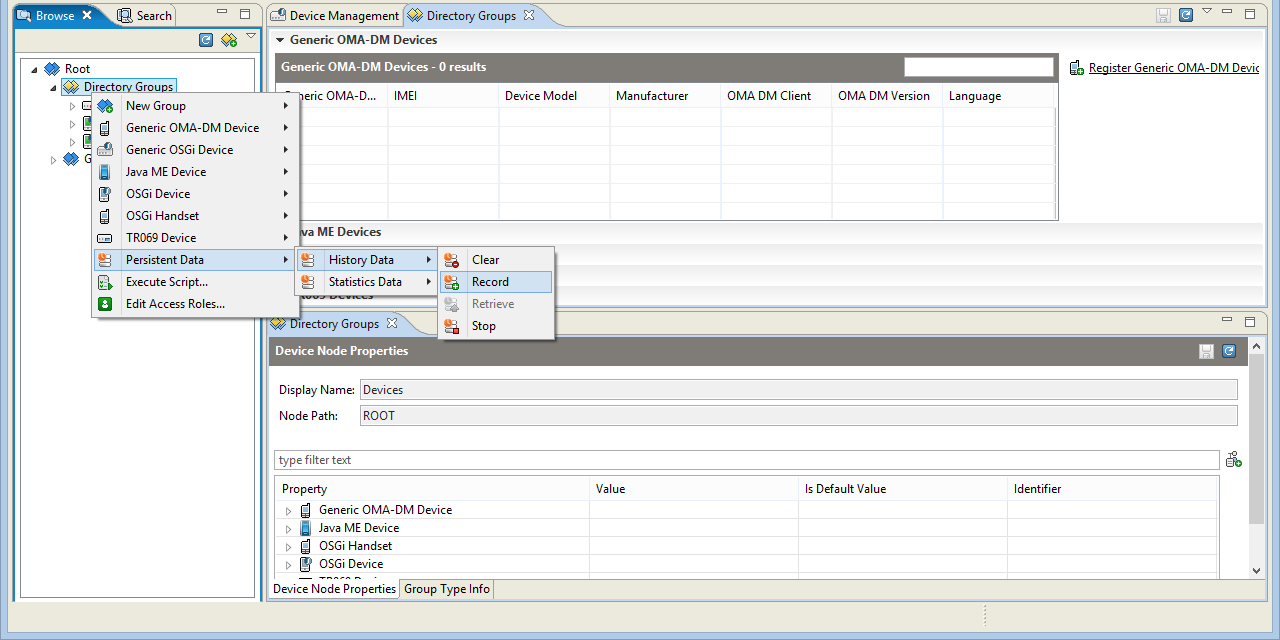
Choosing the variables for which to collect data is shown below.
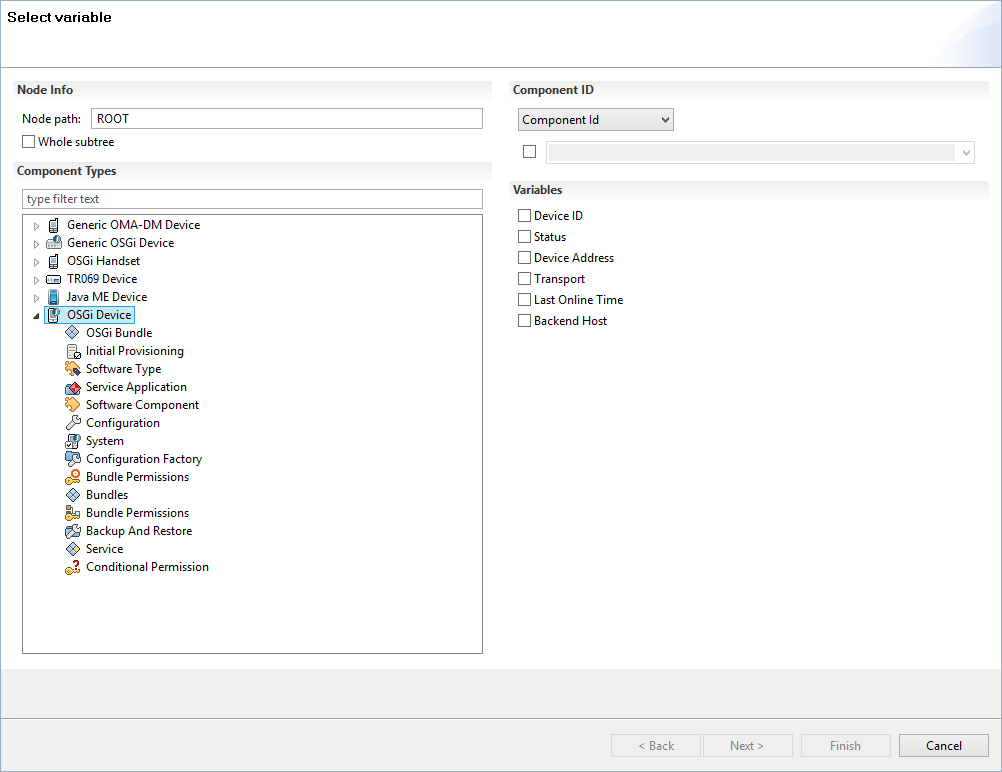
When recording from a group node, you decide if data should be recorded only for the devices in the group or in all of the group descendants (The whole Sub-tree option).
When recording from a device node, only the selected device control unit types are available.
You can also select control unit types from all known device types.
When a concrete control unit type is selected the Variables panel is filled with the corresponding state variables. If the recording request is initiated from a device node the existing component IDs are filled.
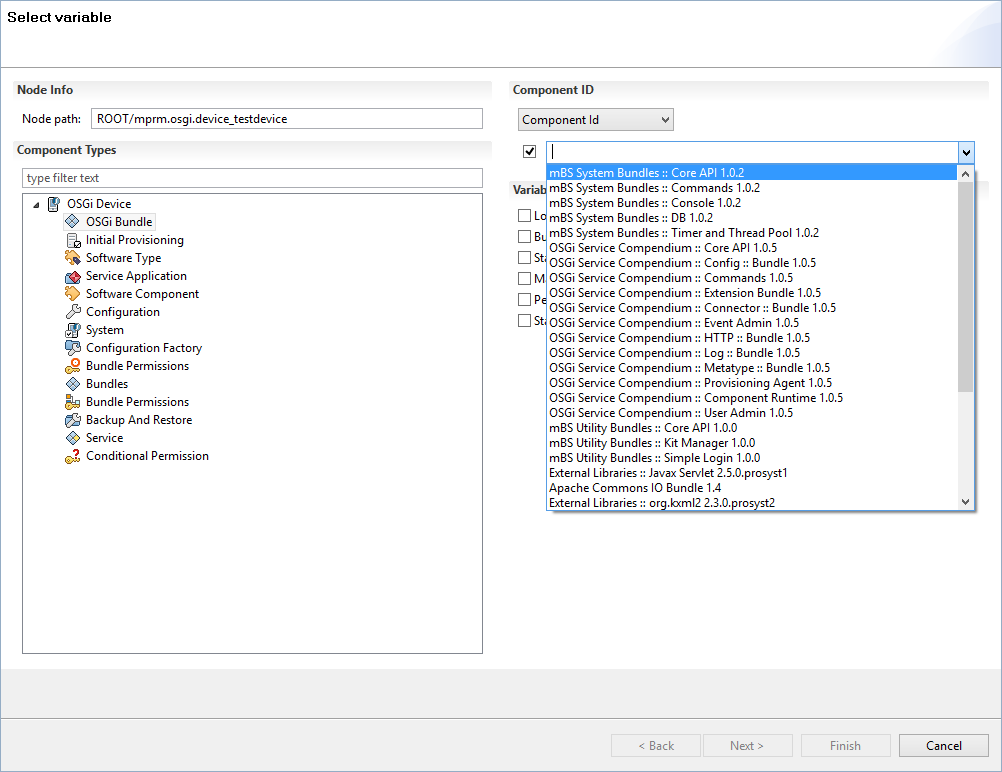
Other option for filtering the State Variables except by Component Id is to create a state variable filter using the other state variables of the control unit type. This allows you to precisely manage which state variables values will be recorded.
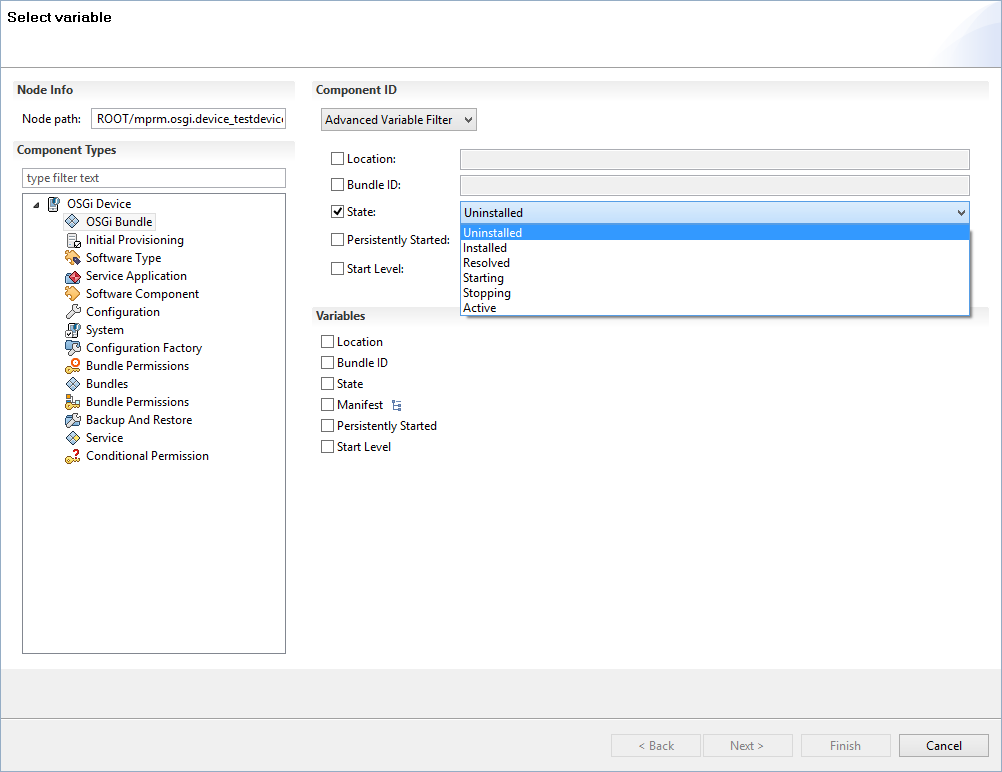
Using Advanced Variable Filter is shown below:
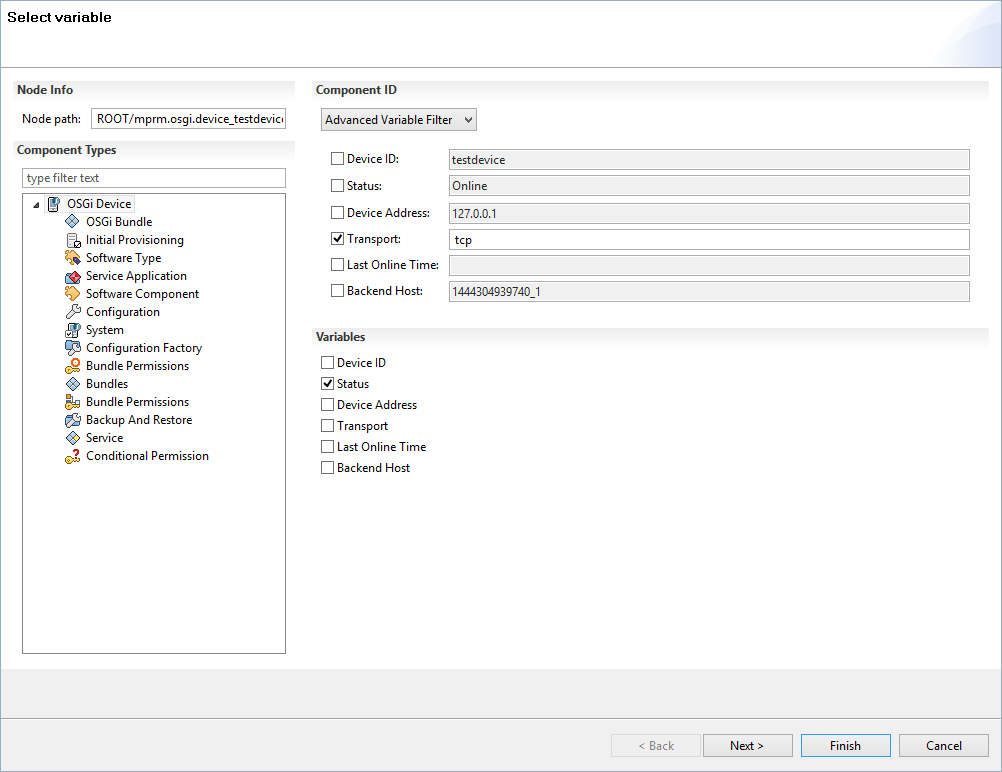
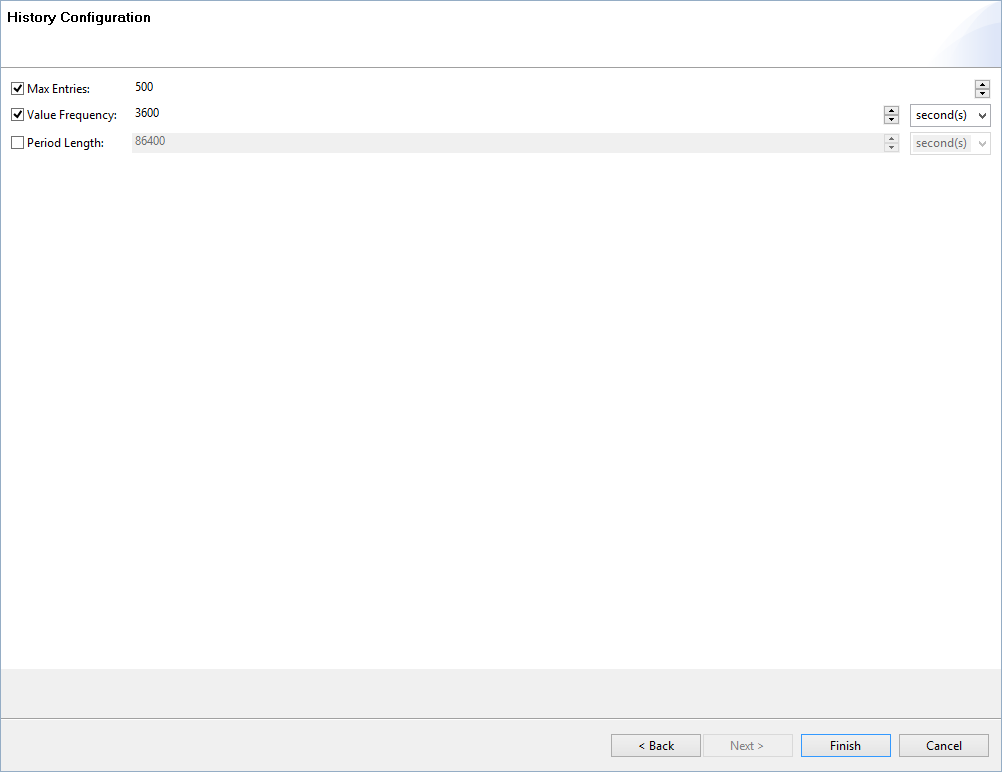
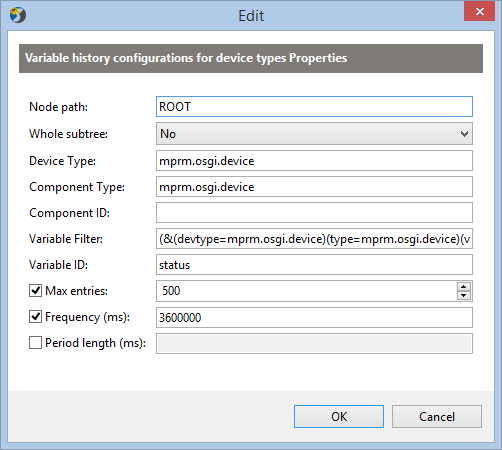
When all is selected the user can either finish creating the recording request or modify the additional options. They include:
Max Entries – the maximum amount of entries recorded per single state variable in the database.
Value Frequency – how often state variable values should be stored in the database.
Period Length – the maximum amount of time entries in the database are to be kept.
When recording requests are added they can be viewed from the Manage Persistence Requests menu in the Devices Perspective. There you can preview all history recording requests as well as all statistics recording requests.
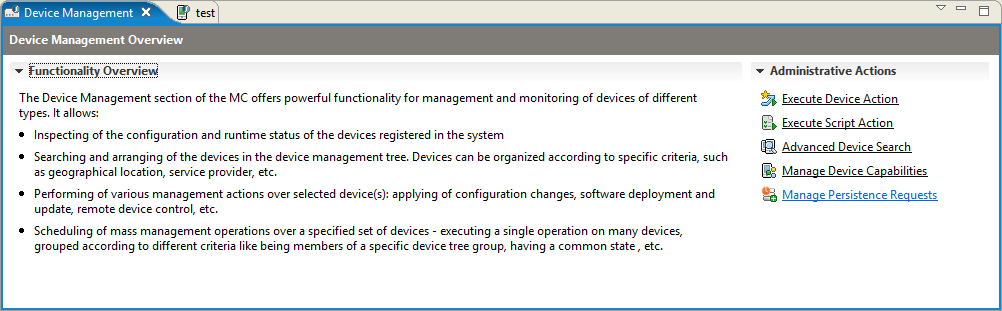
The Variable History Requests are presented in the following figure:
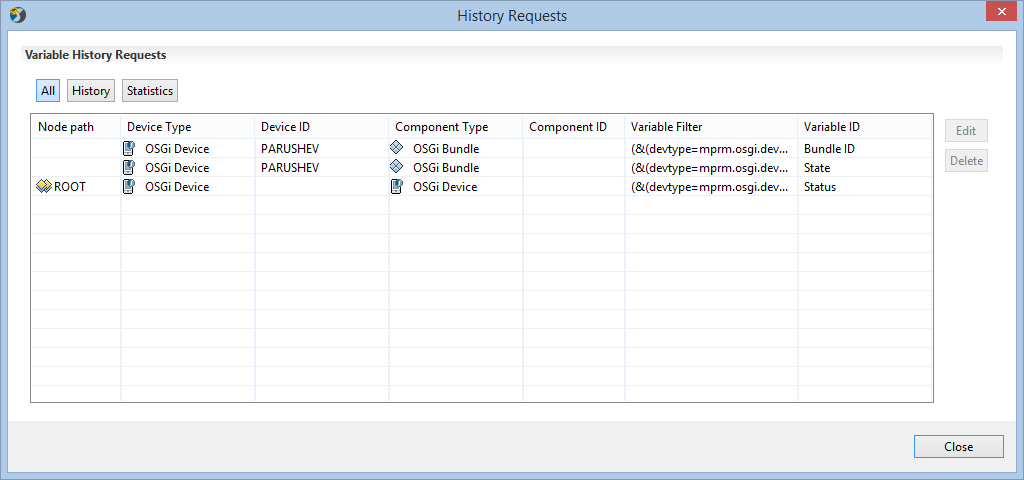
Edit and Delete (stop recording) actions are available in their corresponding dialog boxes.
Stop Recording
In order to stop recording Statistics Data click on Manage Persistence Requests -> select History -> choose the statistics that you want to stop recording and press Delete.
Another alternative method is to select the node that you want to stop collection of data (e.g. the Device node) -> Persistent Data -> History Data -> Stop.
Retrieving History Data
In order to retrieve the recorded History Data select the Click on the node for which you need to view the data (e.g. The Test Device as shown on the screenshot below) -> Persistent Data -> History Data -> Retrieve.
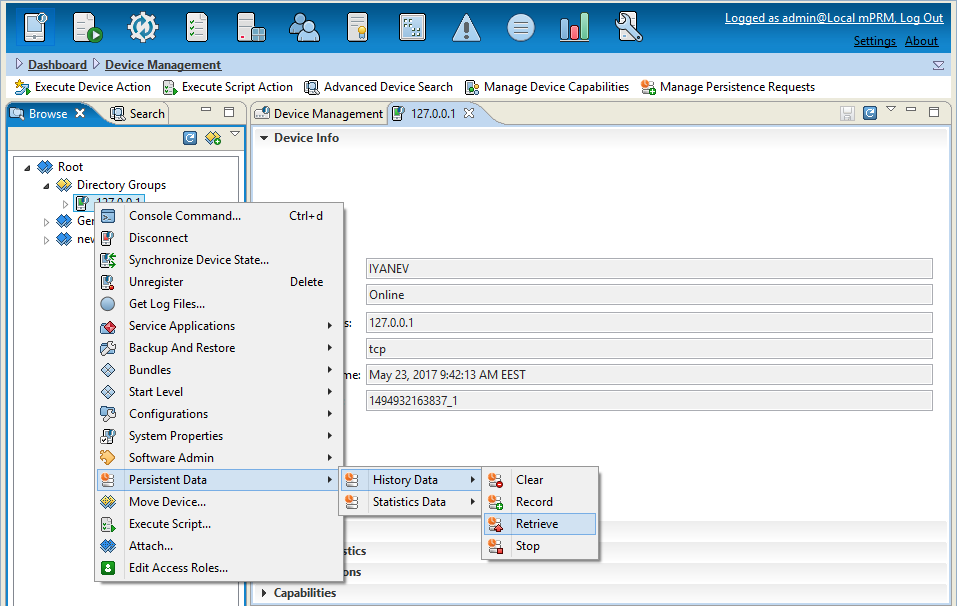
When Retrieve action is selected the user has to provide a concrete State Variable for a concrete Control Unit for a concrete device to proceed with the retrieval.
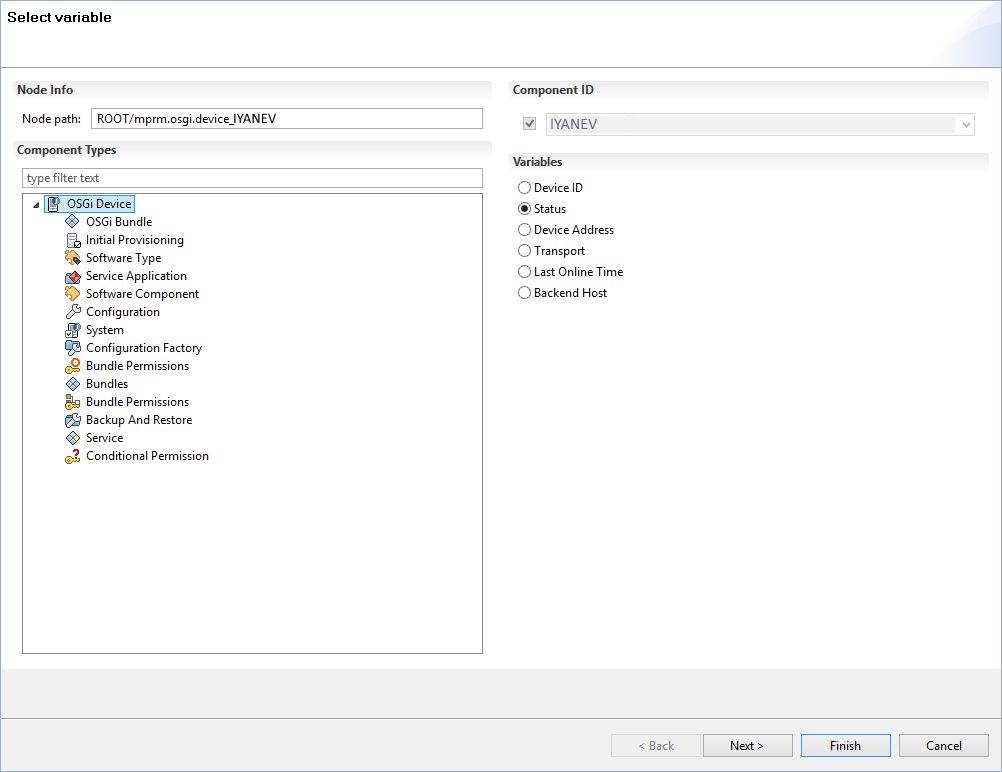
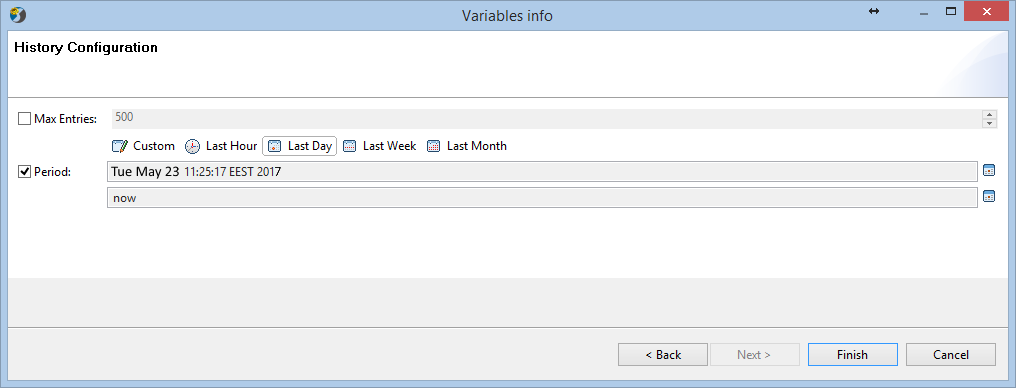
On the next screen you can also fine tune the configuration options:
Max entries – the maximum amount of entries to be returned.
Period – the period the user is interested in. Only values from this period are to be returned.
The retrieved data is then shown in a table with all the information for the selected state variable.