Overview
For a selected device in the Device Management dashboard view, the console shows a Device Preferences expandable section. The section displays the device's system preferences as defined by the OSGi Preferences Service Specification.
The available preferences are arranged in a tree. Select a node to view its properties underneath.
Activate Preferences Support
To be able to assign and apply preferences to an OSGi device, it must have the OSGi Preferences Service registered. You can use the RM Preferences Agent as the service implementation. The agent is saved by default in the Software Repository. You can install it at device registration by selecting it as an optional feature or later by using the Install Bundle action in the device management tree.
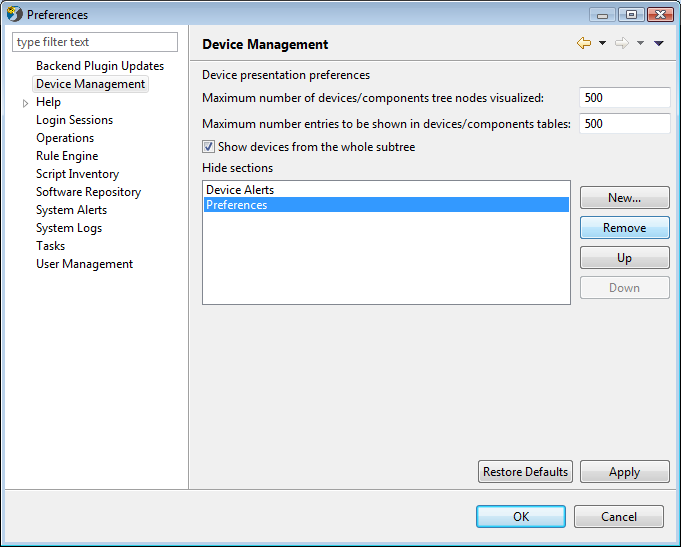
Also the "Preferences" section in the console is hidden by default. To activate it go to "Settings" on the console dashlet, the "Preferences" menu opens.
Choose "Device Management" and select "Preferences" in the "Hide sections" filed.
Click the "Remove" button. Apply the configuration and confirm with "OK".
"Restore Defaults" button hides the section from the console.
"Preferences" section on the console will show upon next logging.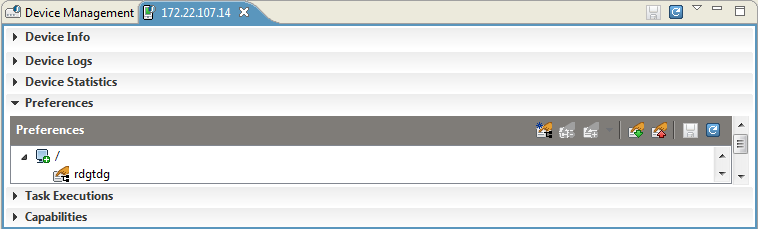
Create a Preferences Hierarchy
You can arrange a hierarchy of system preferences. Usually each node of preferences is designated for a specific application running on the selected device.
To create a preference node:
- Click the
 button to create the preferences tree
 - Right-click a node from the system preferences tree and invoke the New Preferences command from the popup menu or using the New Preferences button in the section.
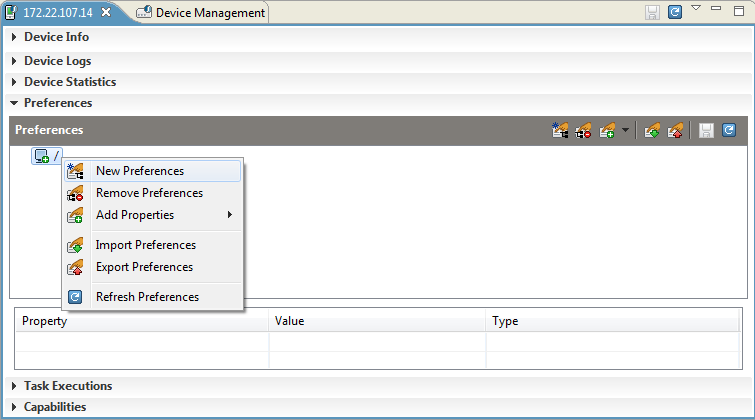
- In the displayed New Preferences dialog, type the name of the new preference node and click OK button.
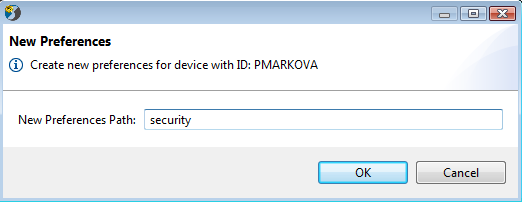
The new node appears in the preferences tree.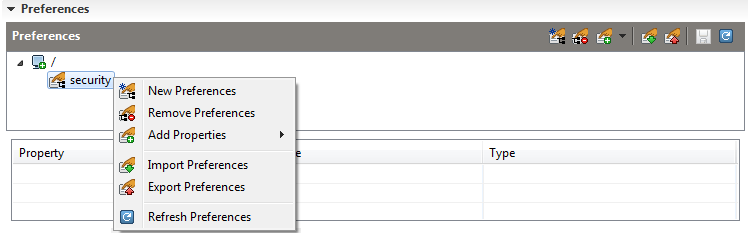
To delete a preference node, right-click it from the system preferences tree and select the Remove Preferences command from the popup menu or Remove Preferences button in the section.
Importing/Exporting Preferences
You can import/export a preferences XML file by using the correspondent command from the popup menu or from the toolbar. In the file chooser dialog specify the preferences file to be imported/exported and click the Save button.
Add/Remove Properties
To define a property in a selected preference node:
- From the Add Properties submenu of the popup menu select the preferred property type.
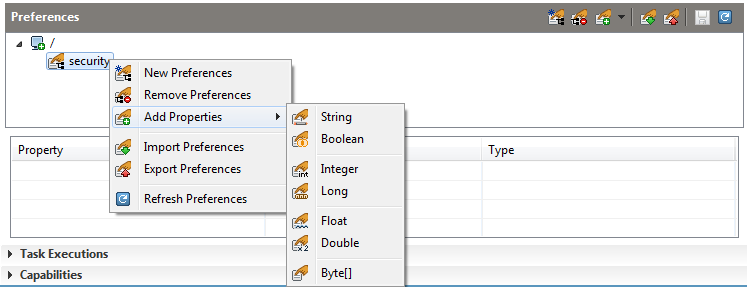
- In the displayed Add New Property dialog fill in the property name and specify its value, then confirm with OK.
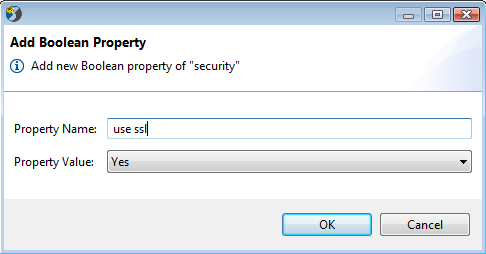
The property will appear in the table listing the properties of the selected preferences node. Click the "Save" icon to preserve the changes.
To remove a property of a specific node, select the property in the node's preferences collection and use Delete Property popup menu command and save the changes.