This document describes how to enable and use the State Variable Statistics.
Recording Statistics Data
Recording requests can be added in three distinct ways:
Selecting a group node – this adds a recording request for this group which will handle events for all devices in the group and optionally for all descendants of the group.
Selecting a device node – this adds a recording request for a control unit belonging to this device limiting the possible control unit types to the ones provided on the device.
Selecting a control unit node – this adds a recording request for the concrete control unit.
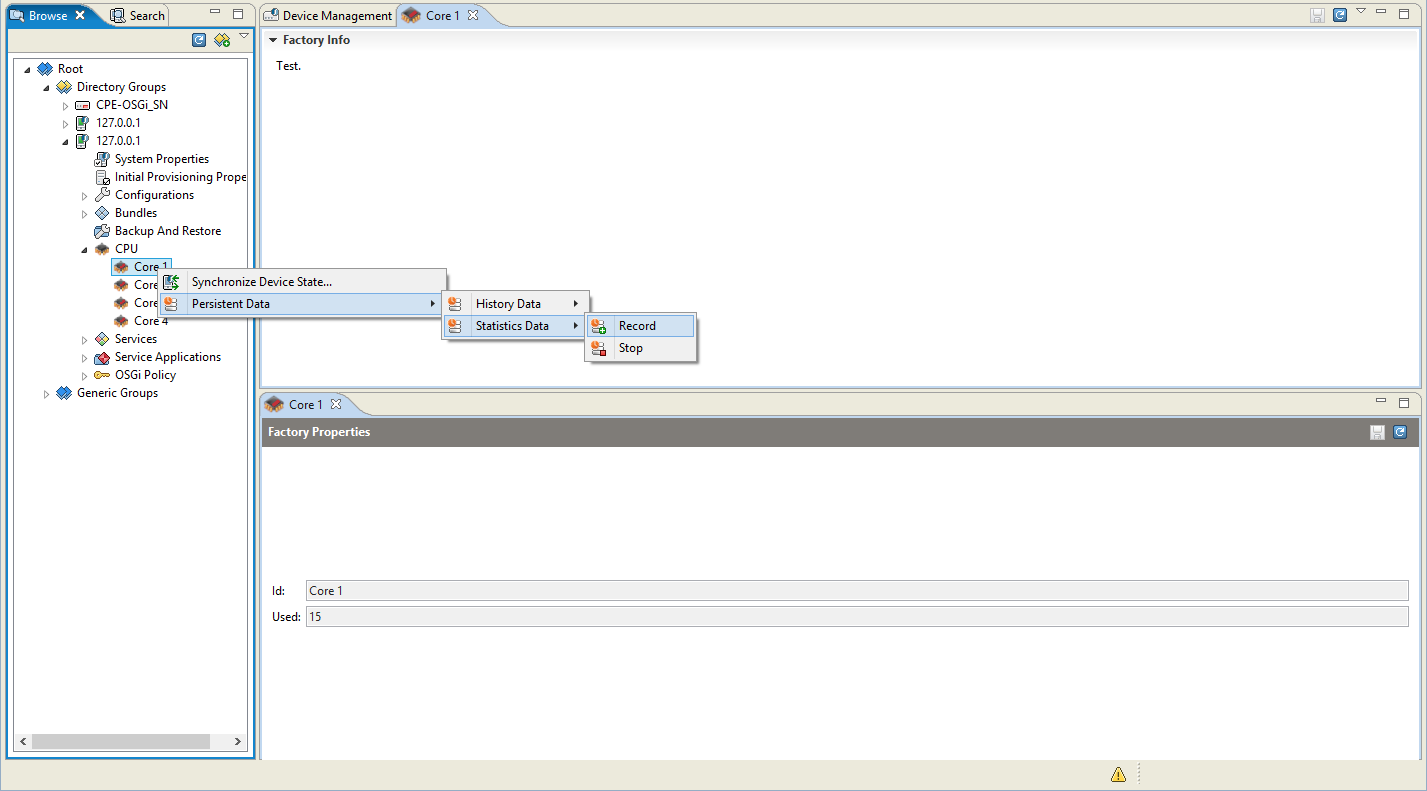
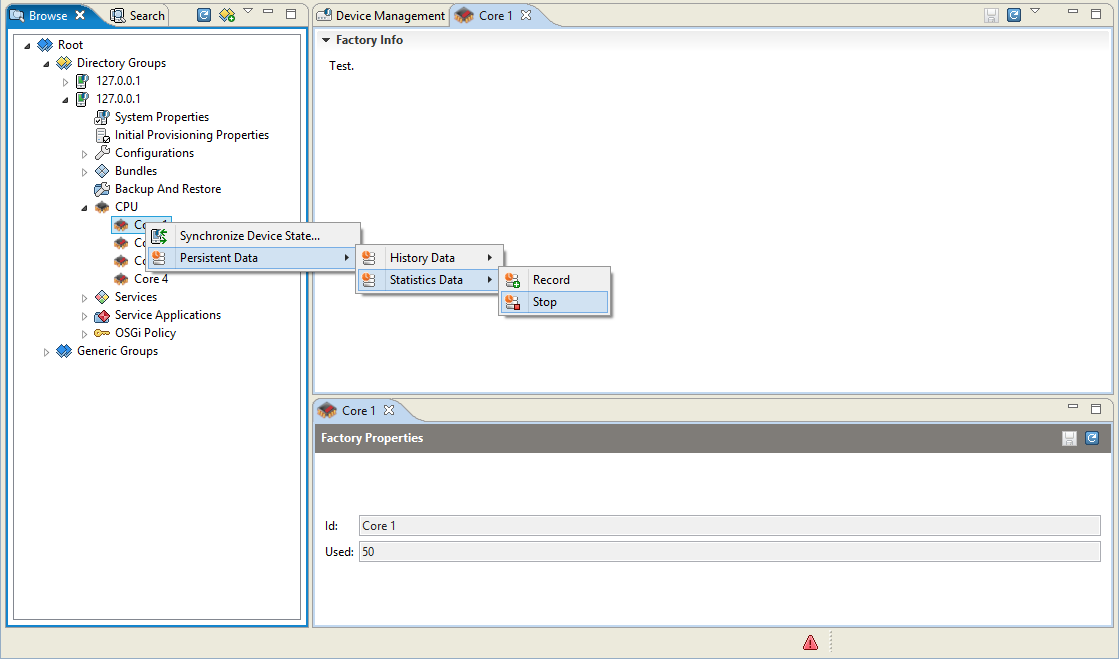
In order to start recording Statistics Data select the node that you want to monitor (e.g. the Control Unit node as shown on the screenshot below) -> Persistent Data -> Statistics Data -> Record.
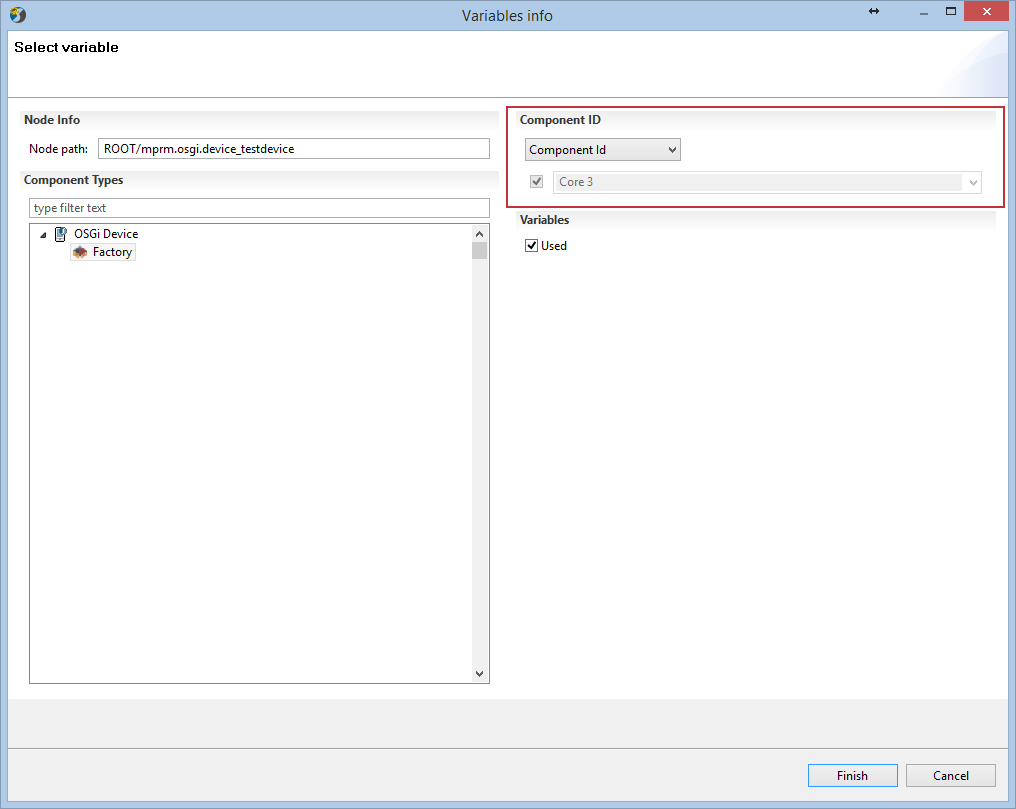
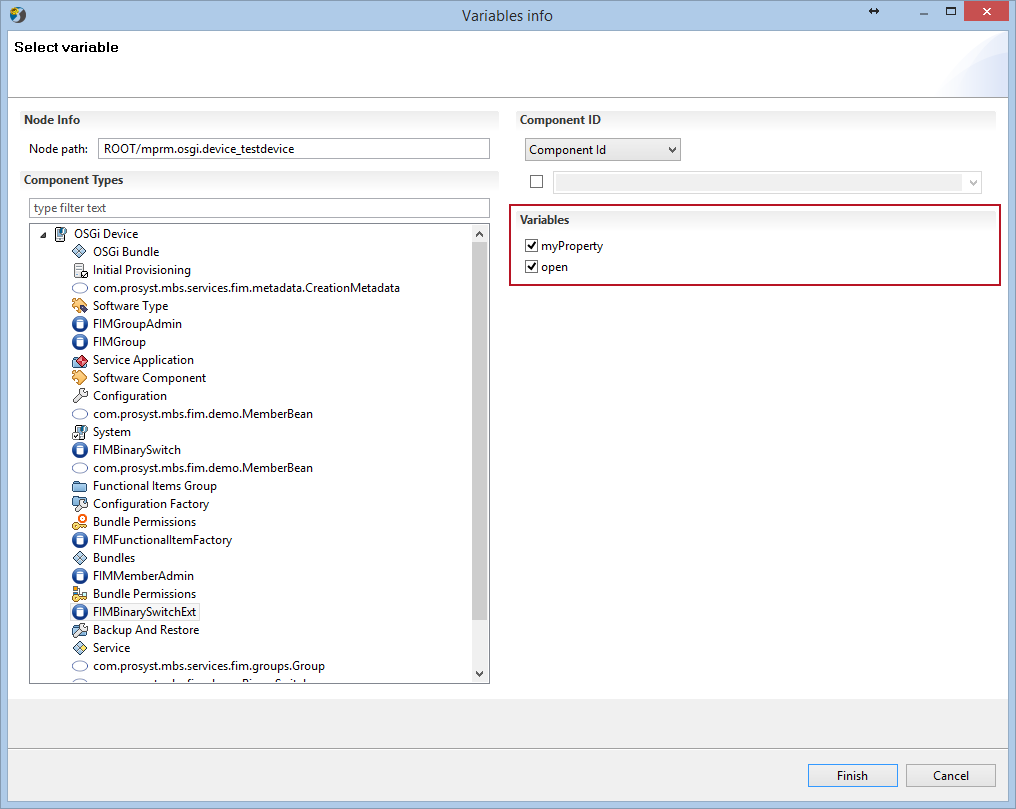
On the next screen select the variable/s of the component the that need to be monitored.
Component Id – species the ID of the Control Unit (of already selected type) that shall be recorded.
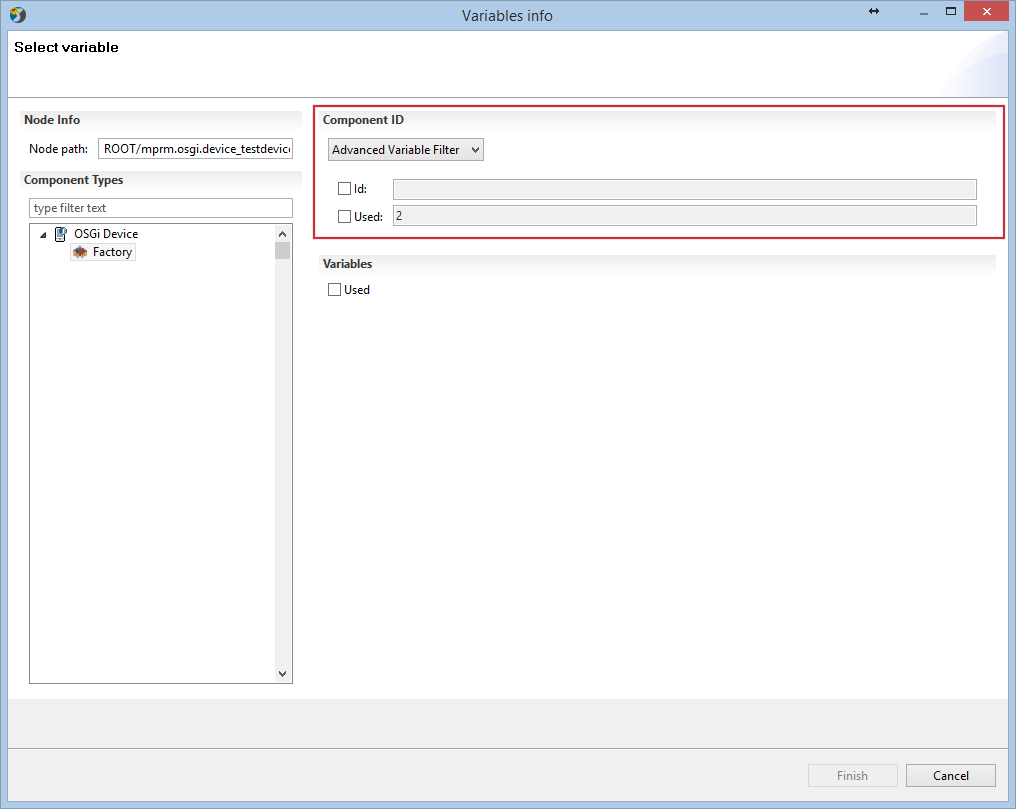
Advanced Variable Filter – gives opportunity to select some state variable conditions/restrictions (or if omitted match all cu of that type).
A set of variables for certain components may be selected also, e.g. if you select the Device Node and then choose a component that has two or more variables that may be monitored as shown in the figure below.
Stop Recording
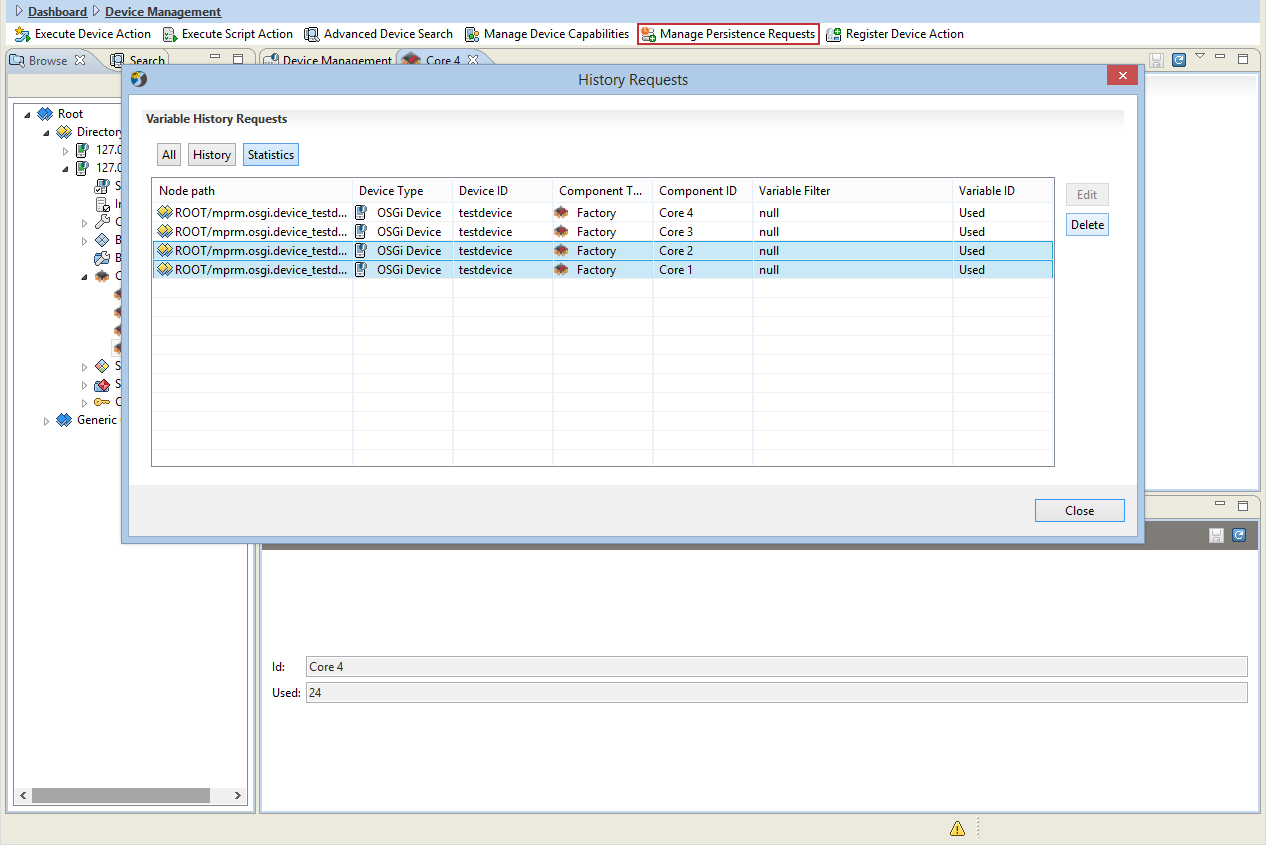
In order to stop recording Statistics Data click on Manage Persistence Requests -> select Statistics -> choose the statistics that you want to stop recording and press Delete.
Another alternative method is to select the node that you want to stop collection of data (e.g. the Control Unit node as shown on the screenshot below) -> Persistent Data -> Statistics Data -> Stop.
Representation of Statistics
State Variable Statistics management is very similar to managing System Statistics, therefore you may find it useful to take a look at the guide.
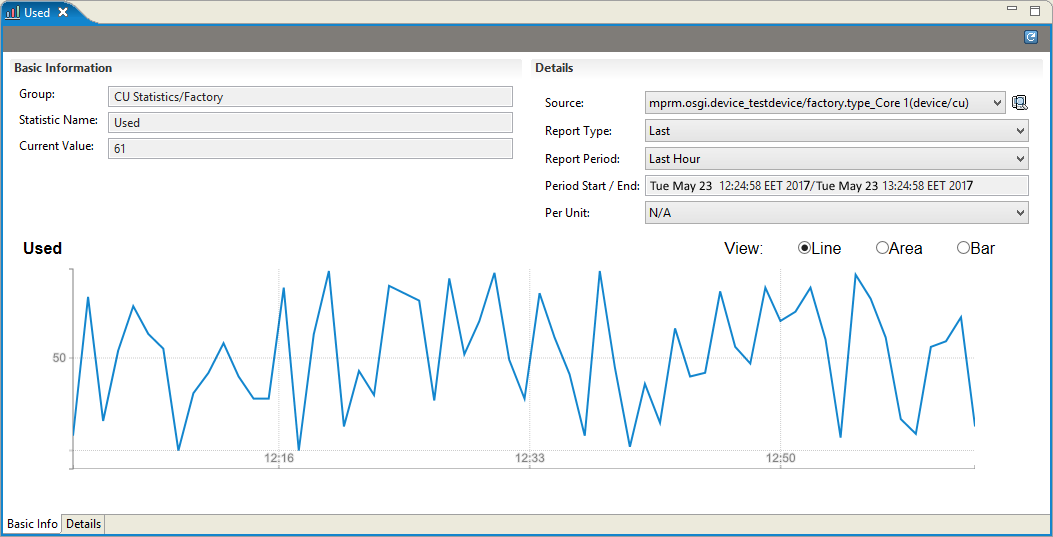
The data representation may be altered for better visualization (e.g. Report Type can be changed to display min/max/avg/last values, the report period can be changed etc.).
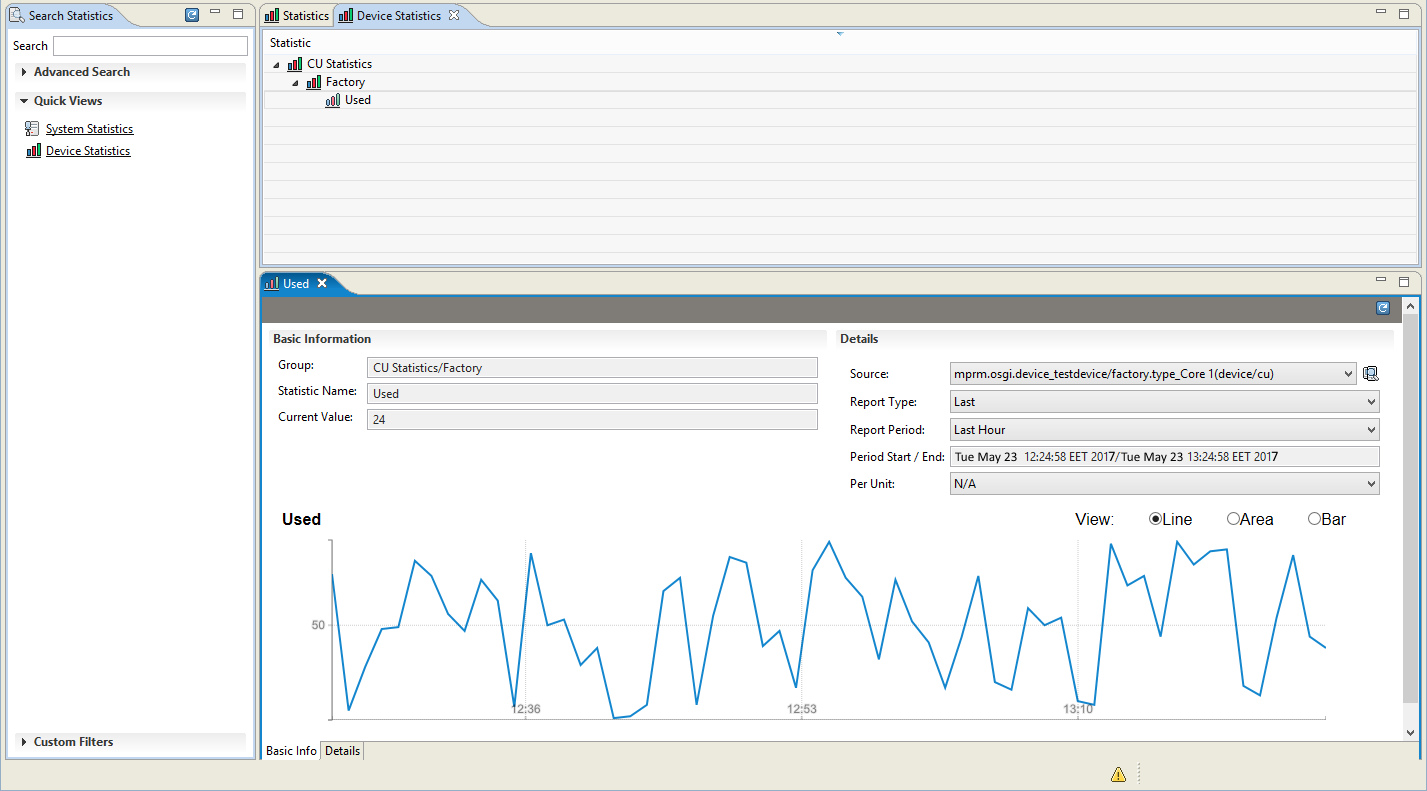
Basic Information – displays the statistics details that may be adjusted as well as the graphic of the change.
Group: Matches the group of the recorded statistics.
Name: Matches display name of the statistics.
Current Value: Represents the current value of the monitored statistics in real time.
SourceType: (device/cu), Name: <device type>_<device id>/<device id><control unit id>.
Report Type: Defines the method of displaying the values of interest in the statistics (Min/Max/Average/Last).
Report Period: Defines the period for which to display the statistics (Last Hour/Day/Week/Month, Custom Defined Period).
Period Start/End: Displays the defined custom Period.
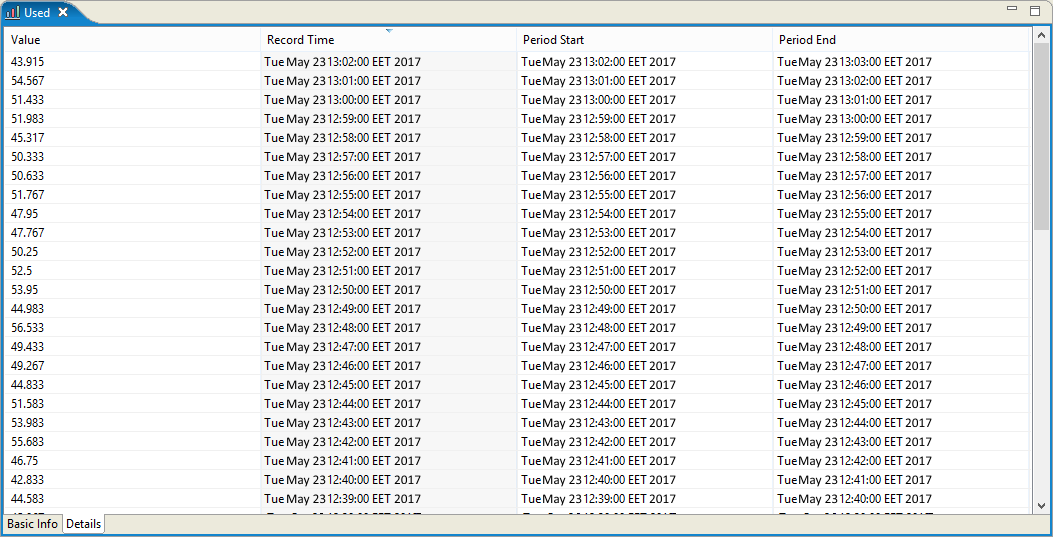
Details – displays the detailed statistics with the selected granularity (e.g. minute by minute).
Searching Statistics
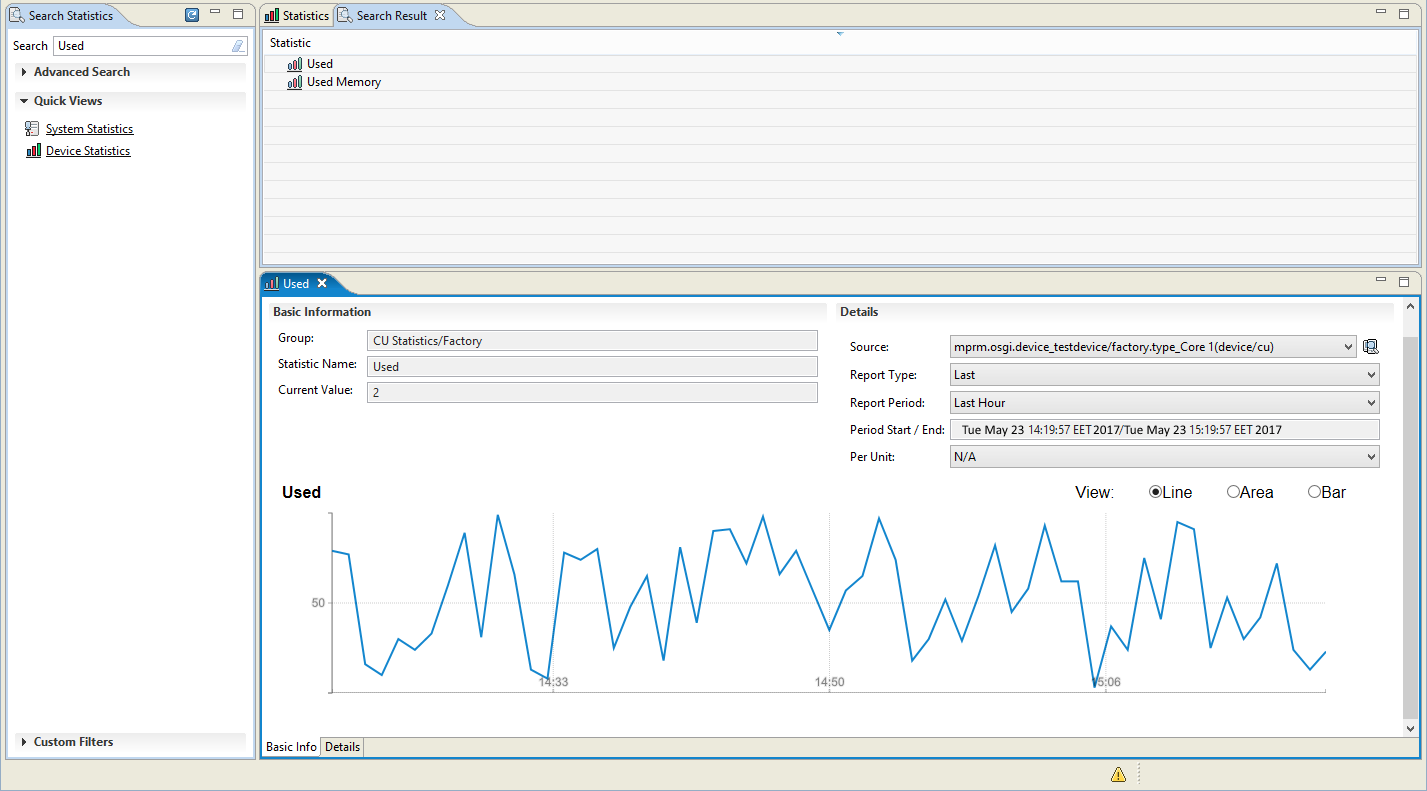
You can use the Search option to quickly find a statistic by it's Statistic Name or Group Name. Simply enter the name of the statistics that you need (e.g. "Used","Price","System", etc.).
Advanced Search
The Advanced Search option gives you the option to easily find the statistics that you need by selecting one or more of the following options from the drop-down menus:
Group
Source Type
Source Name
Statistic Name
After you have selected your search criteria simply press the Search button.
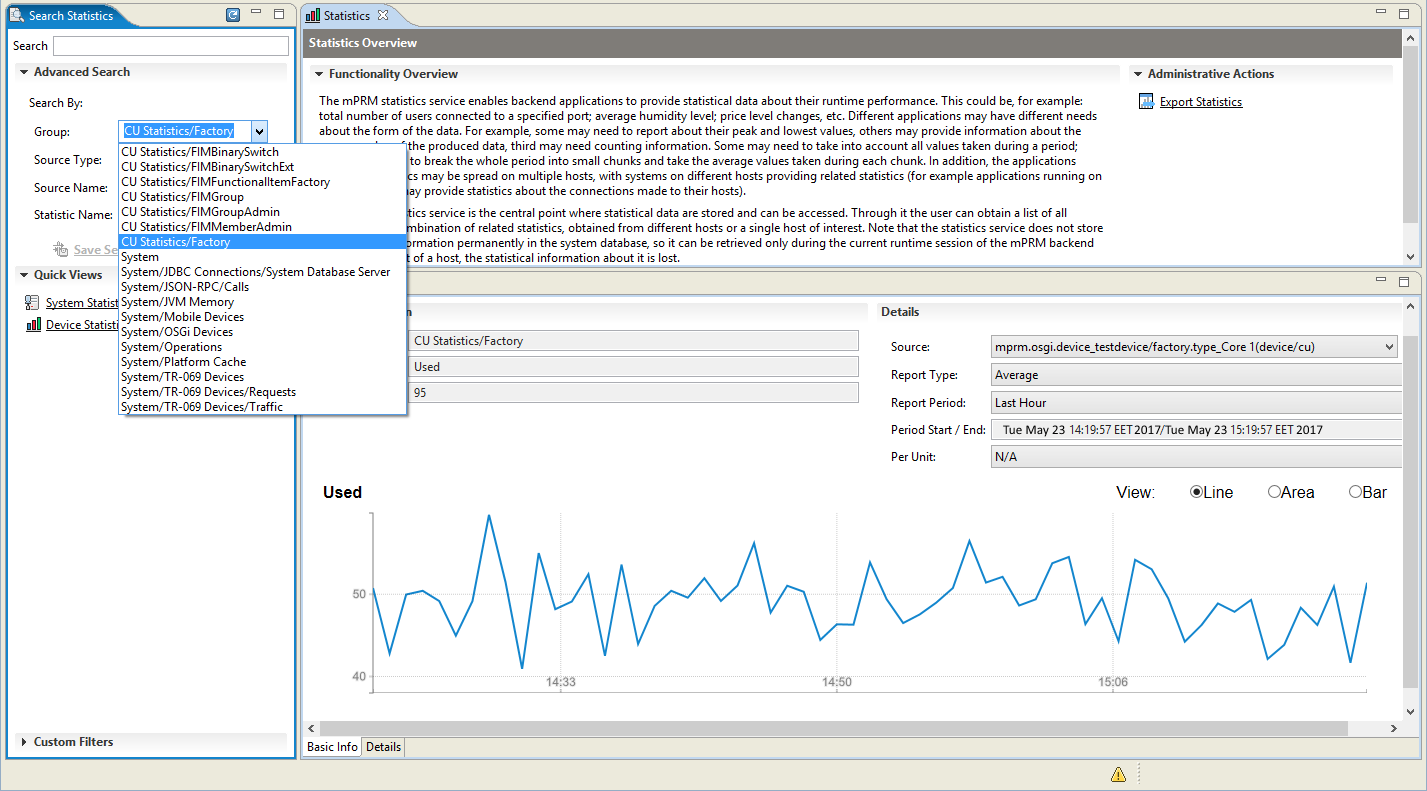
In order to find a specific statistic for a device from a list of many Control Units on many devices you need to select the proper Group + Source Type + Source name from the drop down menus (See Figure below) or specify the Statistic Name if you know it:
Group – matches the group/name
Source Type – device/cu
Source Name – <device type>_<device id>/<device id>_<control unit id>
Statistic Name – matches display name
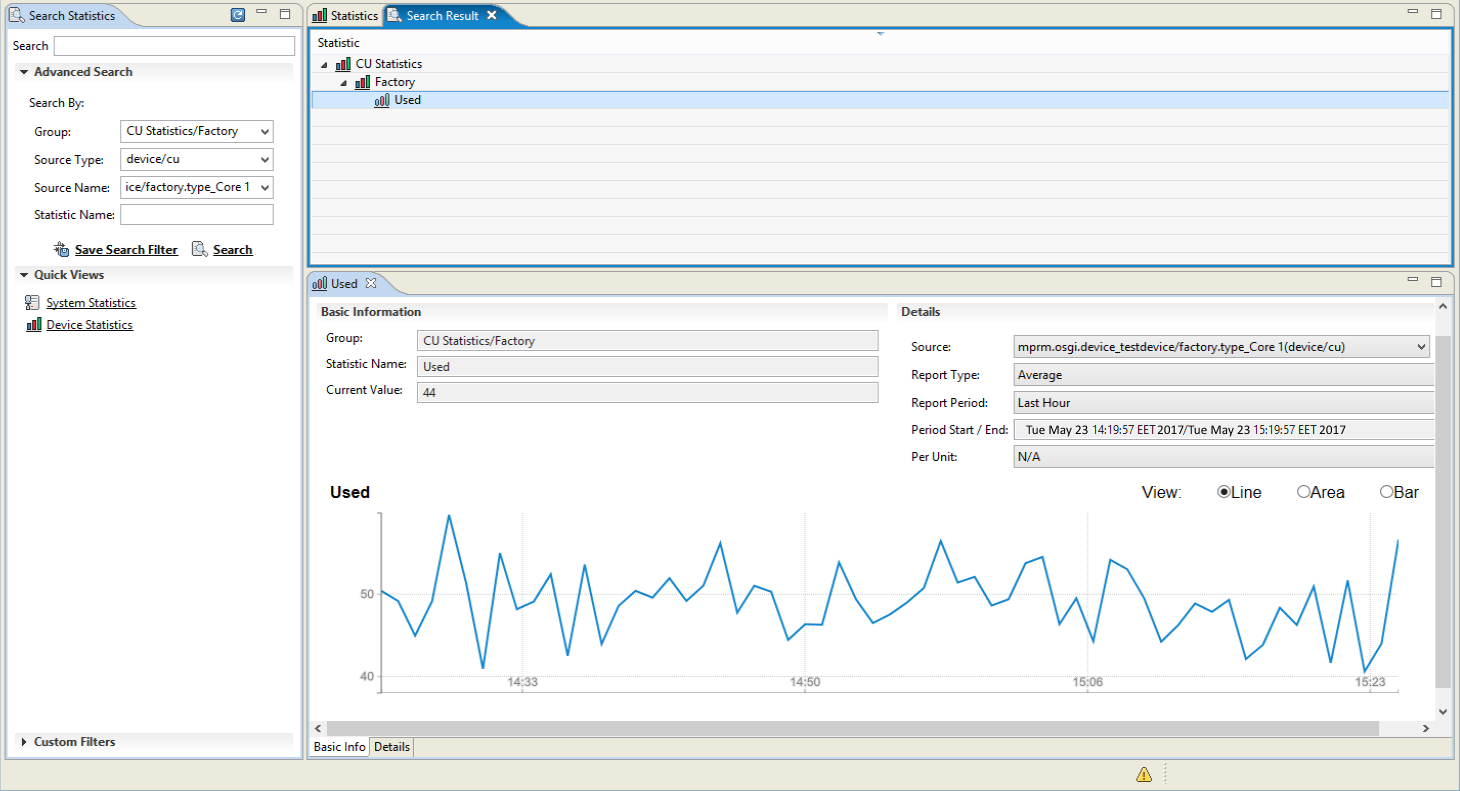
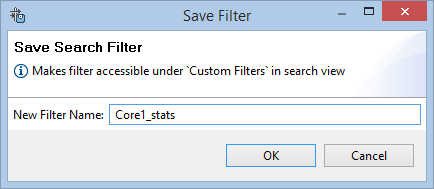
Additionally you have the option to save search filters for later use by clicking on the Save Search Filter option.
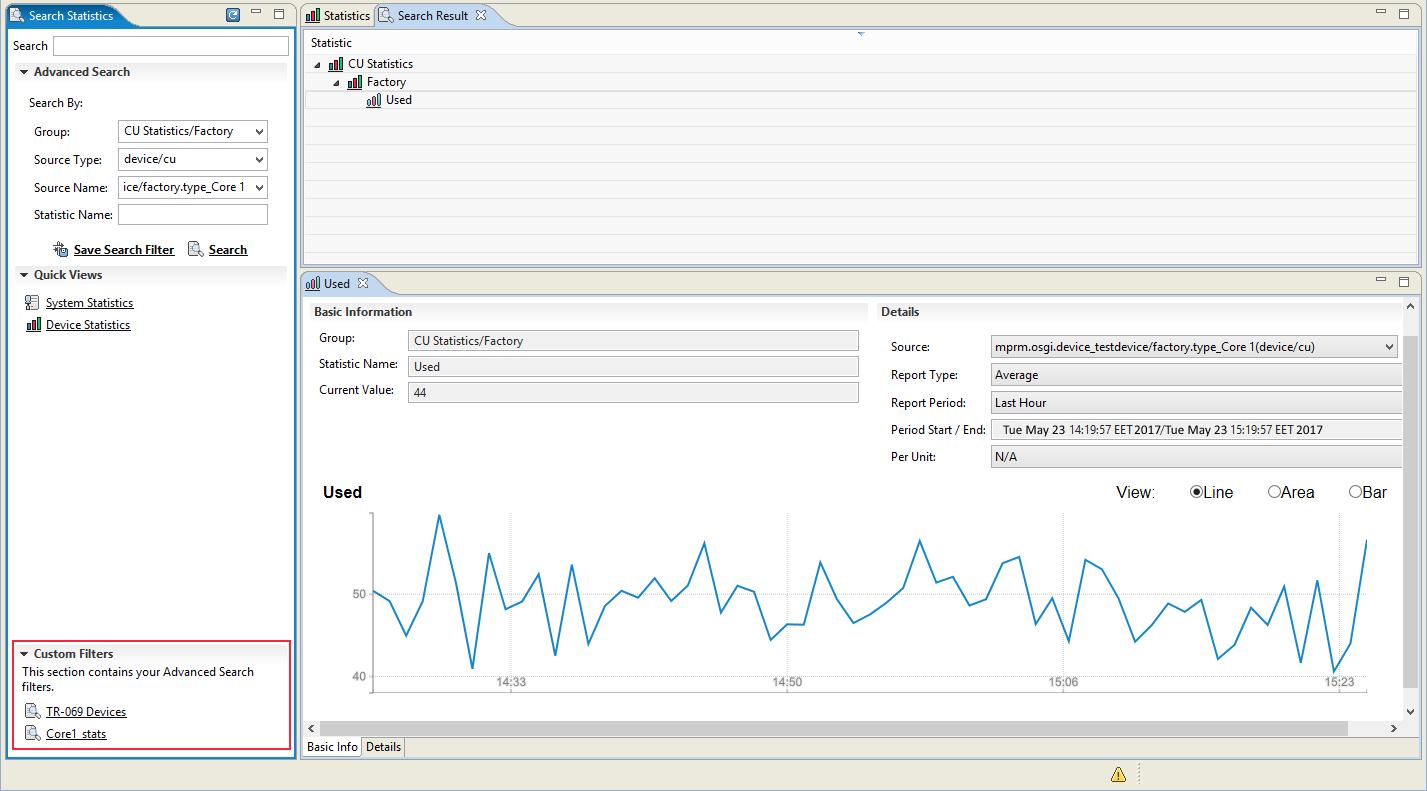
The saved filters may be later found under Custom Filters in Search Statistics pane on the left.
Exporting Statistics
The RM allows you to Export Statistics to a .CVS file and store it for later use.
To begin the process just click on the Export Statistics link as seen on the figure below.
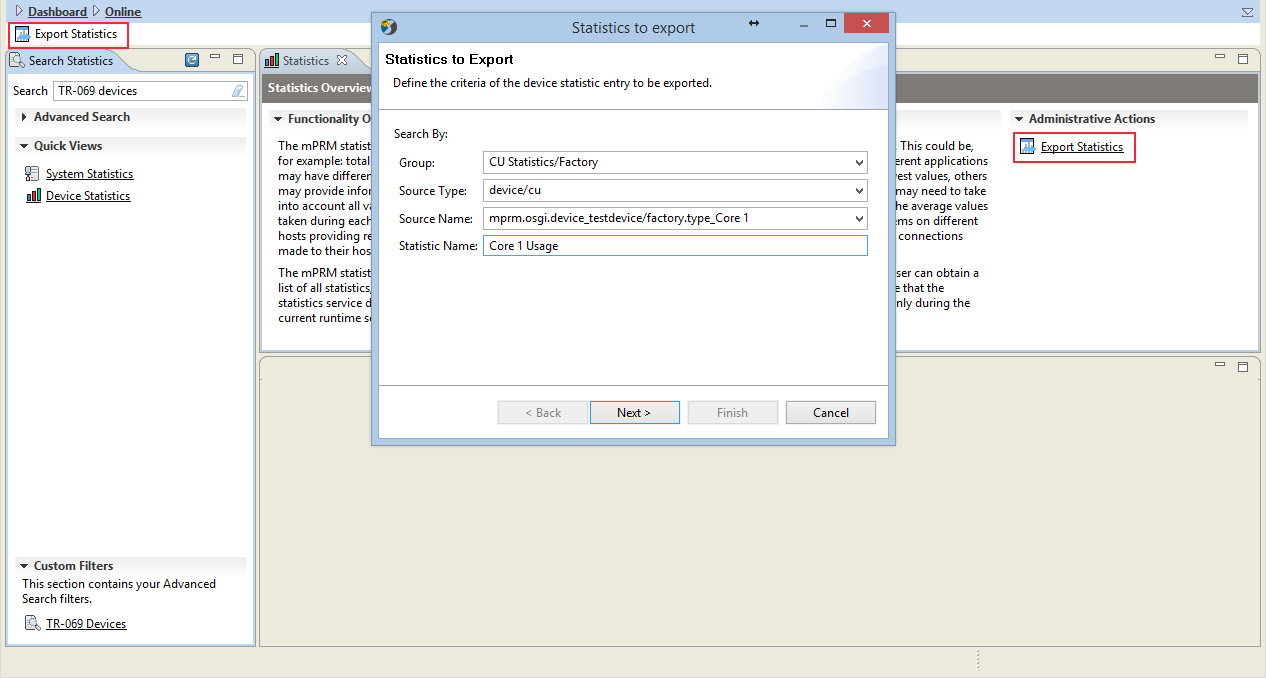
On the next screen you can adjust the statistic details before exporting.
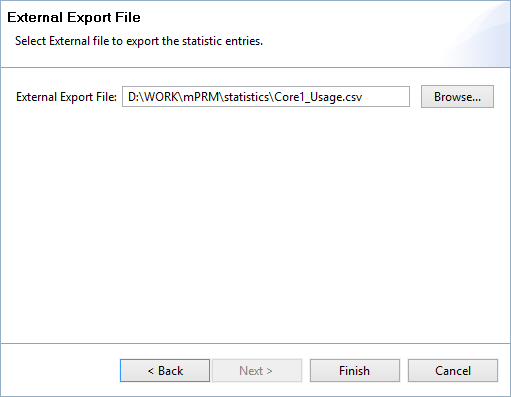
Finally you choose where to save the statistics.