This document contains instructions about managing RM software components in the Software Admin running on OSGi devices.
For more information about this management functionality of RM, refer to the Managing Software Components conceptual guide.
Overview
In the console, the software components installed in the Software Admin and managed from RM are visible under the Software Admin navigation node. They are arranged by software type – OSGi Bundles, OSGi Deployment Packages, ZIP Packages, etc. depending on the types supported on the OSGi device. By default, the OSGi Bundles type is supported.
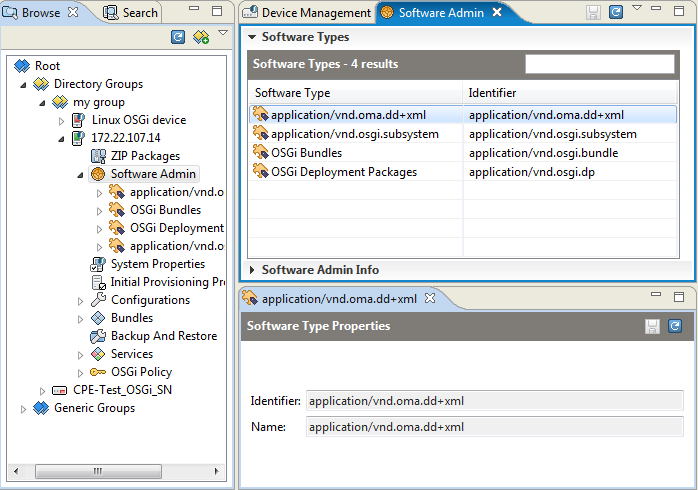
The value of a component properties are determined by the Software Provider responsible for the respective software component type. Basically, the properties show the most important metadata about components – ID, name, vendor, version, type, etc.
Installing Software Components
Prerequisite: To be able to install a component of a specific type, it must be added to the Software Repository beforehand.
- Select a component type sub-node from the Software Admin node from the tree of a connected OSGi device. Let's select OSGi Bundles.
- To invoke the install command use one of the options:
- Right-click the node and from the popup menu select the Install Component... command.
- Use the Install Component... action shown on the right.
An Install Component dialog appears to choose from the existing components stored by concrete type in the Software Repository.
- In the Install Component dialog, select the component to install.
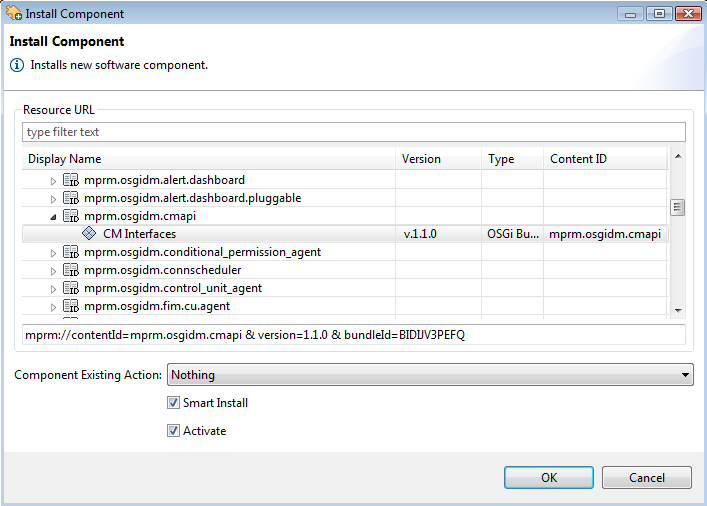
- From Component Existing Action specify the action to execute in case the same component is already installed on the device. Default is Nothing. Other options are: Install (which will install once again the existing component), Update (which will update the existing component) and Error (which will display an error message if the component already exists).
- Select Smart Install to have components which the installed one depends on automatically installed so as to resolve the dependencies.
- Select Activate to have the component automatically started upon installation.
- Select OK to start the installation.
On success, the component will appear in the Software Admin sub-tree.
Updating a Software Component
Prerequisite: To be able to update a component of a specific type, the update must be added to the Software Repository beforehand. The component must have the same content ID (depending on the software type).
- Select the component to update from the Software Admin node of a connected OSGi device.
- Right-click the node and from the popup menu select the Update... command or select it from the Software Component Info pane.
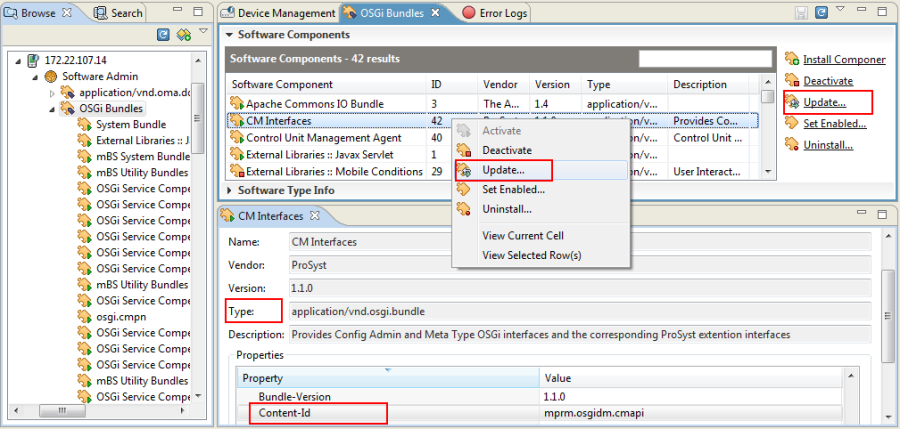
- In the Update dialog, select the updating component from the Software Repository and click OK.
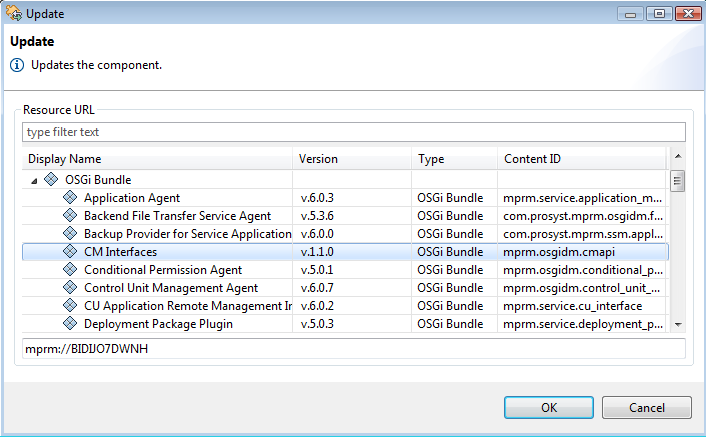
- On success, the target component will be updated and the update will be reflected in the console.
Update command over a device group
- To use Update... as a mass operation over a device group – right click over the node and select OSGi Device->Software Admin -> Update... menu option.
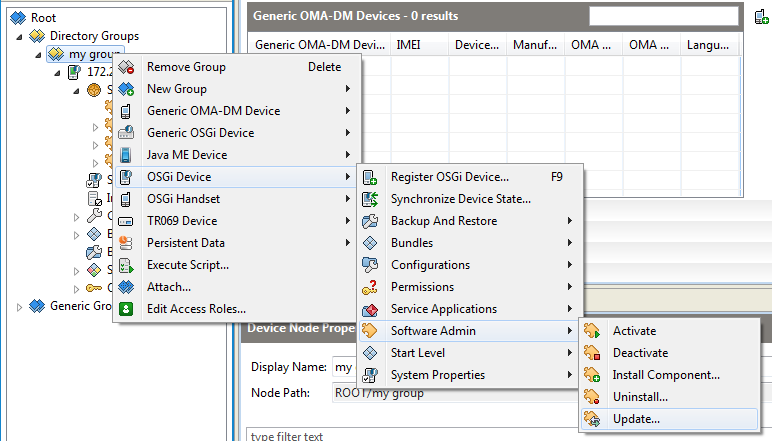
- An Advanced Update Execution dialog appears where software component filter/s must be specified.
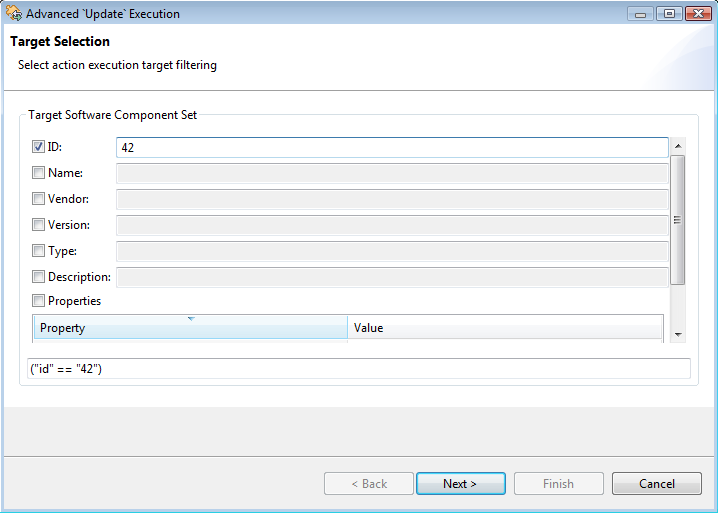
- On the next step choose from the existing components of a specific type, stored in the Software Repository.
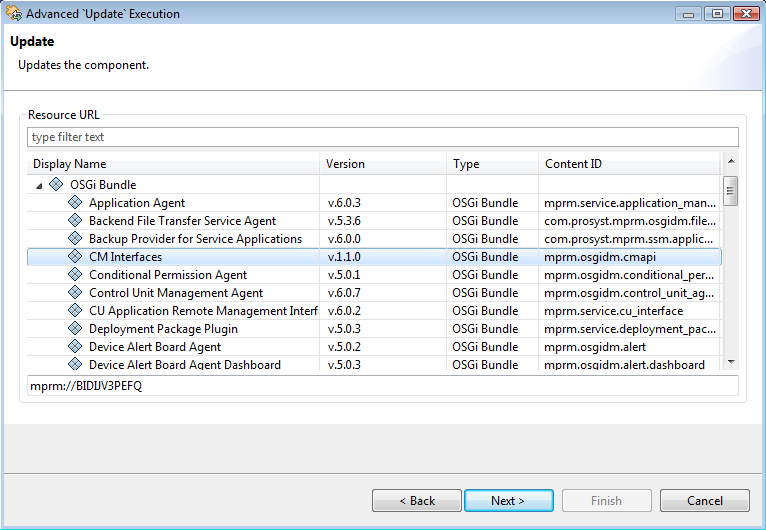
- Follow the steps in the dialog. On the step "Operation Context" select the device group over which the Update... would be performed.
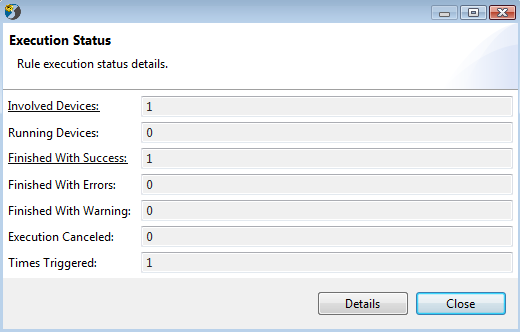
- As a result an "Execution status" dialog appears.
Activating and Deactivating a Component
To activate a component (launch an application, start an OSGi bundle, etc):
- Select the installed component from the Software Admin sub-tree of the device
- Invoke the Activate command – right-click on the component and use the Activate option.
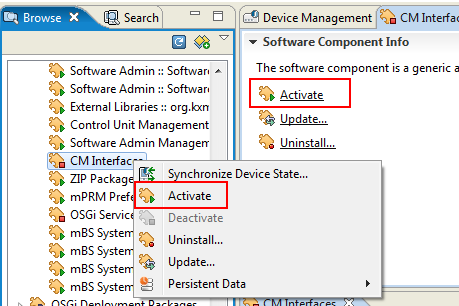
On success, the status of the component will be changed to active.
To activate a component as a mass operation: Right click over the node and select OSGi Device ->Software Admin -> Activate menu option. Follow the steps explained in Update command over a device group.
Similarly, to deactivate an active component, select it from the Software Admin sub-tree and select Deactivate from the popup menu or from the actions list.
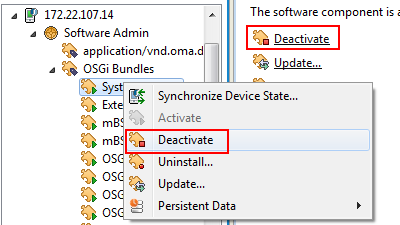
Note: Deactivating a component over a device group follows the same steps as described for activating.
Uninstalling a Component
To uninstall a component, select it from the Software Admin sub-tree of the connected device and use the Uninstall... action.
By default, uninstallation will be executed in case other components are not dependant on the one being removed.
To skip this dependency check – in the Uninstall dialog shown upon uninstalling, change to "Yes" the Force Uninstall Regardless Dependencies combo box.
Click OK to complete the operation.
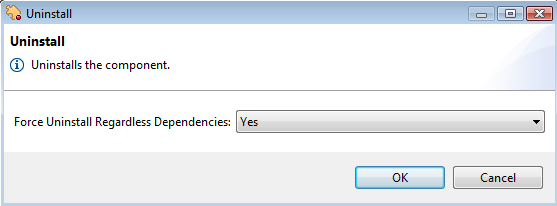
To uninstall a component as a mass operation: Right click over the node and select OSGi Device ->Software Admin -> Uninstall... menu option. Follow the steps explained in "Update command over a device group" above.