Bosch IoT Remote Manager provides Single Sign-on Integration(referred to as SSO) thanks to OpenID Connect 1.0 support which is a simple identity layer on top of the OAuth 2.0 protocol. When SSO is enabled, users can log in through an external identity provider, which means that user information can be stored outside the system.
Through SSO the user identification is handled by the Identity Provider and upon success the user is redirected to Remote Manager. However, if a valid login is already in place, the user will not be redirected to do it once again. When a SSO is already in place, the access to the RM Web Console must be done through the login alias i.e. http(s)://{WEBCONSOLE_HOST}:{WEBCONSOLE PORT}/mprm/login. The required user ID can be found in the subject of the respective access token.
Prerequisites
In order to use SSO, every user whose data comes from an external identity provider has to be registered beforehand.
Configuring the Client
Configure the rm.sso.config.cfg file which is located by default in the
{RM_HOME}\bin\consoleweb\configsdirectory.You can store multiple .cfg files that contain identity provider configurations (profiles), but use only one as the default one.All necessary values can be directly written in the file or set as system properties, which should be then placed in a file that is read periodically. When the values have to be read as system properties, they should be set as in the example below:
responseType=${SYSTEM_PROPERTY_TO_READ_FROM}In terms of SSO, a client represents an application that can request tokens from an identity server. Details may vary, but you typically define the following common settings for a client, as part of the configuration file:
name- a user-friendly name of the identity provider; used as a reference when specifying the default identity provideridentityServer- the main URL used by Remote Manager to access the identity provider.discoveryEndpoint- the discovery endpoint can be used for retrieving metadata about your Identity Server - it returns information such as the issuer name, key material, supported scopes etc. See the specification for more details. If not set, the default value is/.well-known/openid-configurationrelative to the base address.clientId- a unique client ID that needs to be registered with the identity provider.clientSecret- a secret used by the client to authenticate in front of the provider, when such is needed. It has to be registered beforehand.redirectUri- a network location where identity and/or access tokens get sent to. In the case of Remote Manager it is: http(s)://{WEBCONSOLE_HOST}:{WEBCONSOLE PORT}/mprm/login. This redirect URI has to be part of the initial client registration with the identity provider.scope- scopes represent the access privileges requested for access tokens. Scopes determine the resources which will be available to a client when the access tokens are used to access OAuth 2.0 protected endpoints.responseType- the allowed interactions with the token service, e.g. ID token, access token etc;
Set the following system properties within the
{RM_HOME}/bin/consoleweb/plugins/configuration/config.inifile.ui.mprm.jwt.login.enabled=true- set to true to enable Single Sign-onui.mprm.jwt.cookie=<access_token>- provide the name of the cookie containing the access tokensso.default.profile=<prod>- provide a mandatory default profile name (its value must be the name of an existing identity provider profile)Here set the name of the identity provider from the .cfg file, which to be treated as the default one.rm.sso.prod.login.state=<5ca75bd30>- provide a recommended state request parameter related to the login flow; used for maintaining the state between the request and the callbackrm.sso.prod.login.extra.params=<idp_hint=ciam>-if needed, provide any additional request parameters.Here set any additional custom arguments that the identity provider requires during the authorization request.
Configure the JSON Web Token Keystore (JWK) options via Remote Manager’s Web Console.
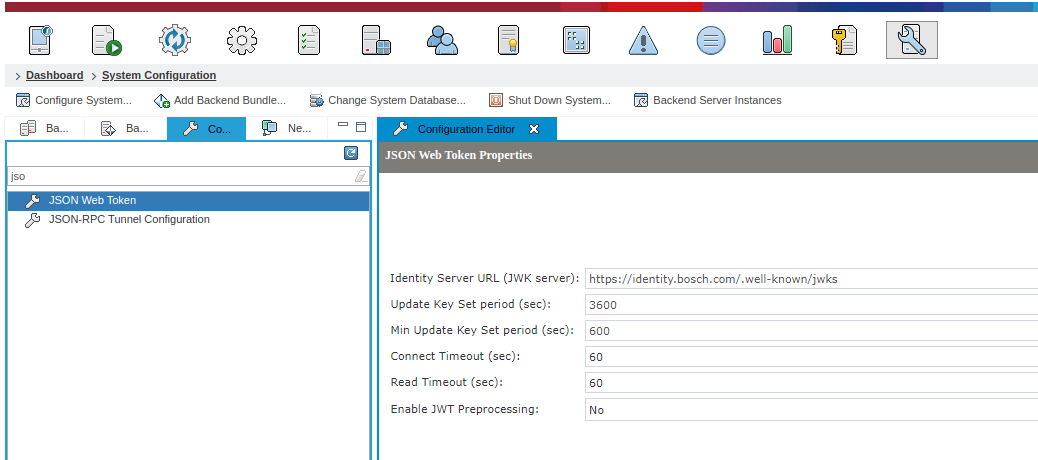
Go to the System Configuration view and find the JSON Web Token options under the Configurations tab (as seen in the screenshot below).
The JSON web token includes a URL for downloading the certificates by which the tokens are validated.
Set the Identity Server URL (JWK server) - it can be found in the discovery endpoint (jwks). By default /.well-known/jwks relative to the base address should work.
The Update Key Set period value is used when connection has failed and results in a timeout.
Set any of the next properties as needed but in most cases they do not have to be altered.
Add the Identity Server's Certificate to the Remote Manager truststore:
Go to Certificates from the RM Web Console Dashboard.
Click Import Certificate.
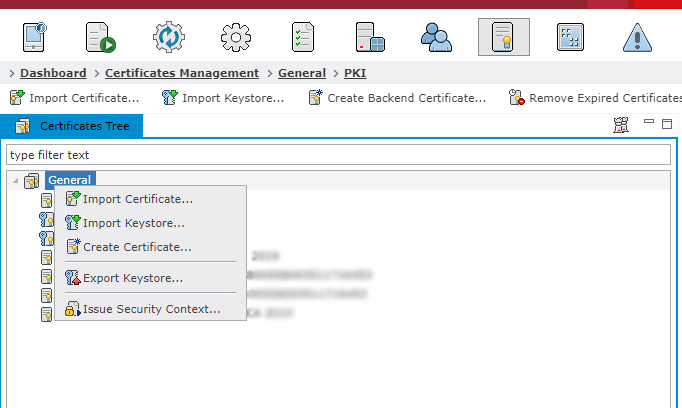
In the dialog that opens up click Add and select the Identity Server's certificate.
As Certificate Domains choose mPRM TLS Client.
See Certificate Management for a detailed step-by-step guide on how to import a certificate.
Preprocessing
If any preprocessing is needed, set the Enable JWT Preprocessing property to Yes. All preprocessing actions are handled by JWTLoginInterceptors which are registered as OSGi services.
Any preprocessing action takes place after the token validation and before the actual login. An example use case would be to create a user and grant the needed permissions on first login (as RM requires all users to be registered beforehand).
To enable preprocessing follow the steps:
Build a custom
com.prosyst.mprm.cloud.auth.sso.JWTLoginInterceptorand register it as an OSGi service in Remote Manager. It receives the token and does all related preprocessing work.Set the
cloud.auth.login.preprocessingproperty in the config.ini file. It indicates that something has to be preprocessed.Set the
cloud.auth.login.preprocessor.type = jwt.login.preprocessorproperties on the Web Console. Thecloud.authlogin.preprocessor.typeproperty sets the type of the preprocessor.
Auto-Configuration related properties
The system checks for any changes in the above-mentioned property values. The following properties are used to configure this action:
Property | Default Value | Description |
|---|---|---|
| ./configs | Sets where the configurations are placed and where to look for them. |
| 60000 | Sets the interval in which to check if any update has occurred. |
| false | Determines whether to do an initial scan of the directory upon start up, or to wait the interval set via |