Log into Bosch IoT Remote Manager Console
Once you have accessed the Bosch IoT Remote Manager’s Console please enter your credentials at the login page. Select Device Management from the Dashboard
Register your IoT Edge Services Device
Click on Register Device Action Button from the Menu Bar and select Register IoT Edge Services Device.
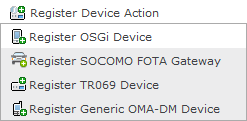
Note that the Register OSGi Device wizard varies in different Bosch IoT Remote Manager Service Plans.
Follow the wizard and give your device a human-readable name, e.g. “My Raspberry 2” and Network Transport. If you will connect a pre-built Demo IoT Runtime image (downloaded in the section below), then select Demo IoT Runtime otherwise leave it unchecked.
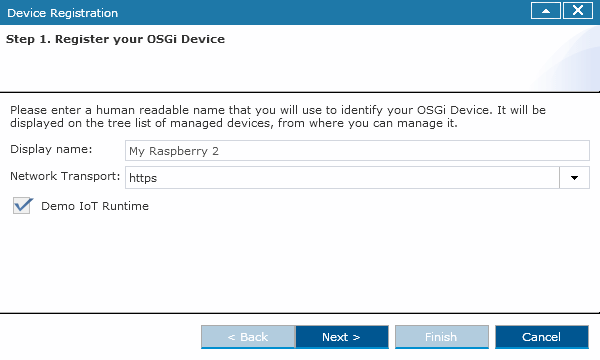
At the third step of the process your browser will automatically download the Connectivity Pack. The Connectivity Pack archive provides your device with a unique identifier, credentials, a runtime license file ( if a demo IoT runtime image is going to be connected), and Remote Manager agent bundles, so that your device will connect to the Bosch IoT Remote Manager automatically upon start up. Please, refer to the Install the Connectivity Pack section (found below) for instructions about installing the archive on your target device.
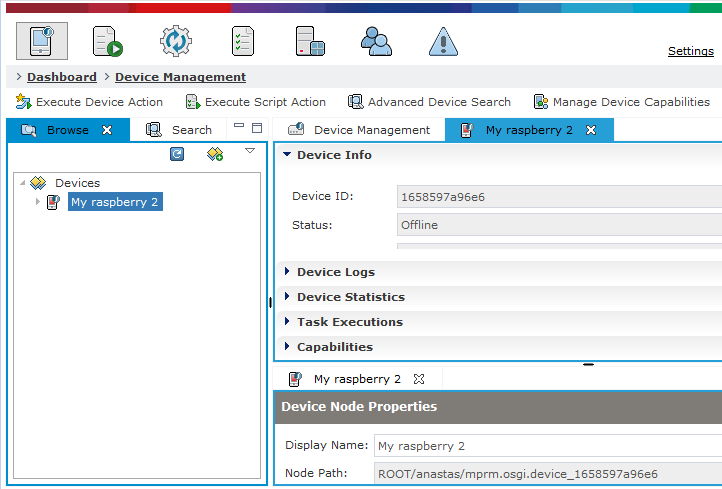
Upon completing the wizard your device will appear in the Device Management tab as follows:
Download a Demo IoT Runtime
The following pre-built Demo IoT Runtime images are available for download:
Platform | Edge Services Image |
|---|---|
Windows x86, 64-bit | |
Linux x86, 64-bit | |
Mac OS x86, 64-bit | |
RaspberryPi 2 | |
BeagleBone |
After downloading, unzip the image to any location on your target device. No additional configuration is required, but make sure you have the recommended JVM installed.
For information on recommended JVMs see Supported Platforms.
Install the Connectivity Pack
During your device registration in Bosch IoT Remote Manager a Connectivity Pack will be generated specifically for your device. The Connectivity Pack archive provides your device with a unique identifier, credentials and a runtime license.
Copy this archive to your target device and extract on top of your IoT Runtime. The pack follows the same structure of the runtime and does not overwrite any existing files.
Start and Manage your IoT Runtime
You can start your IoT Runtime in two ways:
osgi/bin/vms/jdk/server script will keep the OSGi console in foreground
mbsa/bin/mbsa_start script will launch the mBSA native agent first, which will, on its behalf, launch the OSGi runtime in background. The native agent will monitor the OSGi runtime for faults and take appropriate actions if such occur. This is the recommended mode for production usage In order to launch your IoT Runtime automatically upon target device boot-up you can add the mbsa/bin/mbsa_start script to your service startup sequence, and the mbsa/bin/mbsa_stop script to the shutdown sequence.
Once launched, the IoT Runtime will connect to Bosch IoT Remote Manager automatically. Your device Status should indicate Online and you can now deploy additional software remotely, reconfigure the device, perform software updates, mass management operations, and so on.
Download the SDK and Start Developing
You are now ready to start developing your IoT solution.
Feel free to request an evaluation version of the latest Bosch IoT Gateway Software from our contact page.
Our Support Team is available for any technical or commercial questions you may have with regards to this offering.
Managing an OSGi Device
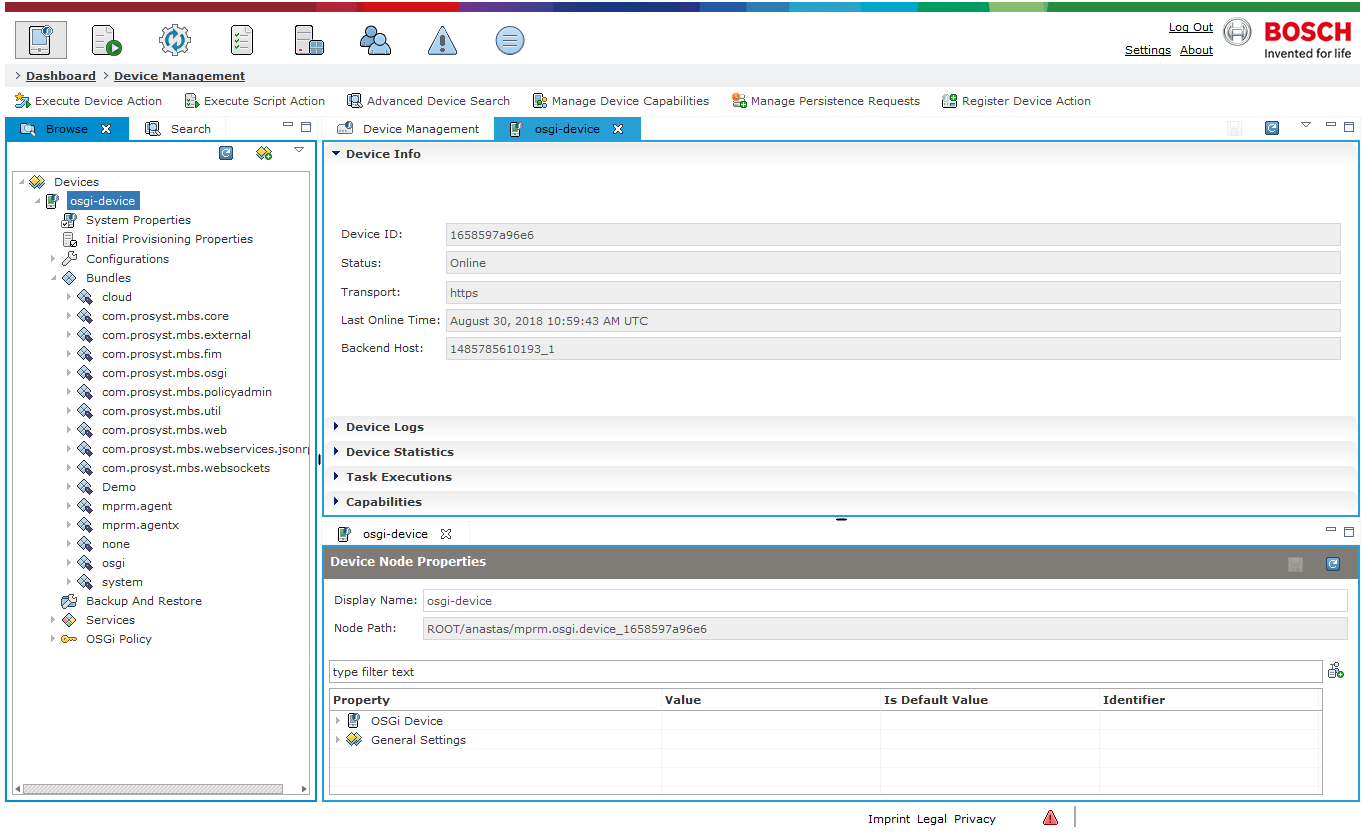
Once the OSGi device is connected its status is changed to Online. The Device Info tab contains valuable information like what type of transport that is used, when was the last successful connection with the device or information about the Backend Host.
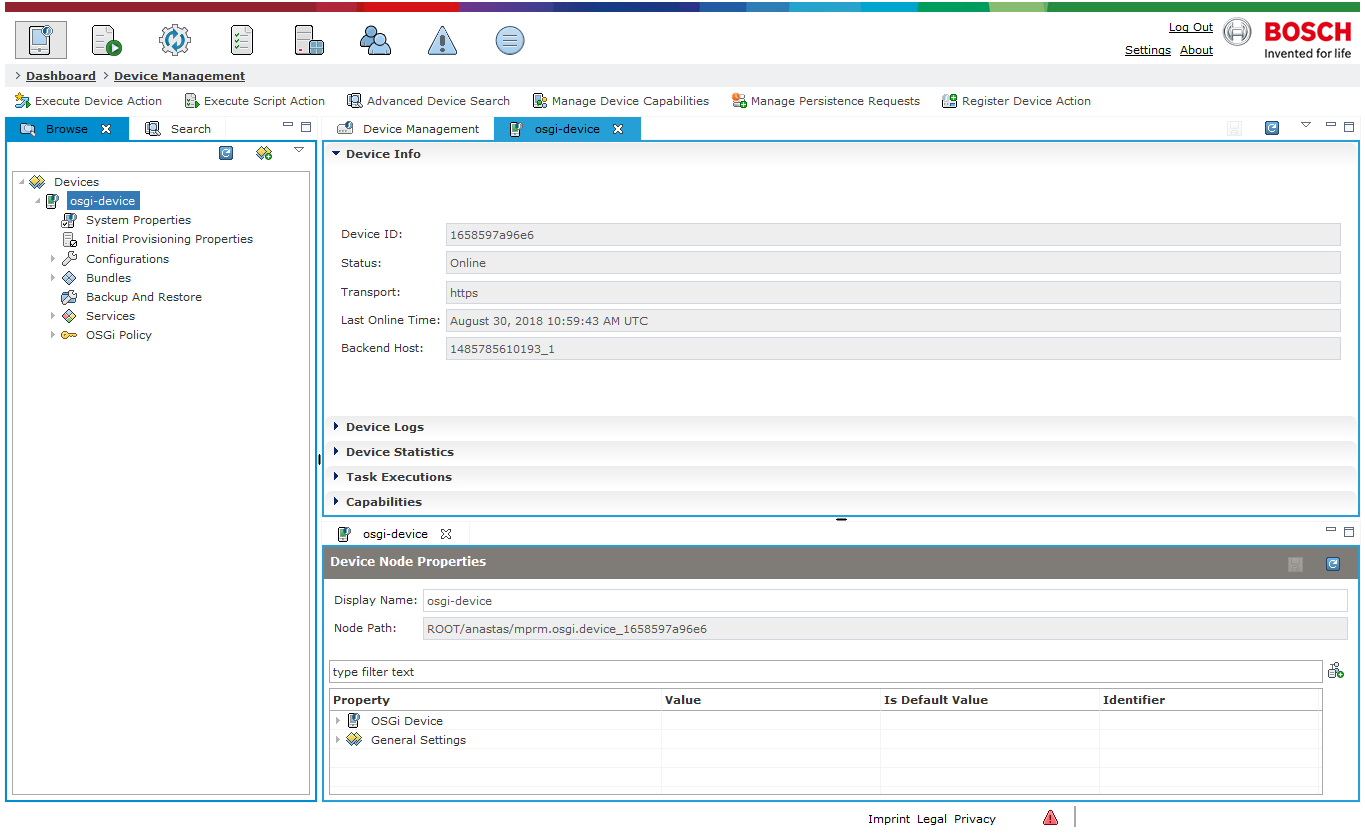
Viewing, Setting or Removing a System Property can be performed in the second node called System Properties.
Opening the Bundles node will show all installed bundles grouped by their package. All bundle-related operations are available with a right click.
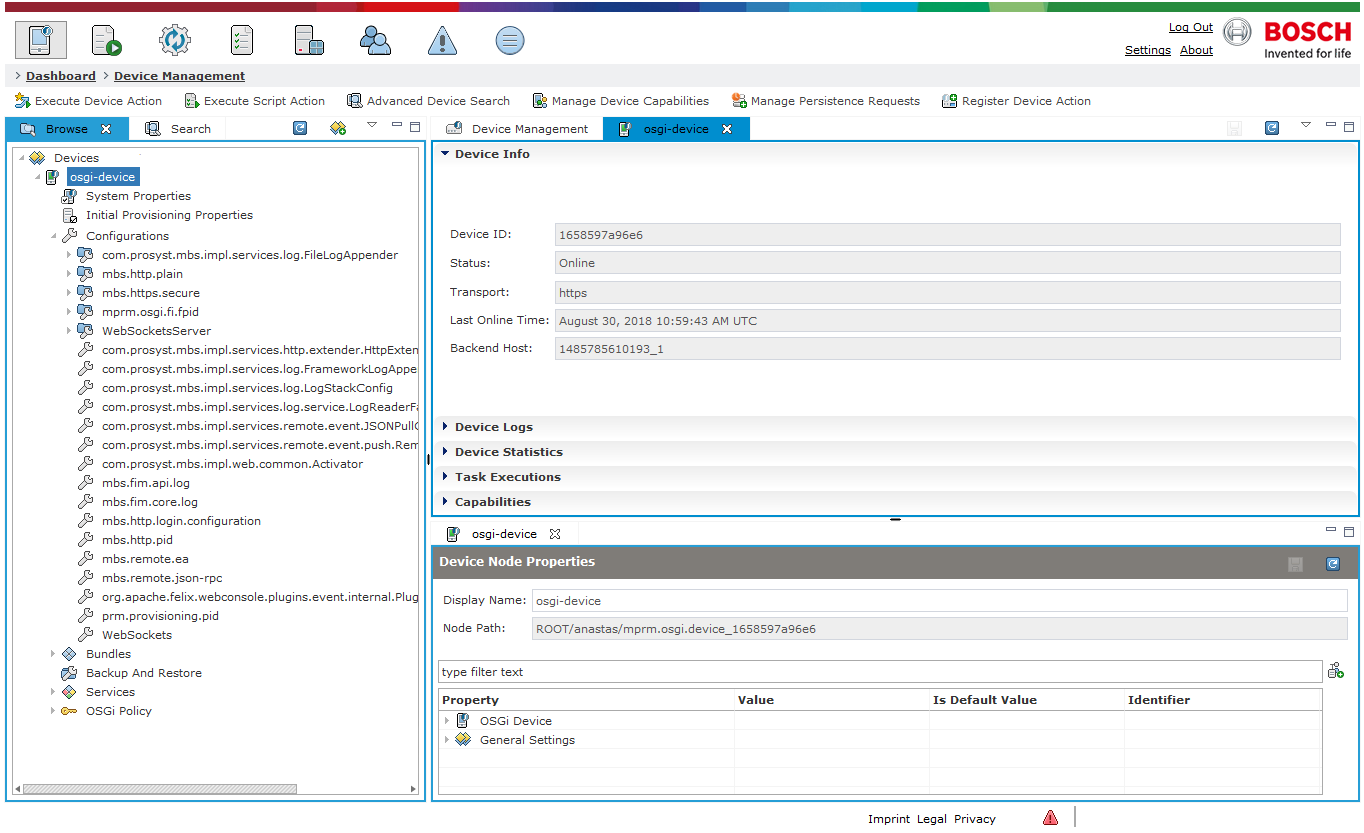
Opening the Configurations node will show all available Configurations, while clicking on a single one will open up their properties.
Enabling Functional Items Support for an OSGi Device
To enable Functional Items support for an OSGi device, follow these steps depending on your scenario:
If using a Demo IoT Runtime image, download the Home Gateway Image from the links above. Normally, it contains the relevant FIM bundles installed and configured out of the box. If this is not the case, however, you should manually install at least the following set of FIM bundles: com.prosyst.mbs.fim.api.jar and com.prosyst.mbs.fim.core.jar.
Find them in <target_image_iot_gateway_main_dir>\osgi\bundles and execute the following command pattern:
install <target-image-iot-gateway>\osgi\bundles\com.prosyst.mbs.fim.api.jar
If using the IoT SDK version:
Check if the connected gateway already supports Functional Items. If not, the needed FIM functions can be installed through the corresponding FIM kitman script. As a minimum, you need to install the "Functional Item Management" module base bundles. The corresponding script for them is:
kitman.install "Functional Item Management"
The other available kitman scripts can be viewed by executing:
fw>$kitman.ls "functional item management"
The FIM Simple Demo can be additionally installed for testing purposes. The corresponding script is:
kitman.install "Functional Item Management Demo Simple Usage"
Once FIM support is enabled on the OSGi device, the FIM agent needs to be installed on the Remote Manager. From the OSGi device node go to install bundle and search for fim – FIM Control Unit Agent.

We highly recommend selecting Smart install as all bundles that the FIM depends on will be installed automatically.
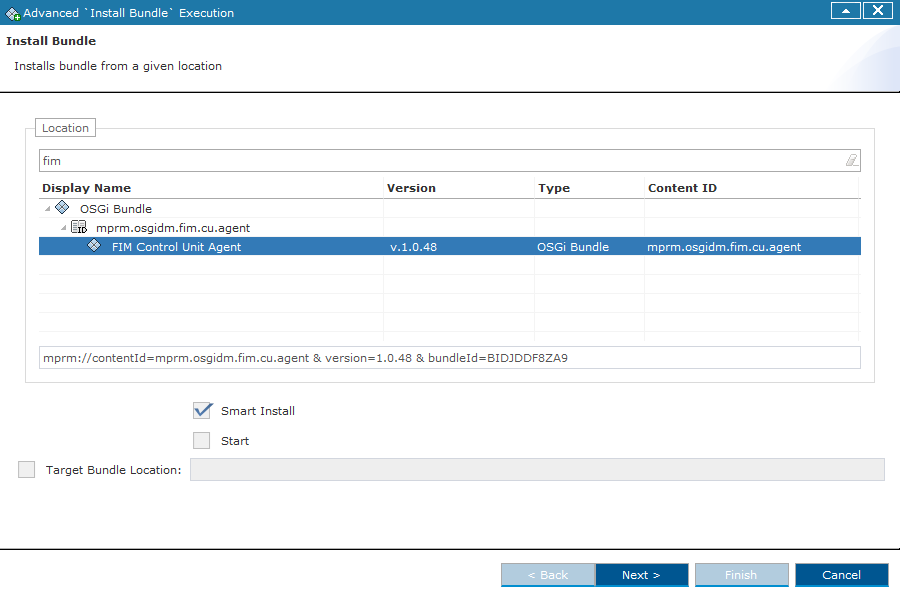
Finish the installation by following the default steps.
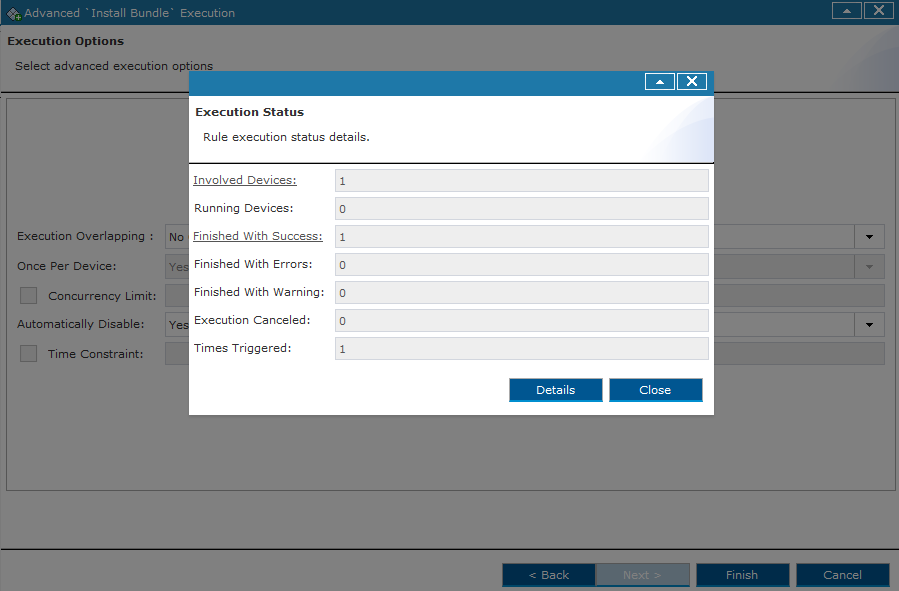
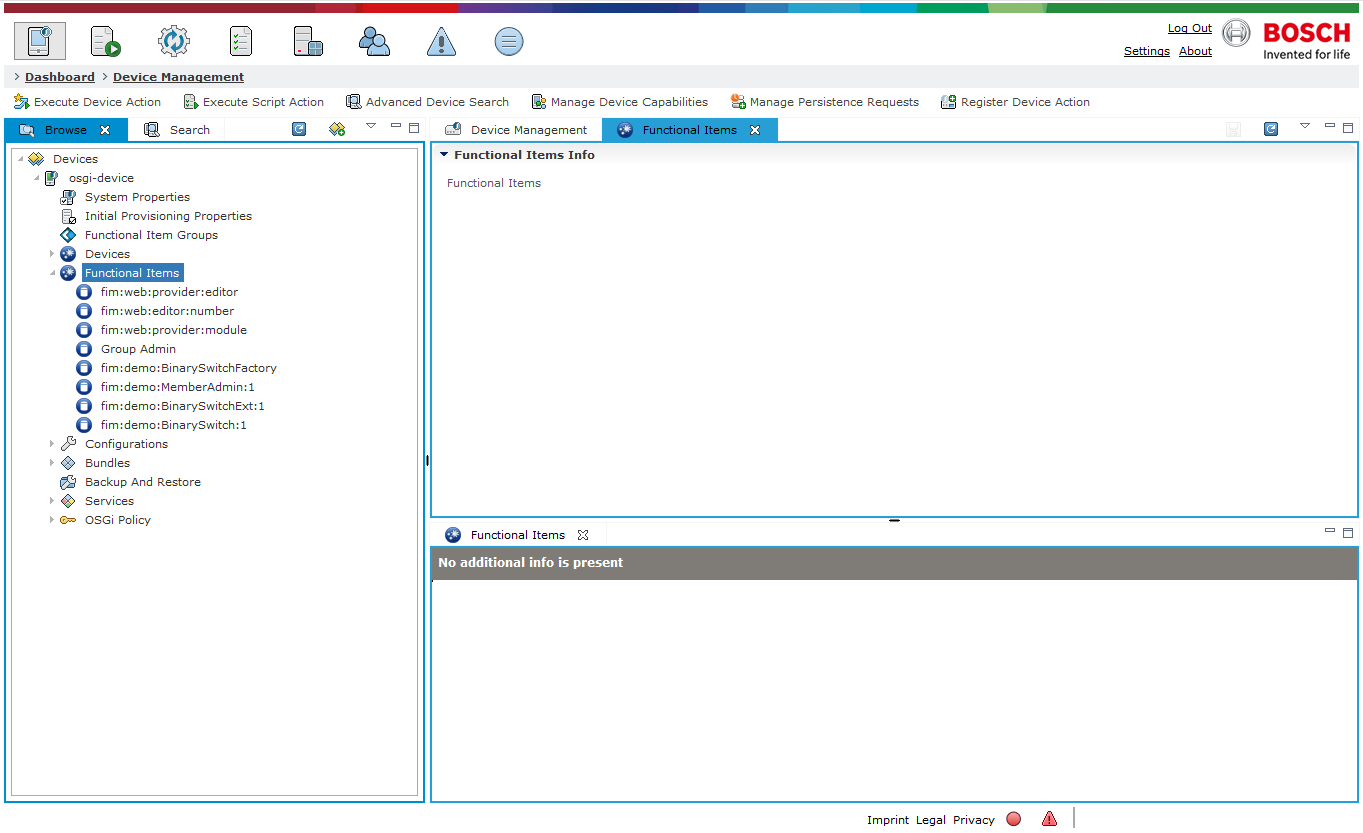
Once the FIM functionalities are installed and operational additional nodes will appear below the device. The new Functional Item Groups, Devices and Functional Items nodes contain the corresponding groups, devices and items that are added. For example opening the Functional Items node will show all FIs that are associated with this device.
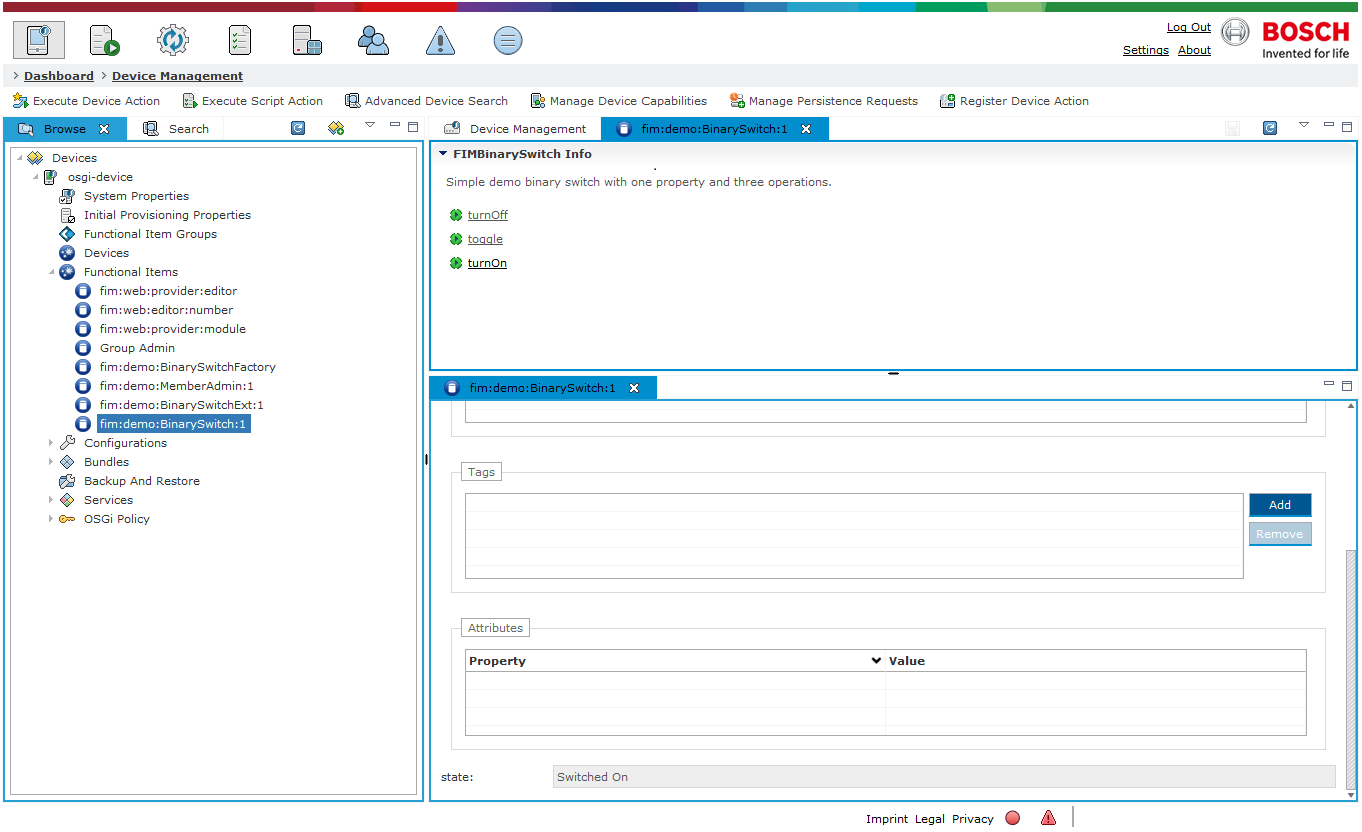
Opening a Functional Item will show all available operations related to this particular FI. For example the BinarySwitch Functional Item has three possible operations - Turn on/ Toggle / Turn off and the result of their execution is visible in the State field at the bottom.
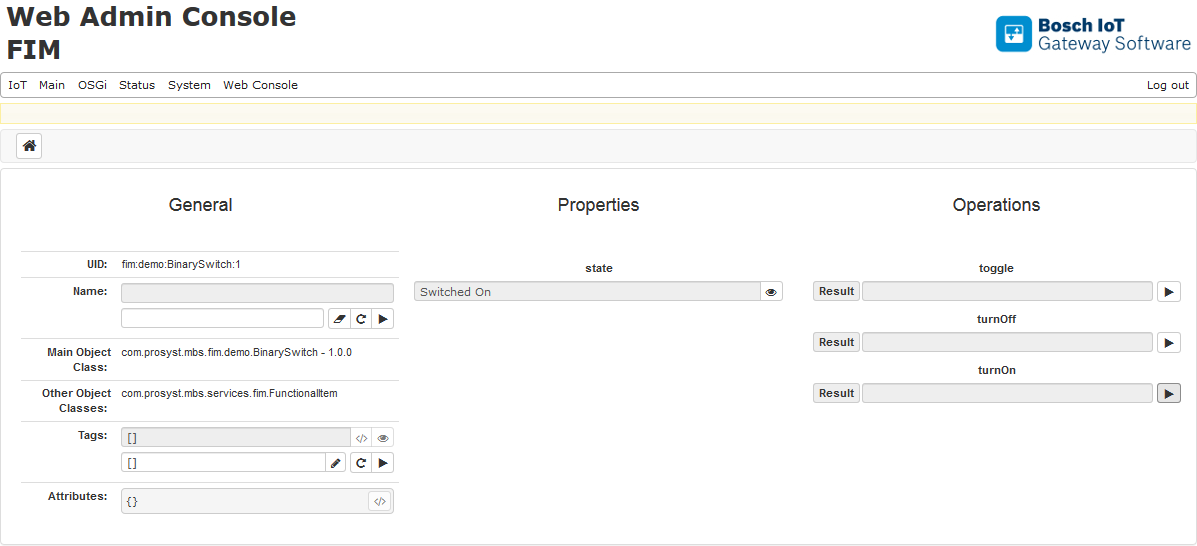
All operations made with the Gateway Software will show up a result in the Remote Manager as well. Executing a BinarySwitch operation in the Gateway Software Web Console will show up a result in the same state field from the screenshot above.
Modifying FIM Configurations
All configurations that come from the FIM support will be visible in the common Configurations node and displayed with their PID. A user can set up a new property, change or remove an existing one. In the screenshot below the properties of the mbs.fim.api.log configuration are changed for debugging purposes.
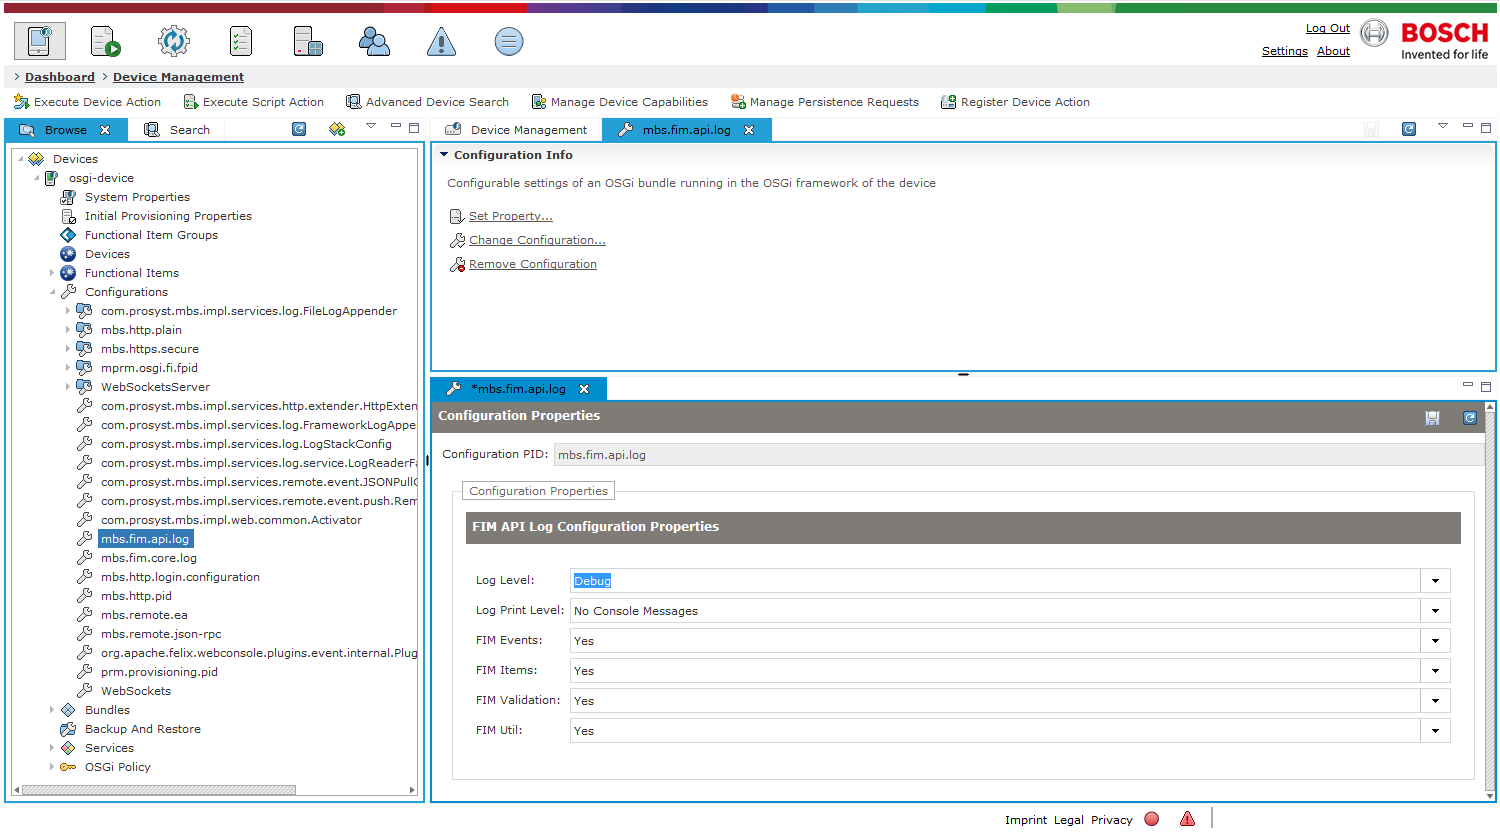
Changing the main Log Level to Debug will produce maximum logs as seen in the values of the next properties (FIM Events, FIM Items etc.)
Connect OSGi Device Through a Proxy Server
If the device will connect to the Bosch IoT Remote Manager through a proxy server then only https transport can be used.
Configuration
To connect a device through a proxy server, the following JVM properties should be added on the device:
https.proxyHost=<PROXY_HOST> - The hostname, or address, of the proxy server
https.proxyPort=<PROXY_PORT> - The port number of the proxy server
Register your TR069 Device
Click on Register Device Action Button from the Menu Bar and select Register TR069 Device
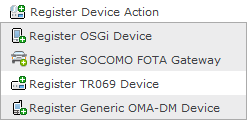
Give your device Display name (optional), Organization Unit Identifier, Product Class and Serial. Click on next button to register the device in the Bosch IoT Remote Manager. Now your TR-069 device can be connected to the Bosch IoT Remote Manager using the https://<RM_HOST>:<RM_PORT>/asc ACS URL.
Register your OMA-DM Device
Click on Register Device Action Button from the Menu Bar and select Register Generic OMA-DM Device or Register OSGi Handset Device
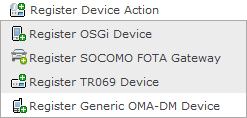
Give your device Display name (optional) and Device ID. Click on next button to register the device in the Bosch IoT Remote Manager. Now your OMA-DM device can be connected to the Bosch IoT Remote Manager using the https://<RM_HOST>:<RM_PORT>/syncml-dm URL.