This page is relevant for users of Bosch IoT Remote Manager on-premises.
This "Setup Guide" describes how to perform initial configuration of all backend hosts in RM Production Configuration mode.

Before proceeding ahead make sure that:
- The database server is started and a blank database to host the RM system information is created.
- At least one stand-alone console is installed.
- The control center host and all other backend hosts that will be part of the initial RM system are installed.
The initial configuration of the system (configuring the database and assigning roles to the system components) consists of the following steps:
- Starting the RM hosts.
- Starting the Management Console.
- Connecting the console to RM
- Login to the control center
- Configuring the database settings
- Creating the initial RM system configuration.
How to perform each of these steps is described in more detail below.
Starting RM
This is done by invoking the RM Server shortcut from the RM program folder or by starting the RM script from the bin folder of Remote Manager's installation.
Starting the Management Console
Invoke the Management Console shortcut from RM's program folder in the Start menu, or start the console script residing in the bin folder.
The default local Remote Manager is shown as Local RM.
Connecting the Console to Remote Manager
If the RM server you are using to handle your devices is not present in the servers list of the console, you can either add it as a new one or edit the connection properties of an already defined one.
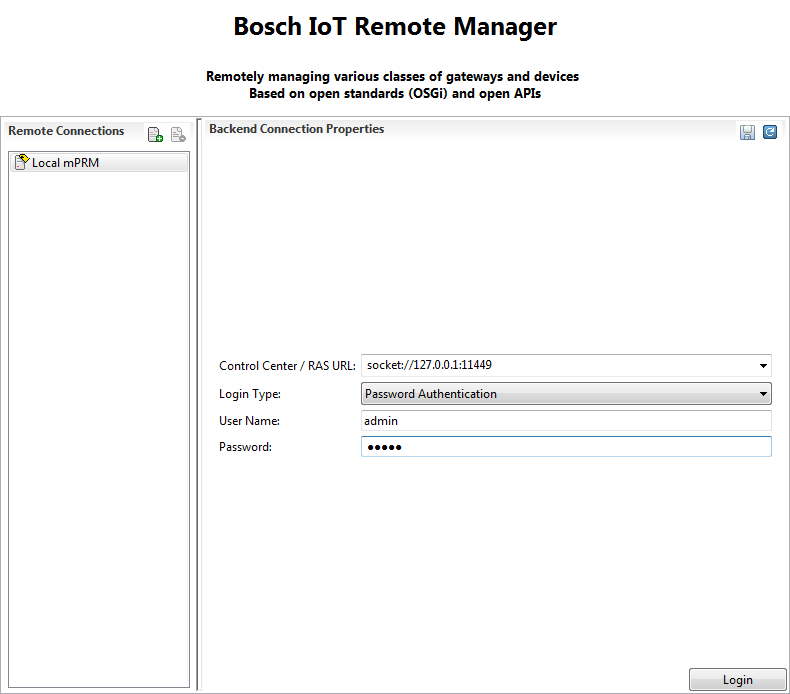
- To create a new set of server settings, click the
 button in the RM Connections pane

- Next, in the displayed Define New Connection dialog (Figiure 2), type the display name of your RM server and click OK. The entry will be added to RM Connections.
- Select the newly-added server from RM Connections and edit its settings on the right:
- Login Type - Should be Password Authentication.
- Control Center/RAS URL - The URL of the RM control center. The format of the URL must be:
- socket://<rm_host>:11449
- Where <rm_host> is the IP address or DNS name of the backend server host that will have control center role. You will establish connection to that host.
- socket://rm_server:11449
- User Name and Password - The user account settings for RM. The default system account for the Control Center is:
- username: system
- password: system

Logging to the Control Center
- Select the RM server from the available servers list in the RM Connections pane (see Figure 4).
- Click the Login button.
A System Configuration dialog appears informing you that you should apply configuration.
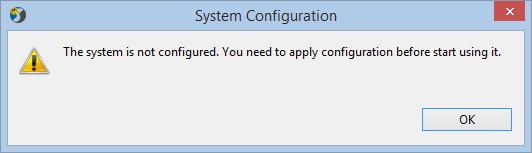
Now you have entered the Console and are able to configure the current state of the system.
Configuring the Database Settings
Next, a Change System Database dialog appears prompting you to specify the connection settings of the database dedicated to RM.
- In the Driver Class field, type the class of the JDBC driver for the SQL server. If you are not certain about the class name of your driver, refer to its documentation. For example: solid.jdbc.SolidDriver.
- In the URL field, type the URL to the driver. It is driver-specific so refer to your driver's documentation for details about it. For example: jdbc:solid.jdbc.SolidDriver://localhost:1313.
- In the Username & Password fields, type the valid pair identifying you to the SQL server. If the server you are using does not require user authentication, leave these fields blank.
- Optionally, you can set Connection Limit with the maximum number of connections, and Statements Limits with the maximum number of cached prepared statements to be accepted by the server.
- After finishing, press OK to continue.
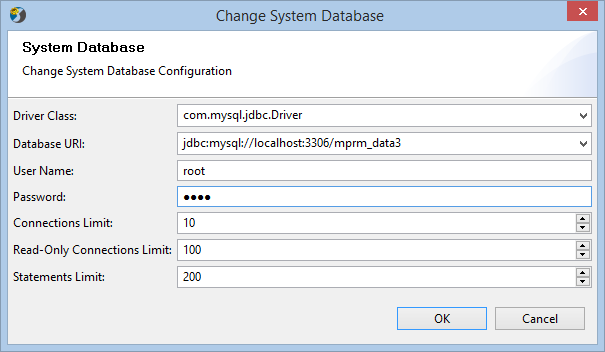
The configuration of the system database can be changed later at runtime. See RM Database Configuration User Guide and Database Access Conceptual Guide.
Initial RM System Configuration
After initiating the RM system database, you are to configure the information about the RM backend server hosts. This means assigning them roles and IDs, etc.
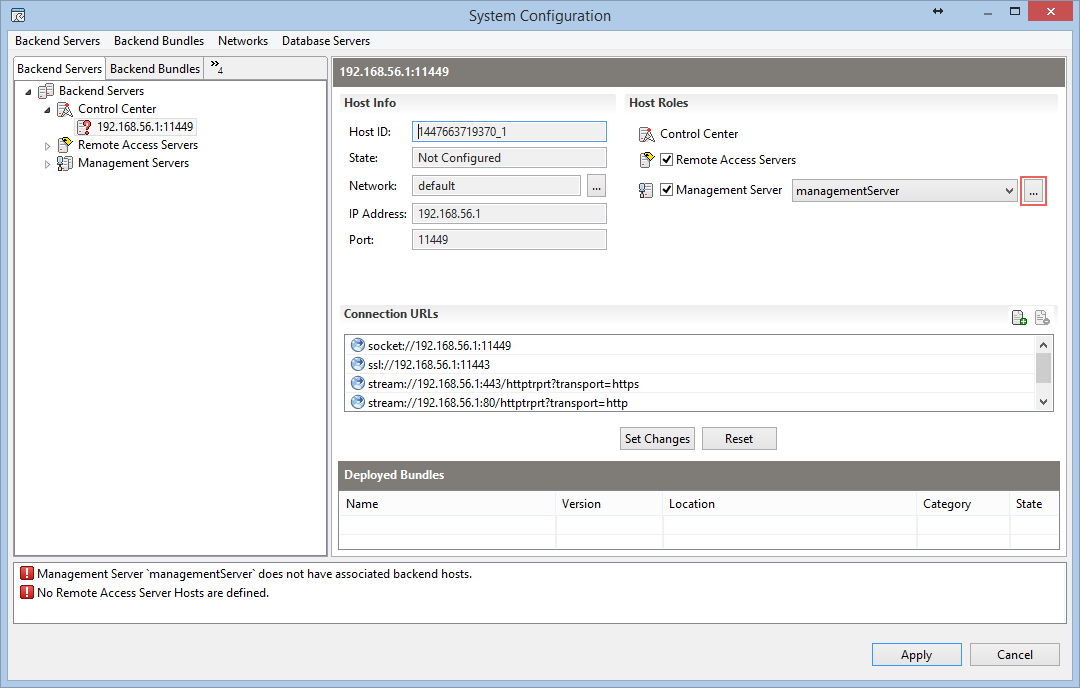
By default, there is one backend server host available in the system. It is the host you are connected to. Initially, this host has control center role. There are no management servers and remote access servers in the system.
Add a Management Server
To add a new management server:
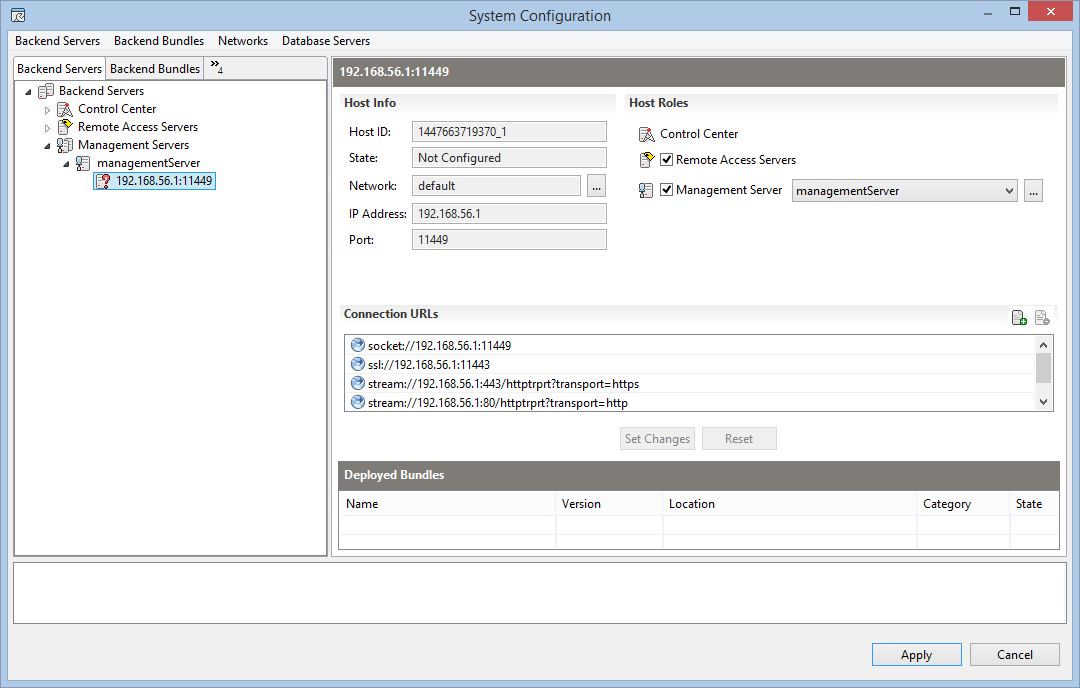
- Click on the "..." button next to the existing management server (highlighted in the screenshot above).
- Click on the button to add New Management Server option.
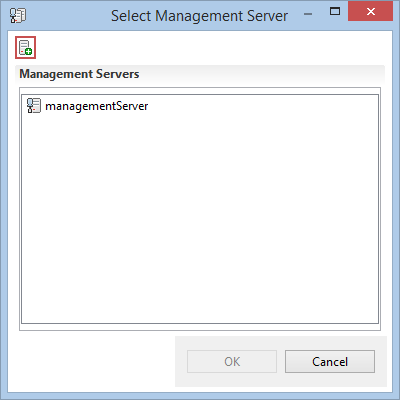
- A new dialog appears allowing you to define the MS settings.
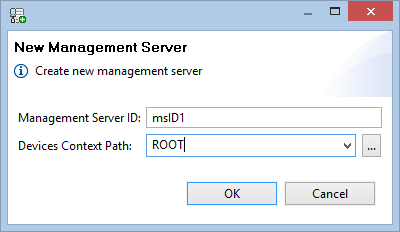
- In the Management Server Id field, type the ID with which the members of the MS will be identified in the RM system.
- In the Device Context Path field, select the ROOT option (because there are no other device groups initially). You can add several management servers at this point - each responsible for different branches of the device management tree. Click the ... button and in the shown Management Contexts dialog create the relevant context groups by using the popup menu or the toolbar at the top. Then, back in the Add Management Server specify the target context path for this management server. To assign the other servers to device tree nodes, use sequentially the New Management Server option.
- Press OK.
- The MS should appear in the Management Servers node.
Add the control center host to the newly created MS as a host:
- Unfold the Management Servers node and select the newly created MS.
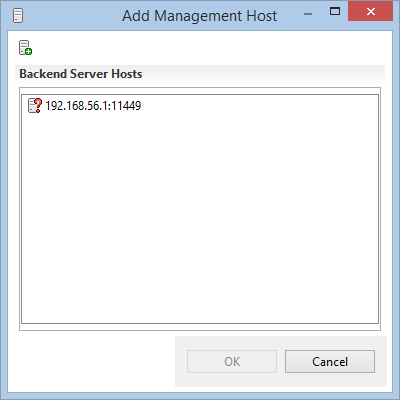
- Right-click the mouse to invoke the popup menu and select the Add Management Host option.
- The new dialog box that appears contains the list of all currently available backend server hosts (only one should be available up to now). Select the available backend host and press OK.
If you select the To List View option from the popup menu, you can see the list of all available backend host. Only one should be available up to now. Select it from the list. In its properties, you can see that this host has both Control Center and Management Server roles.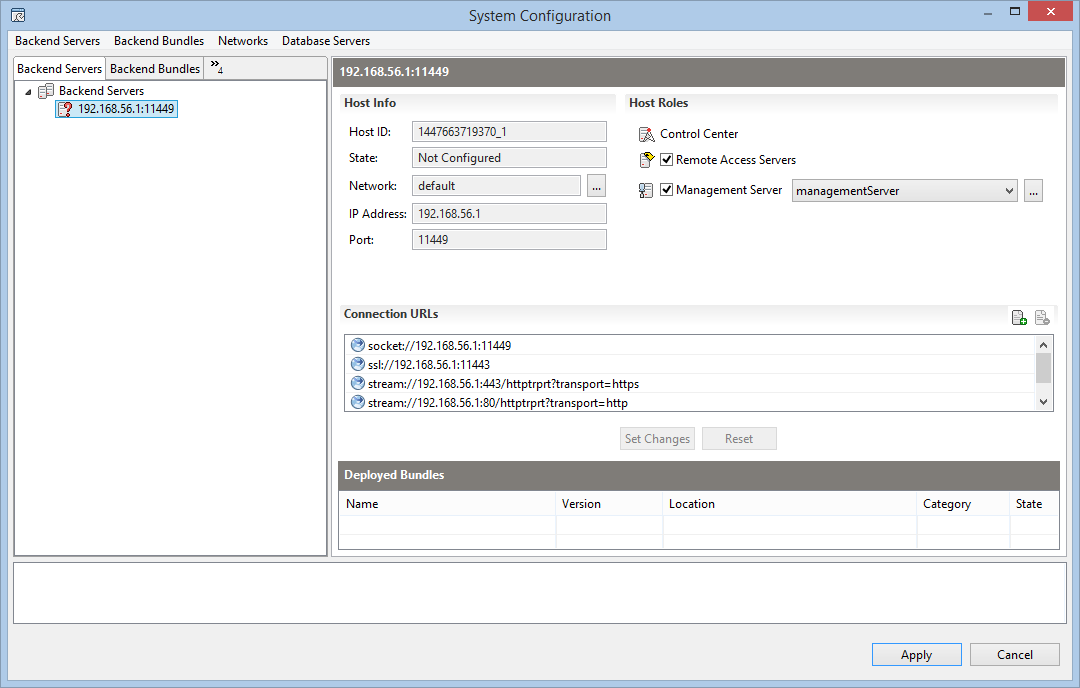
Set Remote Access Server Host
To set the control center host as remote access server:
- Switch to list view (right-click in the Backend Servers pane and select To List View), select the backend host and check the Remote Access Servers on the right. Then, click the Set Changes button.
- In roles view (default), right-click the Remote Access Servers node and select Add Remote Access Host. Select the host and click OK.
Apply the configuration
Once you have finished with all initial system settings, press Apply. This will perform two tasks:
- First, it will apply the current settings and will record them in the system database.
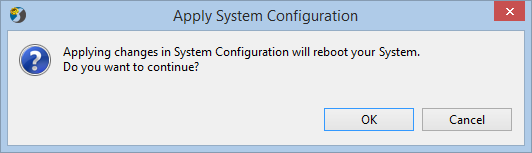
- Second, it will RESTART THE RM SYSTEM! This means that the CC framework will restart and the Console will disconnect you from the control center host. If you want to reconnect, you will have to wait until the CC is fully restarted, and log in as described earlier in this document.
After performing all steps described in this document, your RM system is fully configured and capable of handling tasks.