Hello World
How possibly could a tutorial start without saying Hello World …
Well, to be more precise, as we provide a Things service, in the course
of this tutorial part you will create a Hello World thing and learn to
appreciate the access control settings via an entity called policy.
A: Book a free service plan
Bosch IoT Things provides a free service plan which you can book without any obligations.
 This tutorial assumes, that you have a free instance of Bosch IoT Device Management. However, some parts work the same if you have subscribed the Bosch IoT Things service only.
B: Create a namespace
All things associated to your account will be created in this namespace. However the namespace needs to be set only once.
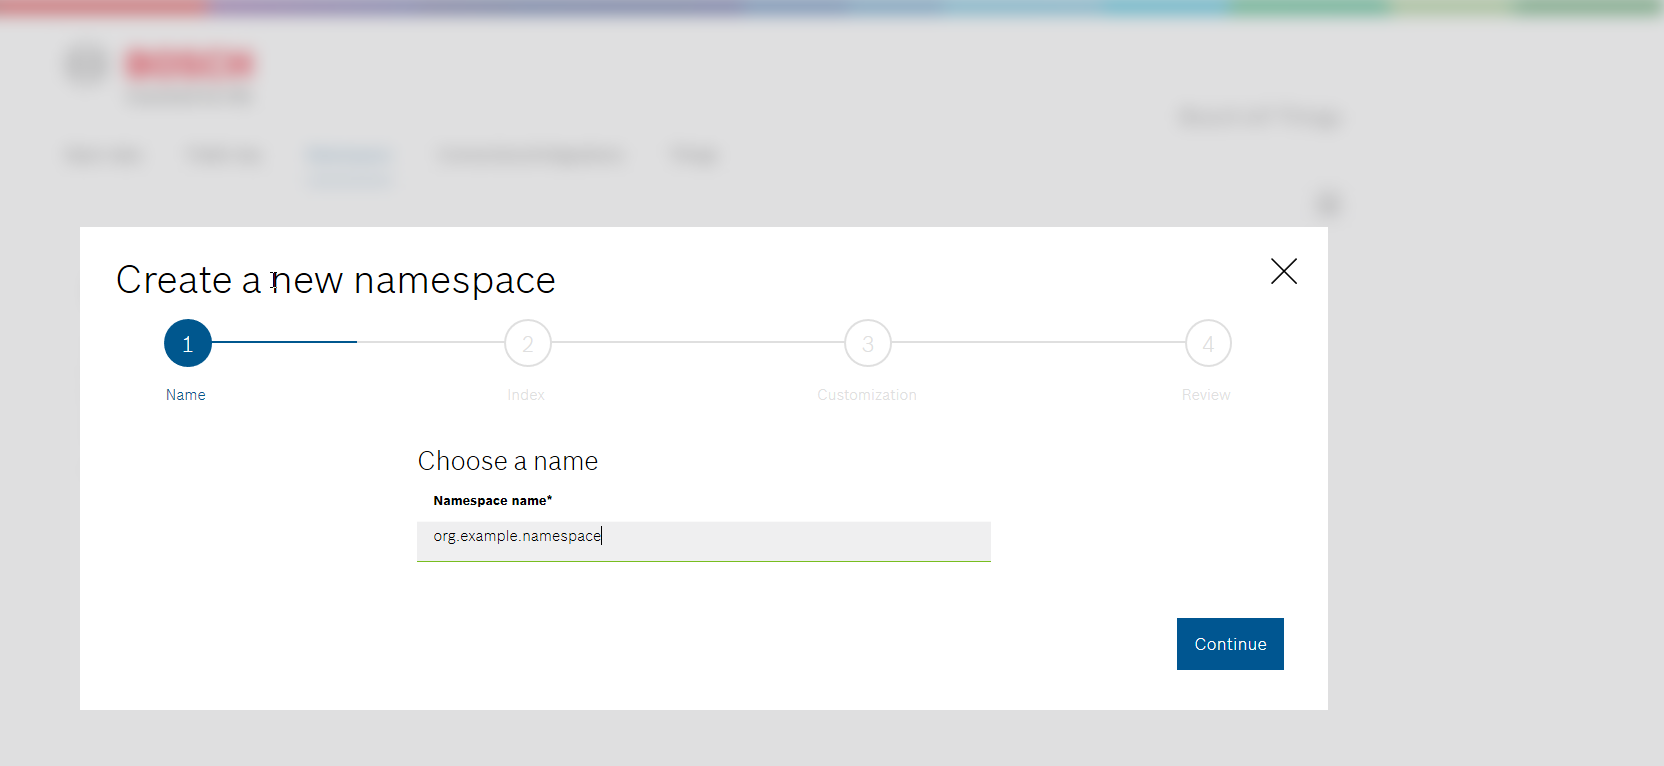
In case you create the namespace via Bosch IoT Suite Console, the steps are a bit different.
See https://docs.bosch-iot-suite.com/device-management/Register-a-namespace.html
C: Create an OAuth2 client
Go to OAuth2 Clients and create a client with the scope of Bosch IoT Things booked before.

 This option is only available in case you have booked a package.
D: Create a thing via Things HTTP API
To use the HTTP API for creating a thing, open the HTTP API documentation in an new browser tab.
In case you have booked a package, the easy way would be to use the Bosch IoT Suite Console and to provision there a new device. See https://docs.bosch-iot-suite.com/device-management/Getting-started.html. However the console uses the Device Provisioning API, whereas this examples uses the plain Things API.
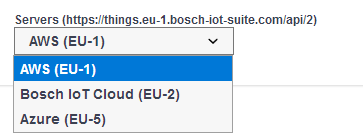
In case your Bosch IoT Things service instance is running on AWS, the default settings in the apidocs are ok, otherwise please select the correct endpoint for your subscription.
- Use your OAuth2 client to create a token via the Use button.
- Paste the token to the bearerAuth authentication.
- Request your thing creation.
- Go to section Things > PUT /things/{thingId}
- Click Try it out.
- Set the thing ID to
your.namespace:HelloWorldThing01 - Submit the request with Execute.
Please note, that your thing ID must be unique.
In case it already exists, you will need to alter the thing ID.
E: Learn to read the thing notation
The response body of the request from step D already shows the thing you have created.
However, generally you can read each of your things with a GET request.
- Go to section GET /things
- Click Try it out.
- Set the ID created at step C in the required field called ids.
- Submit the request with Execute.
Result
In case you have kept the body part provided as example, your Hello World thing will most probably
have already attributes, and the features of a coffee brewer, like shown the following snippet.
{
  "thingId": "my.first.namespace:HelloWorldThing01",
  "policyId": "my.first.namespace:HelloWorldThing01",
  "definition": "com.acme:coffeebrewer:0.1.0",
  "attributes": {
    "manufacturer": "ACME demo corp.",
    "location": "Berlin, main floor",
    "serialno": "42",
    "model": "Speaking coffee machine"
  },
  "features": {
    "coffee-brewer": {
      "definition": [
        "com.acme:coffeebrewer:0.1.0"
      ],
      "properties": {
        "brewed-coffees": 0
      }
    },
    "water-tank": {
      "properties": {
        "configuration": {
          "smartMode": true,
          "brewingTemp": 87,
          "tempToHold": 44,
          "timeoutSeconds": 6000
        },
        "status": {
          "waterAmount": 731,
          "temperature": 44
        }
      }
    }
  }
}
Find detailed info in section Concepts > Things and features.
Congratulations,
you have successfully created a Thing.