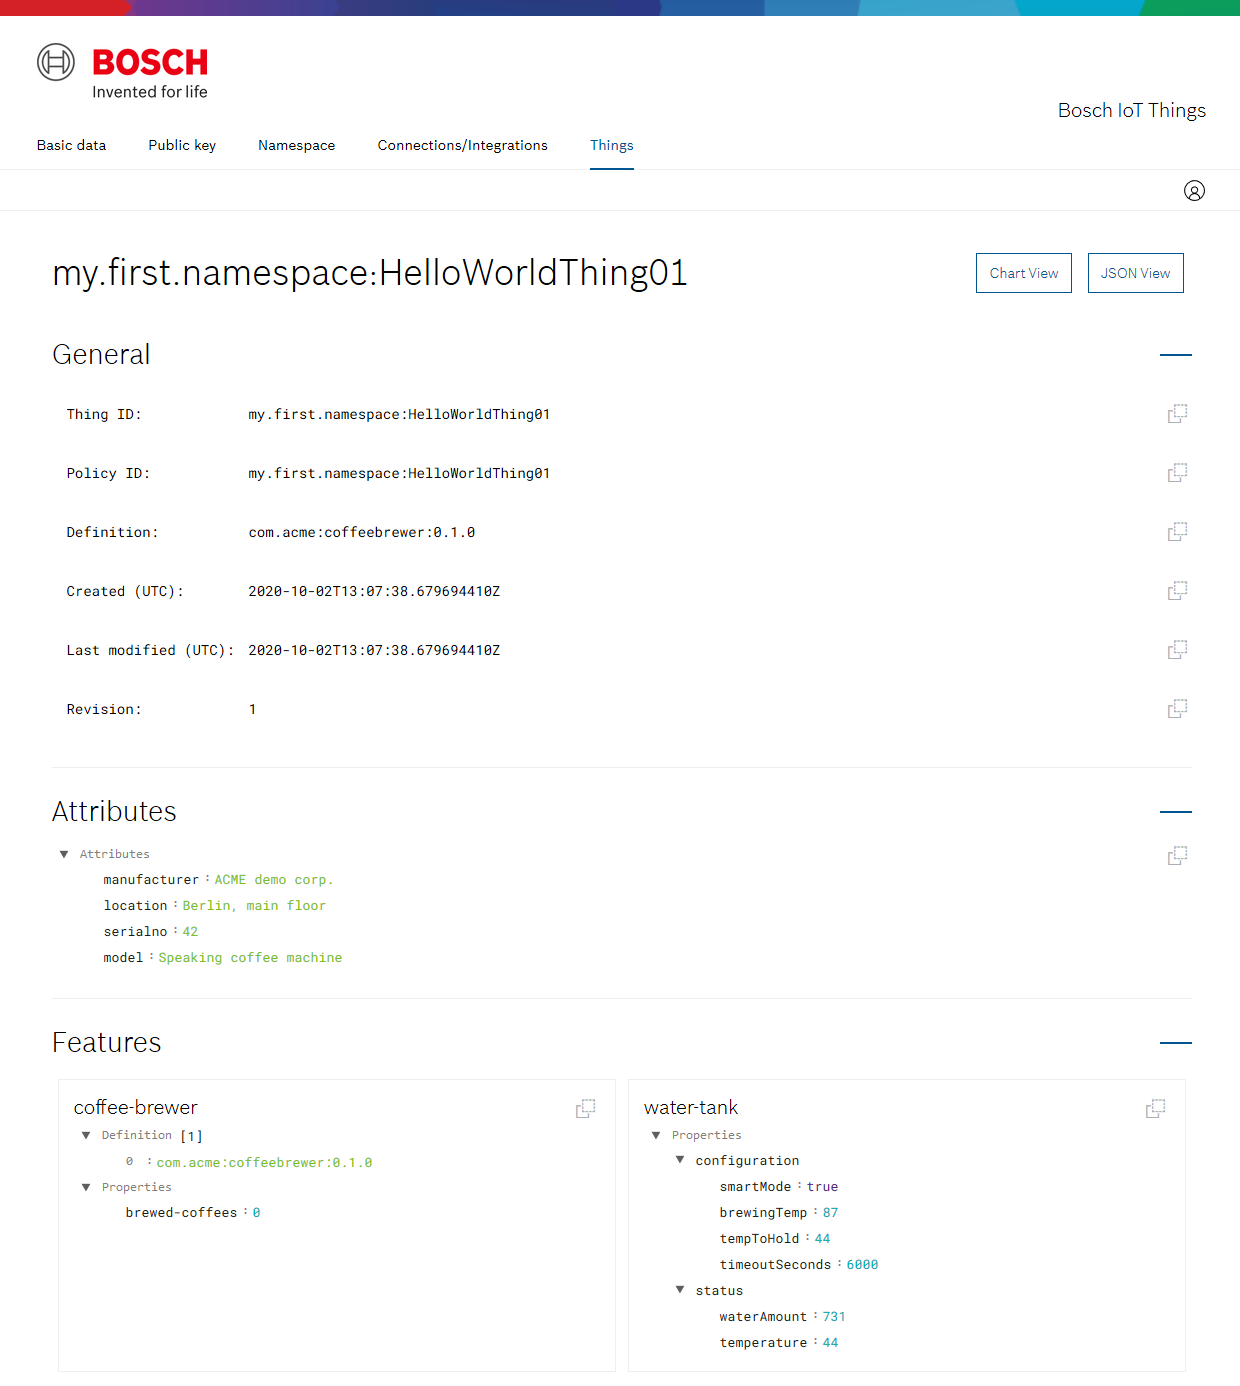
Hello World
Given you have created a Hello World thing. Knowing its policy ID, try to get familiar with its content.
Use the Things HTTP - policy resources
Navigate to the API docs > Bosch IoT Things - HTTP API v2 > Policies
- Authenticate in the upper right corner with a Suite token.
See OAuth2 Clients - Request the policy
- Go to section Policies > GET /policies/{policyId}.
- Click Try it out.
- Set the ID in the required field called ids.
- Submit the request with Execute.
The response would look similar to the following snippet.
{
   "policyId": "your.namespace:HelloWorldThing01",
   "entries": {
     "DEFAULT": {
       "subjects": {
         "iot-suite:/service-instance.<your-service-instance-id>.iot-things@<your-suite-oauth-client-id>": {
           "type": "generated"
         }
       },
       "resources": {
         "policy:/": {
           "grant": [
             "READ",
             "WRITE"
           ],
           "revoke": []
         },
         "thing:/": {
           "grant": [
             "READ",
             "WRITE"
           ],
           "revoke": []
         },
         "message:/": {
           "grant": [
             "READ",
             "WRITE"
           ],
           "revoke": []
         }
       }
     }
  }
}
The automatically generated policy shows a DEFAULT entry with a subject generated from your OAuth2 client and all “root” paths of your thing. So far, this means that whoever authenticates with a token issued from this client, is empowered to read and write on these resources.
Empower another user or application to read your Hello World thing
As you have read and write permission on the thing’s policy, there are several ways how you can grant other users or applications permission on your entity:
- Add a new authorization subject at the DEFAULT entry of the current policy
put /policies/{policyId}/entries/{label}/subjects
However, this is only recommended, if you want the user to get all permissions on all resources. - Add a new entry to the current policy
put /policies/{policyId}/entries/{label}
The complete example will be shown in example A. - Create a new policy entity
your.namespace:test-policy-01viaput /policies/{policyId},
and afterwards assign your thing this new policy viaput /things/{thingId}/policyId.
This alternative is feasible for example if you need to completely change the permissions for testing or productive use.
 The write permission at the policy root resource (i.e. “
policy:/") allows to manage the policy itself.
Make sure to always grant your user this permission to not lock yourself out.
Find the full concept description at Concepts > Policies.
A: Example change the policy via Things API
Given you have decided to add a “USER-Bosch-ID” policy entry to make the HelloWorldThing01 visible (i.e. read permission) to a user who has a Bosch ID.
Further, the subject is allowed to read and write massages, and has no permission to change the policy (therefore we just omit such a section).
-
Go to section PUT /policies/{policyId}/entries/{label}.
-
Click Try it out.
-
Set the policyId to
your.namespace:HelloWorldThing01. -
Set the label to
USER-Bosch-ID. -
Set the policyEntry into the Request body.
{ "subjects": { "bosch:<xxx-bosch-id-xxx>@ciamids_3692D578-A9D4-406A-8675-0964925256AA": { "type": "bosch-id" } }, "resources": { "thing:/": { "grant": [ "READ" ], "revoke": [ ] }, "message:/": { "grant": [ "READ", "WRITE" ], "revoke": [] } } }- Replace the placeholder <xxx-bosch-id-xxx> with your
Bosch ID. Your Bosch ID is visible in the Suite portal. Open in a new
browser tab the page https://accounts.bosch-iot-suite.com/account/myaccount
- Replace the placeholder <xxx-bosch-id-xxx> with your
Bosch ID.
- Make sure to keep the
@ciamids_3692D578-A9D4-406A-8675-0964925256AAwith the client ID of the Things service, as our Things dashboard will expect this client.
Example:bosch:xxx-bosch-id-xxx@ciamids_3692D578-A9D4-406A-8675-0964925256AA.
- Submit the request with Execute.
Check your work
Navigate back to the subscription page (https://accounts.bosch-iot-suite.com/subscriptions/) click Go to Dashboard, and click the Things tab.
In case the policy has
been changed successfully, your thing with ID
your.namespace:HelloWorldThing01 should be listed there.
B: Example change the policy via Bosch IoT Suite Console
Navigate back to the subscription page (https://accounts.bosch-iot-suite.com/subscriptions/) click Go to Developer Console, and click the Things tab.
In case you see the Hello World thing there, either you have created it via this console, or the policy entry from step A applies.
Act as application
If you have generated the Thing via the HTTP API, but now prefer to see it on the Bosch IoT Suite Console instead, you will need to act there as an application and to authenticate with the token.
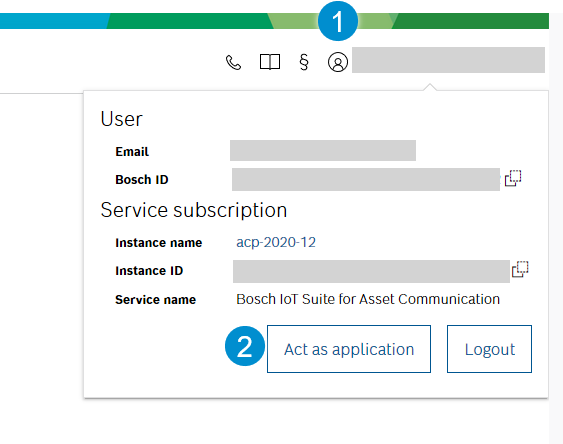
Add the token to authenticate.
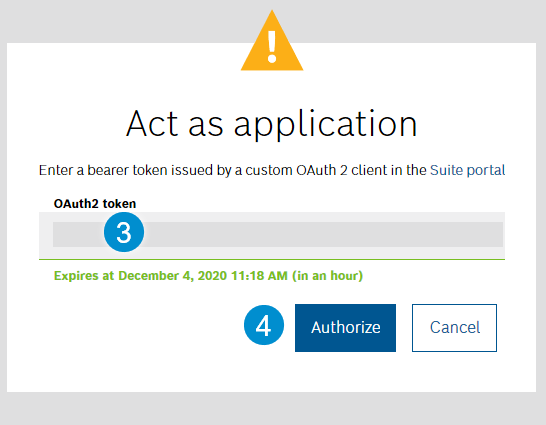
Upon success the token info is displayed and instead of the user icon the robot icon is shown.

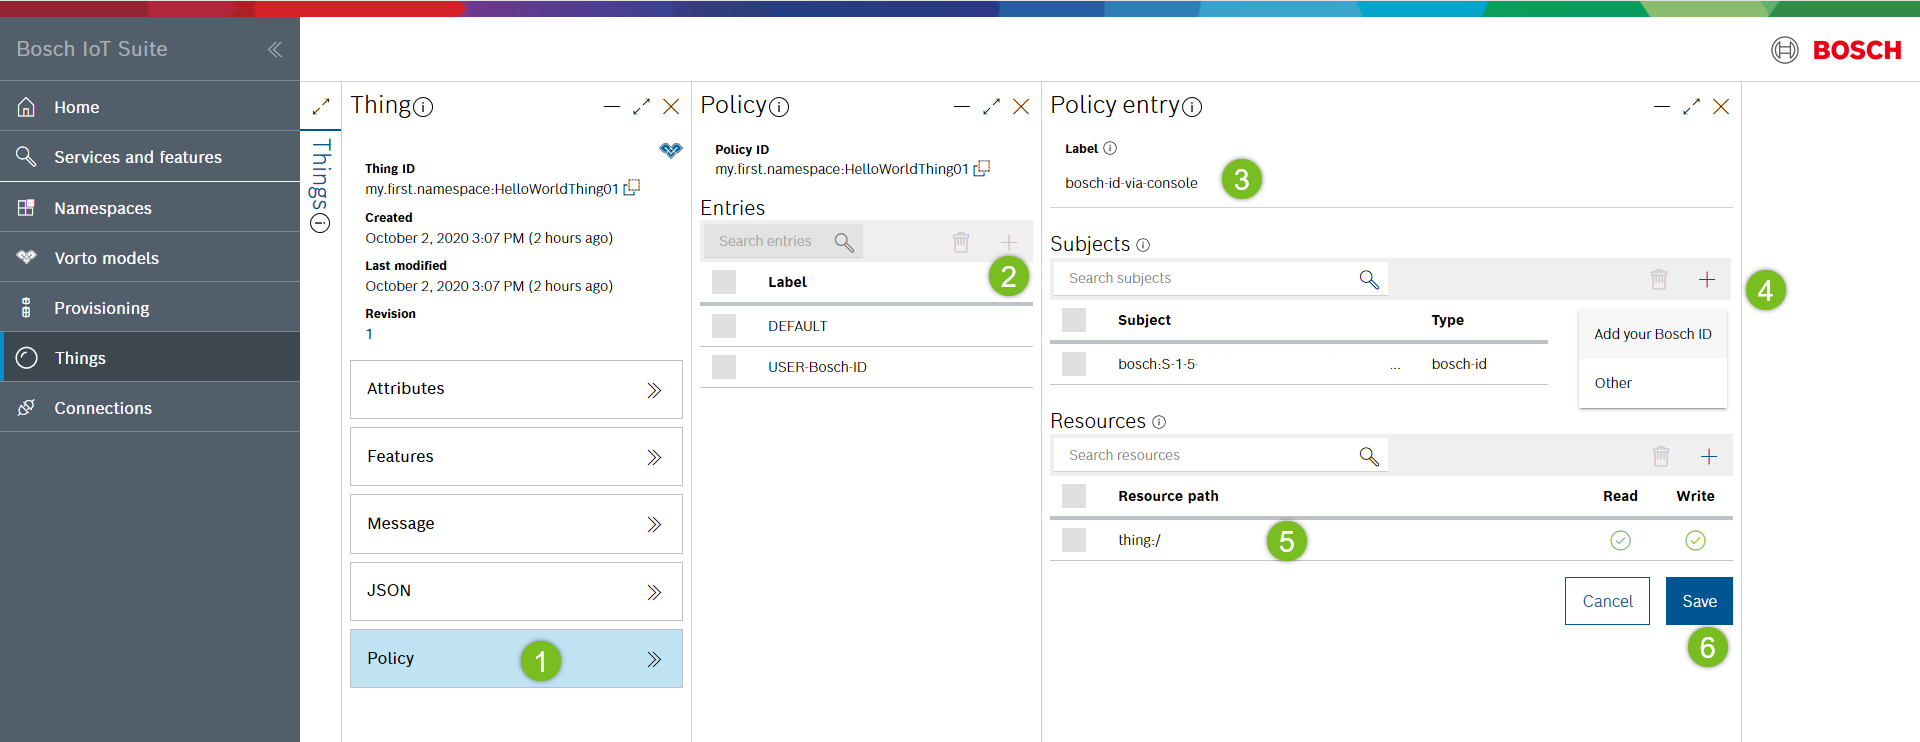
Add a new policy entry
The new example entry grants the Bosch ID read and write permission on thing:/ level.
Congratulations,
you have successfully used the policy concept to grant reading permission on a thing.
Further reading
Find all details about the policy at Concepts > Policies.