Subscribe a Bosch IoT Rollouts instance
The Bosch IoT Suite UI allows you to book a Bosch IoT Rollouts service instance via a simple user-friendly wizard.
In case you already have a subscription, feel free to skip this step and proceed with Device provisioning.
In case of booking a paid subscription or change service plan, proceed with Ordering Process.
Proceed as follows
Use the Bosch IoT Suite portal as an entry point.
Click the My Account icon
 and then click the Sign in button.
If you already have a Bosch account you can log in via Bosch Employee (for Bosch employees only) or SingleKey ID (for external customers).
In case you are not a Bosch employee and do not have a SingleKey ID account either, select the SingleKey ID login option and follow the wizard.
After successfully logging in you will be re-directed to the Bosch IoT Suite UI.
If this is the first time you visit the Bosch IoT Suite UI, you would now need to create a Bosch IoT Suite account and your first organization.
See also Access a Bosch IoT Rollouts tenant.
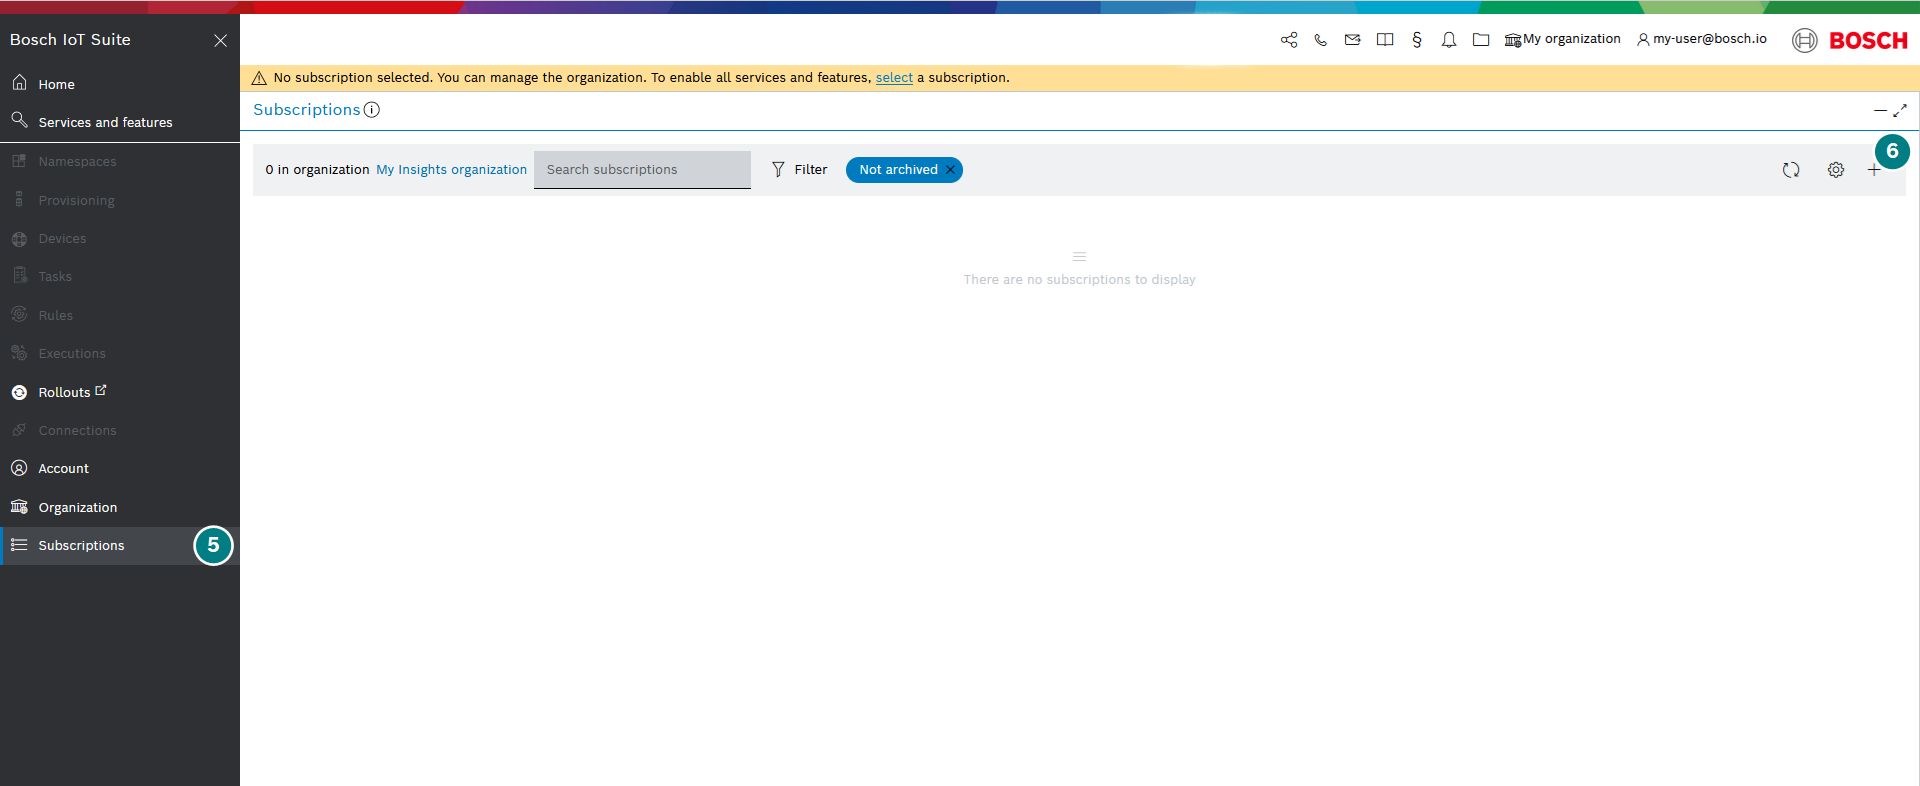
Open the Subscriptions UI feature.
Click the + icon on the right side.
Select the service for which you want to subscribe.
For this example select Bosch IoT Rollouts and click Next.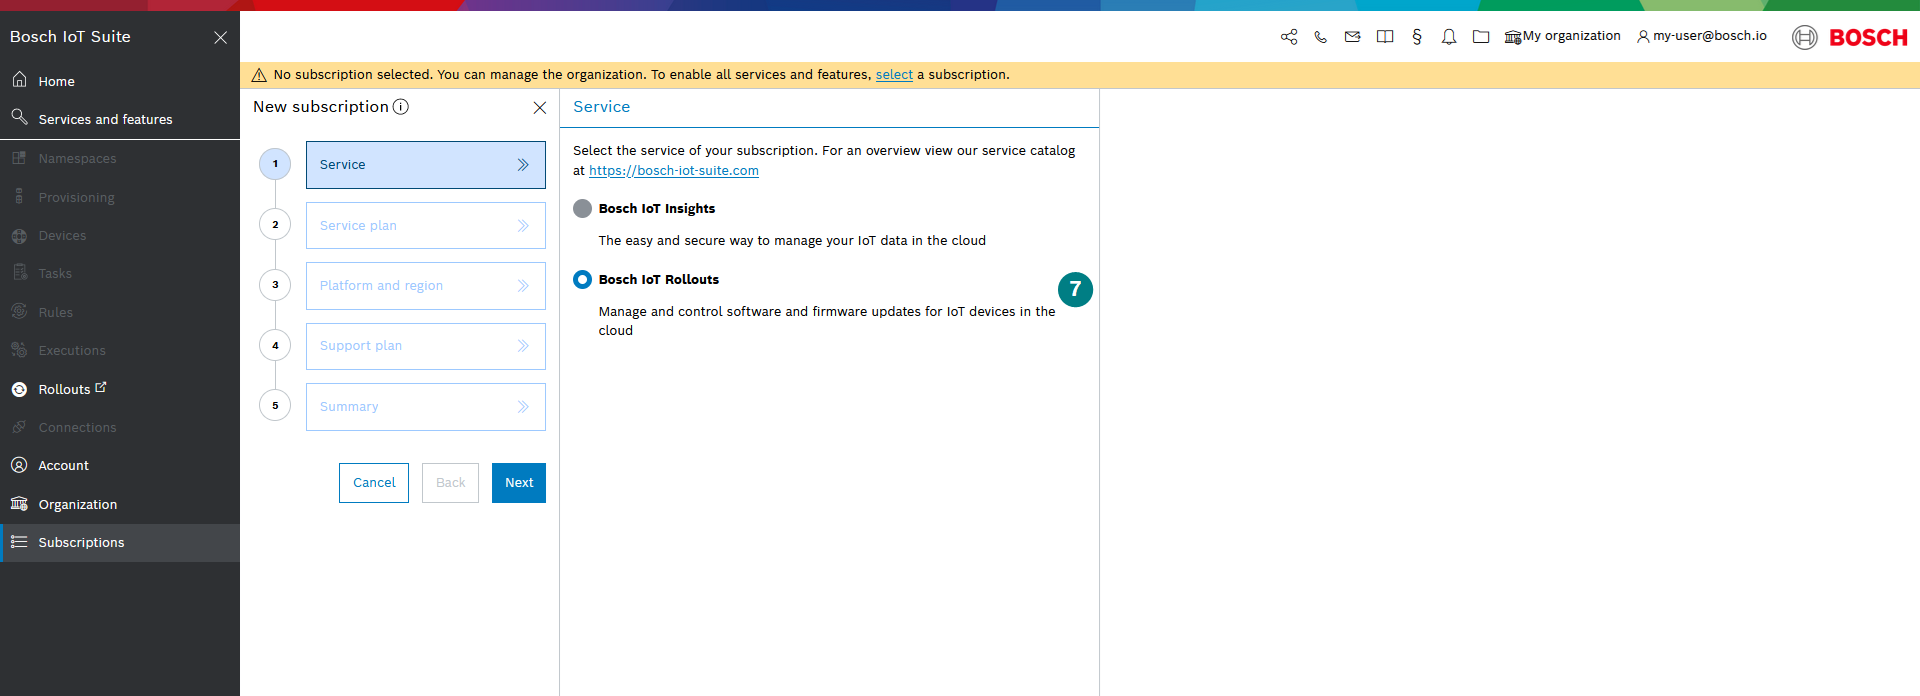
Select the desired service plan of the subscription.
As you are just getting started, stay with Bosch IoT Rollouts Trial.At the Platform and region step, select the region of your choosing click Next.
At the Support plan step, you can again click only Next.
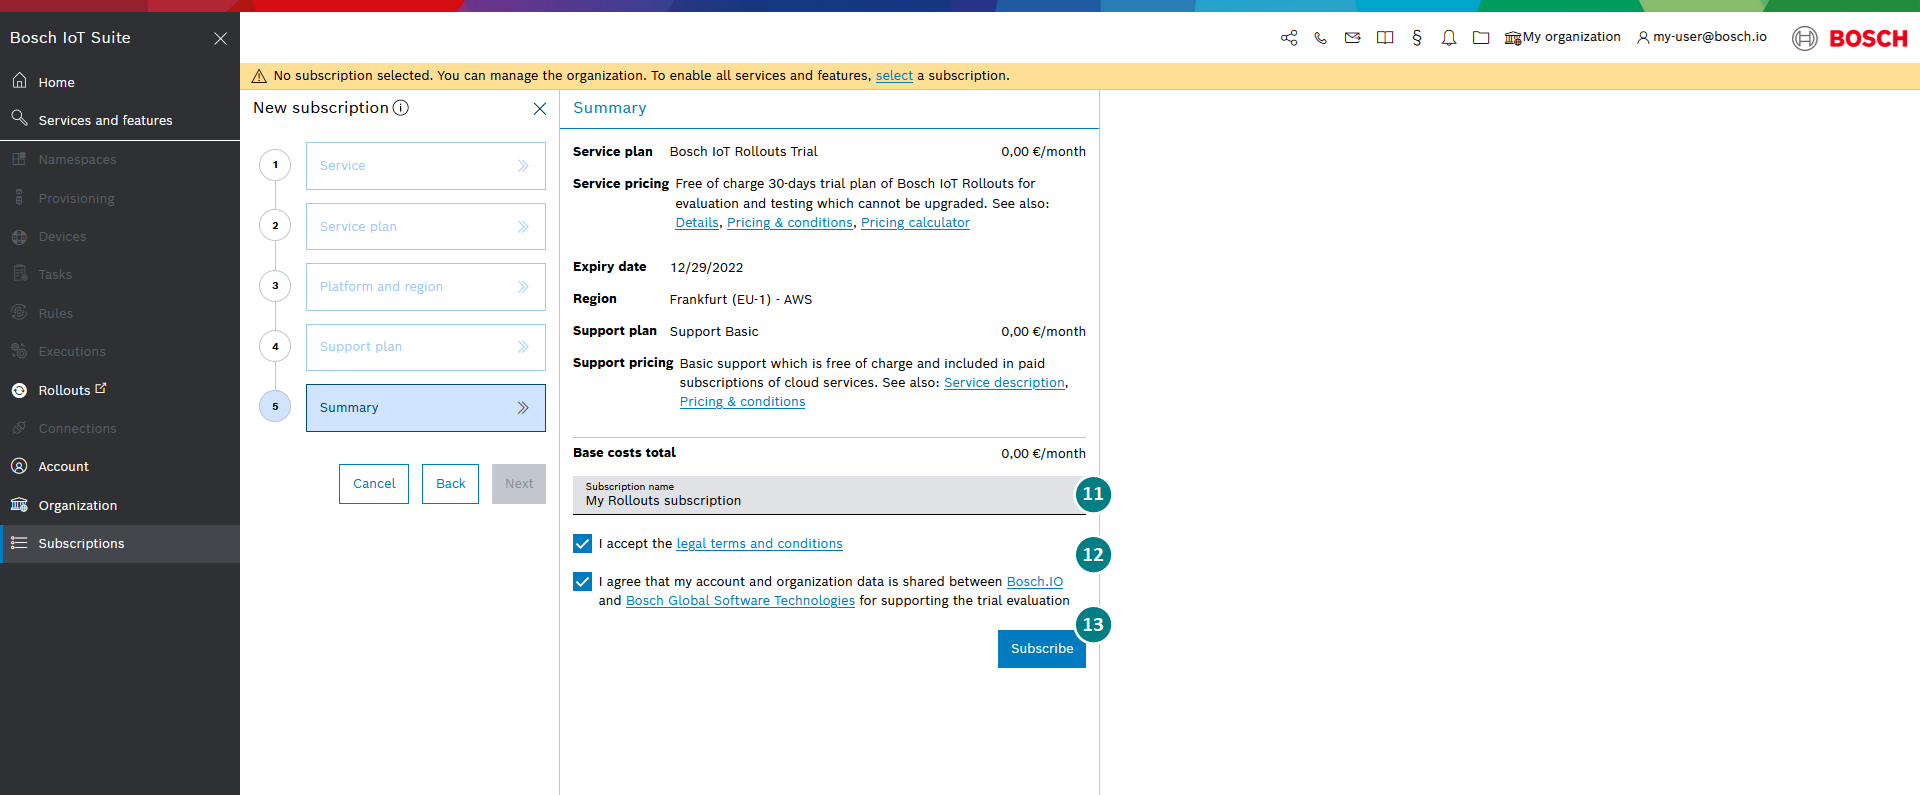
As you selected a Trial subscription you can only benefit from Support Basic.At the Summary step you must enter a valid Subscription name.
Here you can also review your subscription information and if something needs to be changed - go back via the respective button.You must also accept the two conditions concerning legal terms and organization data sharing.
Click Subscribe.
You will then see your new service instance as part of your subscriptions list.
If you want to find your access credentials, select your subscription and then click Binding credentials, as shown below:
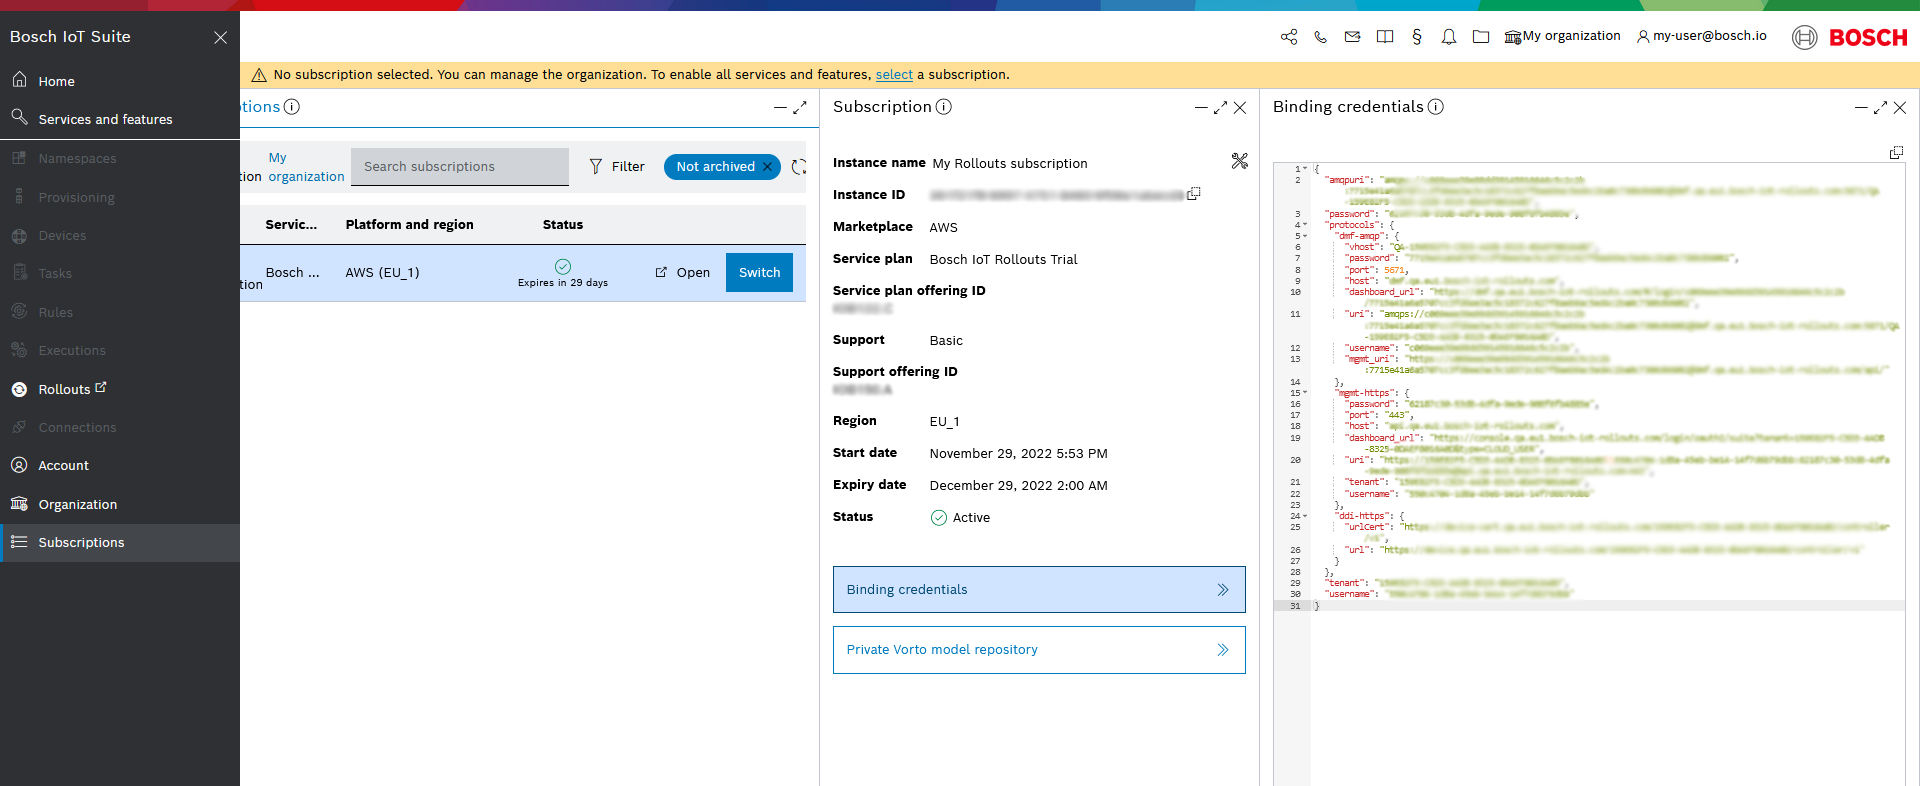
The example shows the structure of the credentials.
{ "password" : "xxx", "amqpuri" : "xxx", "protocols" : { "dmf-amqp" : {...}, "mgmt-https" : {...}, "ddi-https" : {...} }, "tenant" : "xxx", "username" : "xxx"}Copy the binding credentials of the generated Cloud User and the protocol you want to use to your local machine, as you will need such credentials later on.
Your service instance is free and hosted on region EU-1. You can connect up to 50 devices within your free plan.
For further information about the regions, see Service plans and regions.
Further constraints of a free plan are listed in Quota.