Rollouts service integration with hawkBit device simulator running on Cloud Foundry
Table of contents:
Introduction
This guide explains how to push a device simulator application to a Cloud Foundry instance that has Bosch IoT Rollouts in its catalog.
The hawkBit device simulator simulates the creation of targets and execution of updates in your Bosch IoT Rollouts instance.
It leverages the following capabilities:
Service binding of Cloud Foundry.
Usage of Rollouts Device Management Federation API
Applicable to Rollouts customers of
Rollouts EU-1 - Bosch IoT Suite portal
Rollouts EU-2 - Bosch IoT Cloud catalog
Rollouts US-1
Prerequisites
A booked Bosch IoT Rollouts service instance.
You have the Cloud Foundry CLI installed.
JDK and Maven installed.
Steps
Download and build the device simulator
First of all the open source project hawkBit has to be download as zip or cloned as Git repository.
git clone https://github.com/eclipse/hawkbit-examples.gitNext build the project with Maven.
mvn clean installNow you can find the device simulator application as jar file in hawkbit-device-simulator/target/hawkbit-device-simulator-#version#.jar
The device simulator supports the Direct Device Integration API and Device Management Federation API.
Push the device simulator to Cloud Foundry
To push the device simulator to Cloud Foundry either create an application manifests or run a command with all settings. You will have to define a name and a services binding to your instance of Bosch IoT Rollouts.
As mentioned, the device simulator supports both device integration APIs (DDI and DMF).
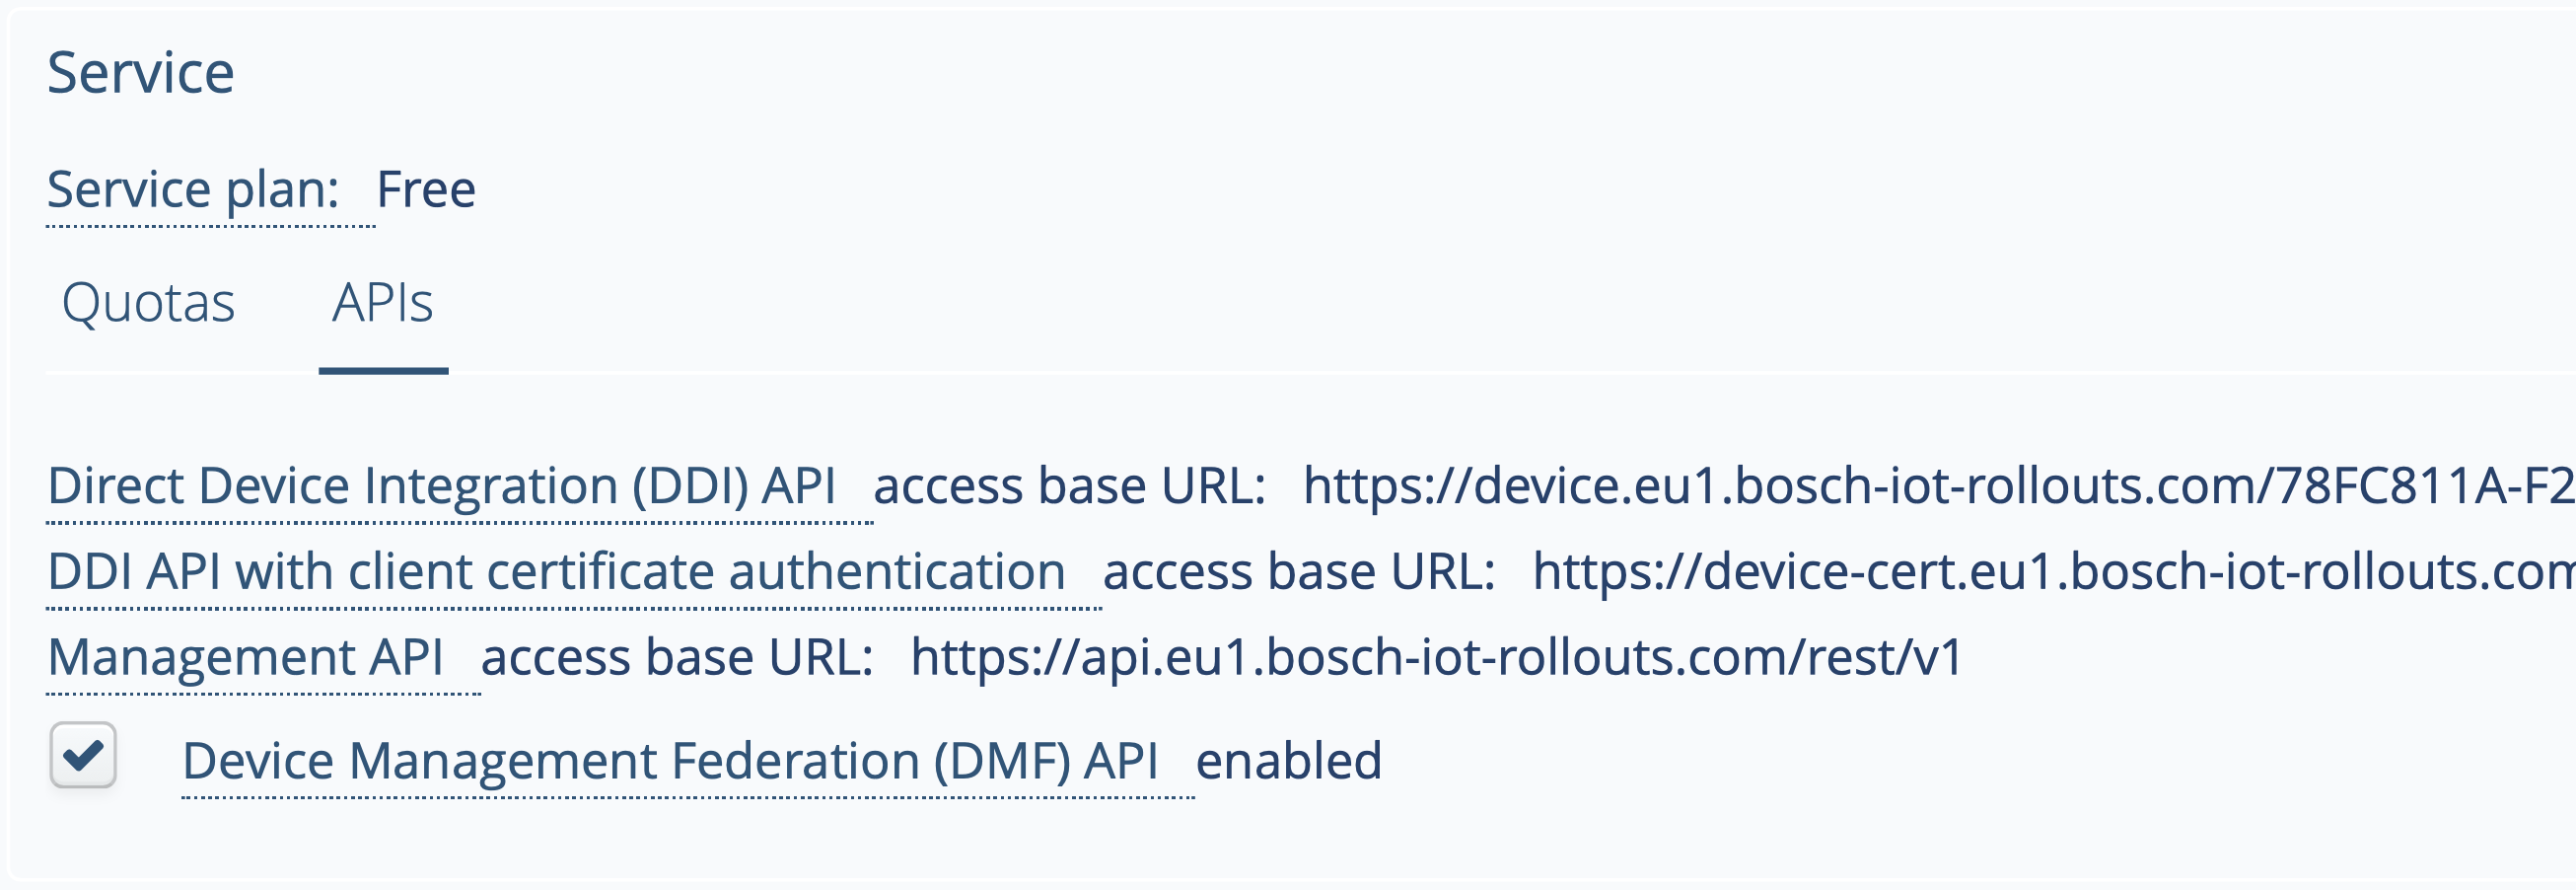
The DMF API is available in Free plan for evaluation purposes and in the Standard plan for productive use.
Note that the API has to be activated (either by Management API or Management UI).
In case of DDI only we recommend to disable the AMQP interface of the device simulator either via property
hawkbit.device.simulator.amqp.enabled=false
or
environment variable HAWKBIT_DEVICE_SIMULATOR_AMQP_ENABLED=false
otherwise the simulator tries to connect to DMF automatically.
Option 1.a: Create an application manifest (DMF enabled)
Create a file named manifest.yml with the following settings (example with DMF integration) and add it to the
examples/hawkbit-device-simulator folder.
---applications:- name: device-simulator memory: 512M buildpack: https://github.com/cloudfoundry/java-buildpack instances: 1 path: target\hawkbit-device-simulator-#version#.jar services: - myrolloutservice env: DMF_SERVICE: myrolloutservice HAWKBIT_DEVICE_SIMULATOR_AMQP_ENABLED: true HAWKBIT_DEVICE_SIMULATOR_AMQP_RECEIVERCONNECTORQUEUEFROMSP: sp_direct_queue HAWKBIT_DEVICE_SIMULATOR_AMQP_SENDERFORSPEXCHANGE: sp.direct.exchangeGo to the /examples/hawkbit-device-simulator directory and push the app.
cf push Option 1.b: Create an application manifest (DMF disabled, DDI only)
Create a file named manifest.yml with the following settings (example without DMF integration) and add it to the examples/hawkbit-device-simulator folder.
---applications:- name: device-simulator memory: 512M buildpack: https://github.com/cloudfoundry/java-buildpack instances: 1 path: target\hawkbit-device-simulator-#version#.jar services: - myrolloutservice env: HAWKBIT_DEVICE_SIMULATOR_AMQP_ENABLED: falseGo to the /examples/hawkbit-device-simulator directory and push the app.
cf pushOption 2: Run a command with settings and bind the device-simulator to DMF RabbitMQ
cf push device-simulator --no-start -m 512M -b https://github.com/cloudfoundry/java-buildpack -i 1 -p target\hawkbit-device-simulator-#version#.jarSet environment variable.
cf set-env device-simulator DMF_SERVICE myrolloutservicecf set-env device-simulator HAWKBIT_DEVICE_SIMULATOR_AMQP_ENABLED truecf set-env device-simulator HAWKBIT_DEVICE_SIMULATOR_AMQP_RECEIVERCONNECTORQUEUEFROMSP sp_direct_queuecf set-env device-simulator HAWKBIT_DEVICE_SIMULATOR_AMQP_SENDERFORSPEXCHANGE sp.direct.exchangeBind the device simulator to your Bosch IoT Rollouts service.
cf bind-service device-simulator myrolloutserviceStart the device-simulator application.
cf start device-simulatorTest the device simulator application
After successfully pushing the device-simulator you can generate simulated devices. Don’t forget to enter your tenant.
curl http://YOUR_SIMULATOR_HOST/start?tenant=YOUR_TENANTHint: see device simulator homepage for further details and options.
Note: in case you want to simulate devices connected through DDI you have to provide Rollouts DDI endpoint URL (see Service plans and regions) and a gateway token (see Authentication > Gateway security token) for device authentication to the simulator.
The generated devices will now appear in the Bosch IoT Rollouts service interface.
