Step 1 - Device provisioning
In this part of the tutorial, we will show you how to provision your Arduino board with Bosch IoT Suite.
You will need the generated provisioning data for the config files in Step 2 of this tutorial.
Set up your service instance
Use your existing subscription for Bosch IoT Device Management or create a new one, then enter the Bosch IoT Suite UI.
Your service instance needs a namespace.
If you are using an existing subscription where you have already defined a namespace, go ahead with the next steps. Otherwise Register a namespace.
Provide provisioning settings
Now that you have entered the Suite UI and have defined a namespace, you can provision your Arduino board.
Click Provisioning in the left sidebar.

You can expand and collapse the left sidebar through the burger icon.
You will see the 3 provisioning steps:
Settings: (open by default) where you provide essential settings explained in more detail below
Preview: where you can preview and change the provisioning data and send the request
Connect device: where you can save the provisioning response and the device configuration properties, and then navigate to the device
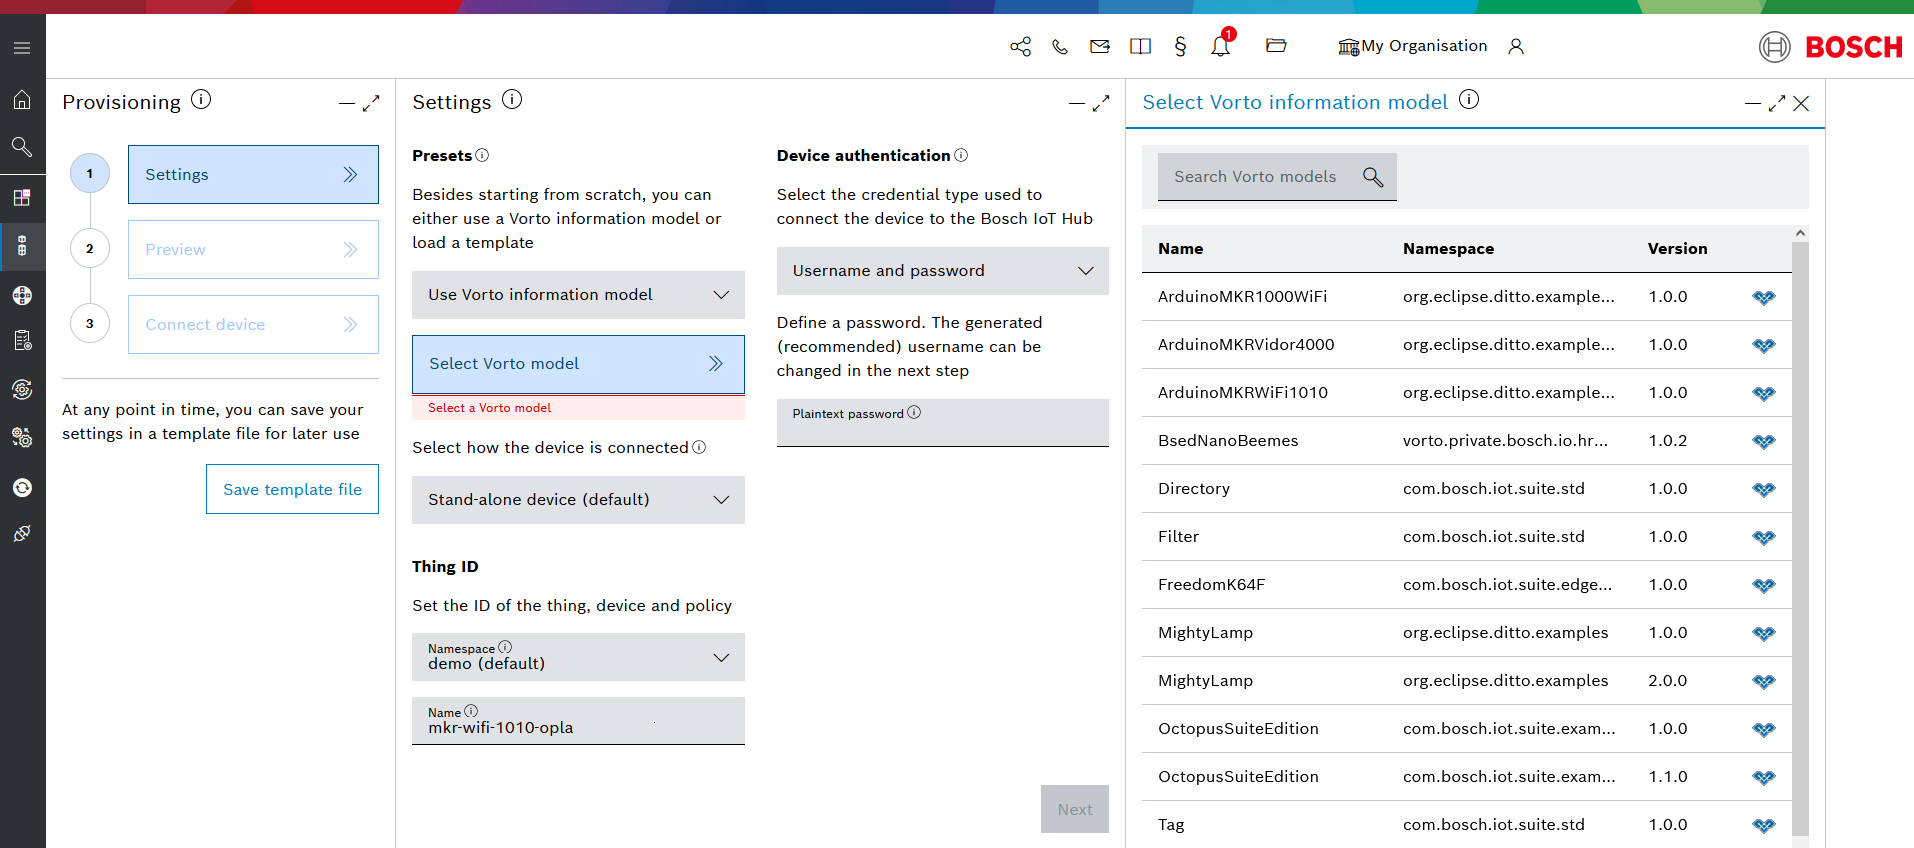
From the first drop-down, choose the option Use Vorto information model.
A list of the available Vorto models is loaded on the right. Select the model ArduinoMKRWiFi1010 (version 1.0.0), as this is the board included in the Opla IoT Kit.
From the next drop-down, select how the device will be connected. Keep the default selection stand-alone device.
Set the Thing ID, which follows the format "namespace:name".
Namespace - this field is pre-filled.
If you are using a standard plan and have more than one namespace, select the relevant one.Name - enter a unique name for your device.
For the Device authentication, keep the selected Username and password authentication method and enter a password in plain text.
Confirm with Next.
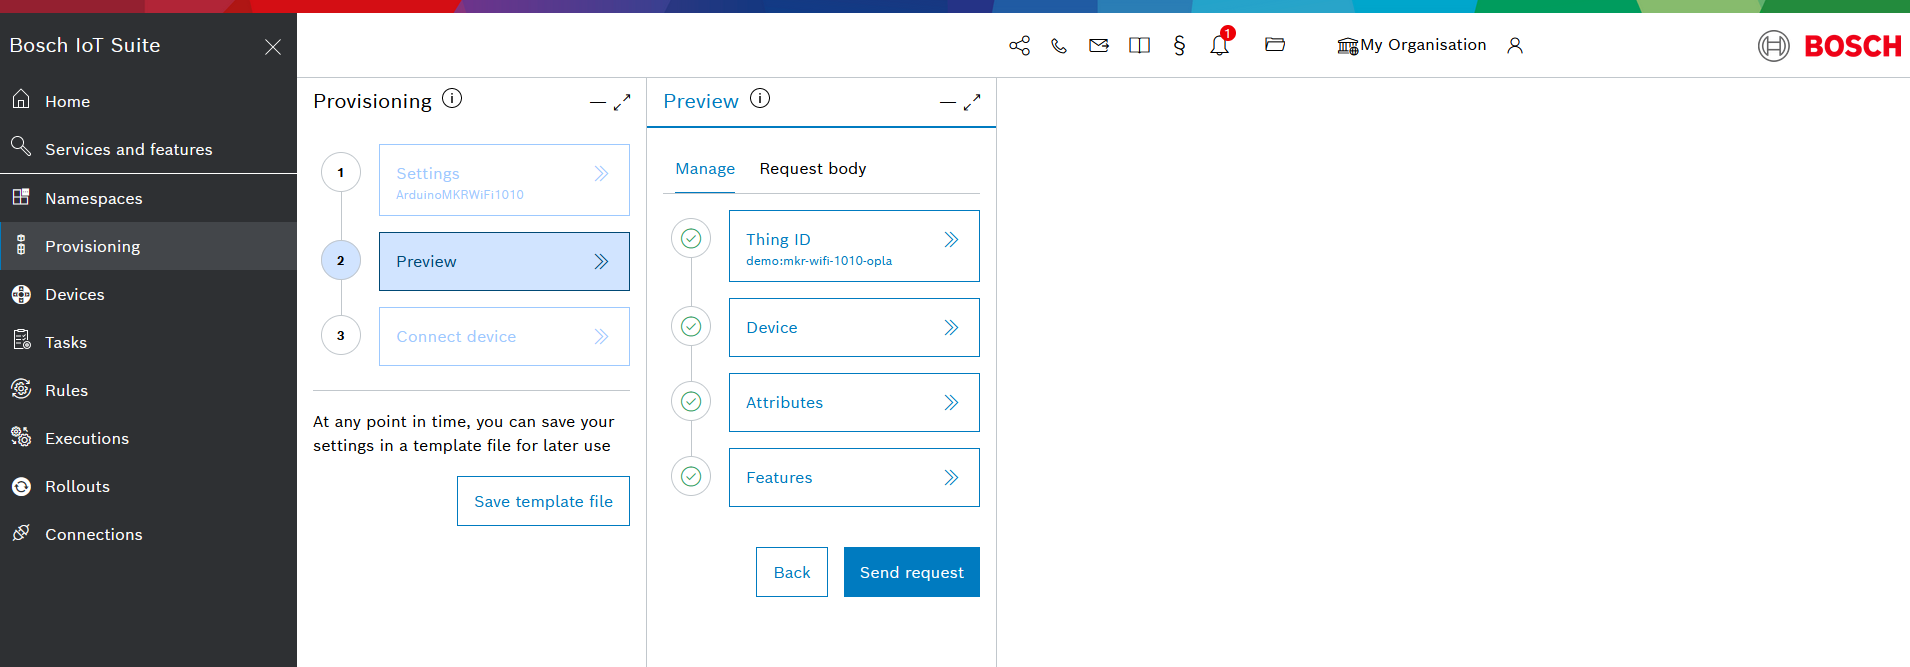
Preview and send the provisioning request
The preview indicates with check marks ![]() that you are ready for provisioning.
that you are ready for provisioning.
Click Send request.
Save the response
Upon success, the Connect device view provides the information needed to connect the Arduino (e.g. credentials), which should be saved.
Click Save response to save the response of the provision request, which contains important device configuration properties.
A file called provisioning.json will be downloaded to our local machine.Copy your password in plain text and store it at a safe place.
Please, note that your password will henceforth only be displayed in encoded/hashed form.When your device has to communicate with the device connectivity layer, it will authenticate with the Authentication ID (i.e. "namespace_name") and this password.
Therefore, it is important that you remember this password in plain text.
Upon success, the device connectivity layer has registered the Arduino board and its credentials, and a corresponding digital twin has been created with a default policy.
Check your work
Click Go to device to see the device generated out of the model.

In case you forgot to copy the password, you can set a new one in section Credentials.
To see the skeleton of your digital twin created so far, open the JSON view. To see all features registered so far, open the Features view.
As soon as the the Arduino board connects, even more features will appear.