Provisioning via Device Provisioning API
Your entry point into our interactive API documentation is Bosch IoT Suite - Device Provisioning.
However, in case you don't feel comfortable to use it right away, have a look on how the Developer Console does the job for you Provisioning via UI
and try afterwards the steps described here.
Goal
This page first introduces you into creating an OAuth2 Client which will issue you a JWT each time you need to authenticate at the HTTP API.
Then you will learn how to execute the REST request for getting a device registered into the Hub and Things services.
Procedure
Create a Suite Auth client
Each call to our services needs to be authorized.
In this case, you will use the Suite Auth approach provided by Bosch IoT Suite.
To do so navigate to the Bosch IoT Suite UI and:
Select OAuth2 clients from the left sidebar.
Click the + button on the right.

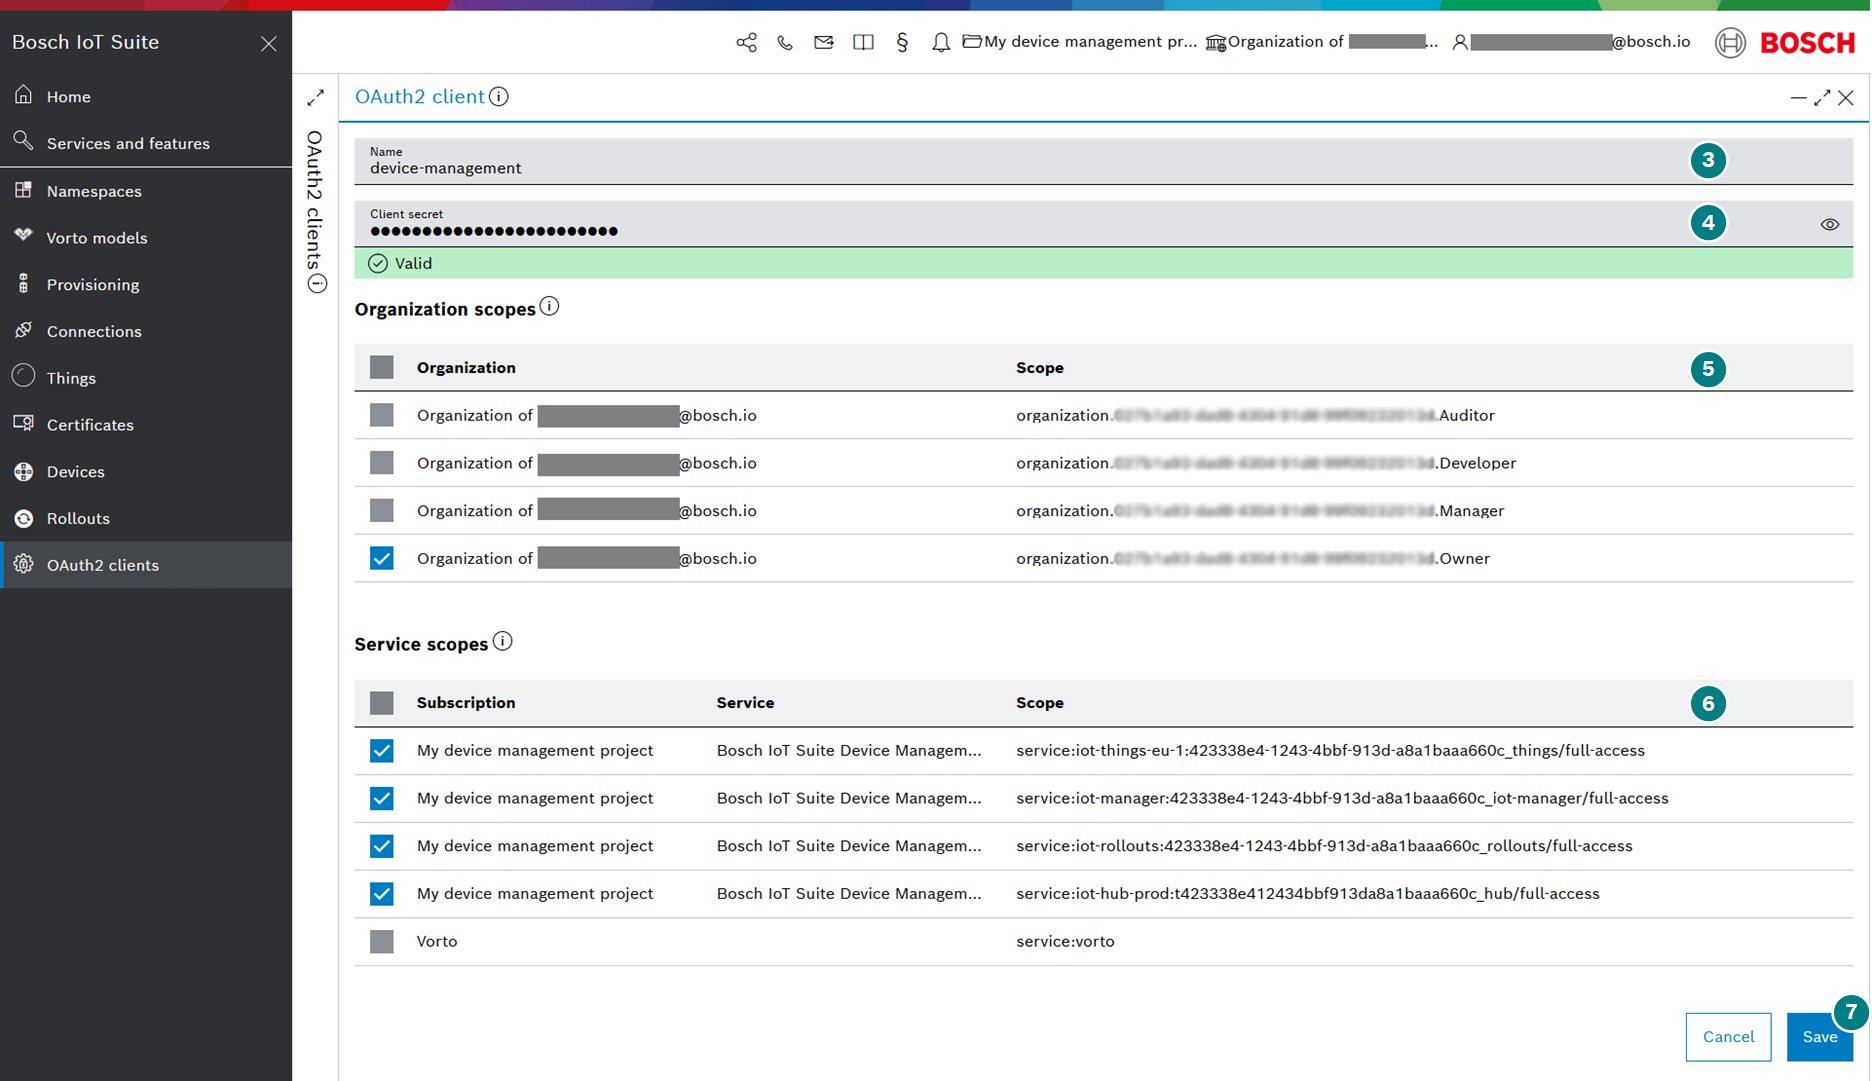
Set a Name.
Set a Client secret.
Select the Organization Scopes. You must select only one organization scope.
Select the Service scopes.
Click Save to store the entries.
You will then be redirected to the OAuth2 clients page, where your new client will be already selected.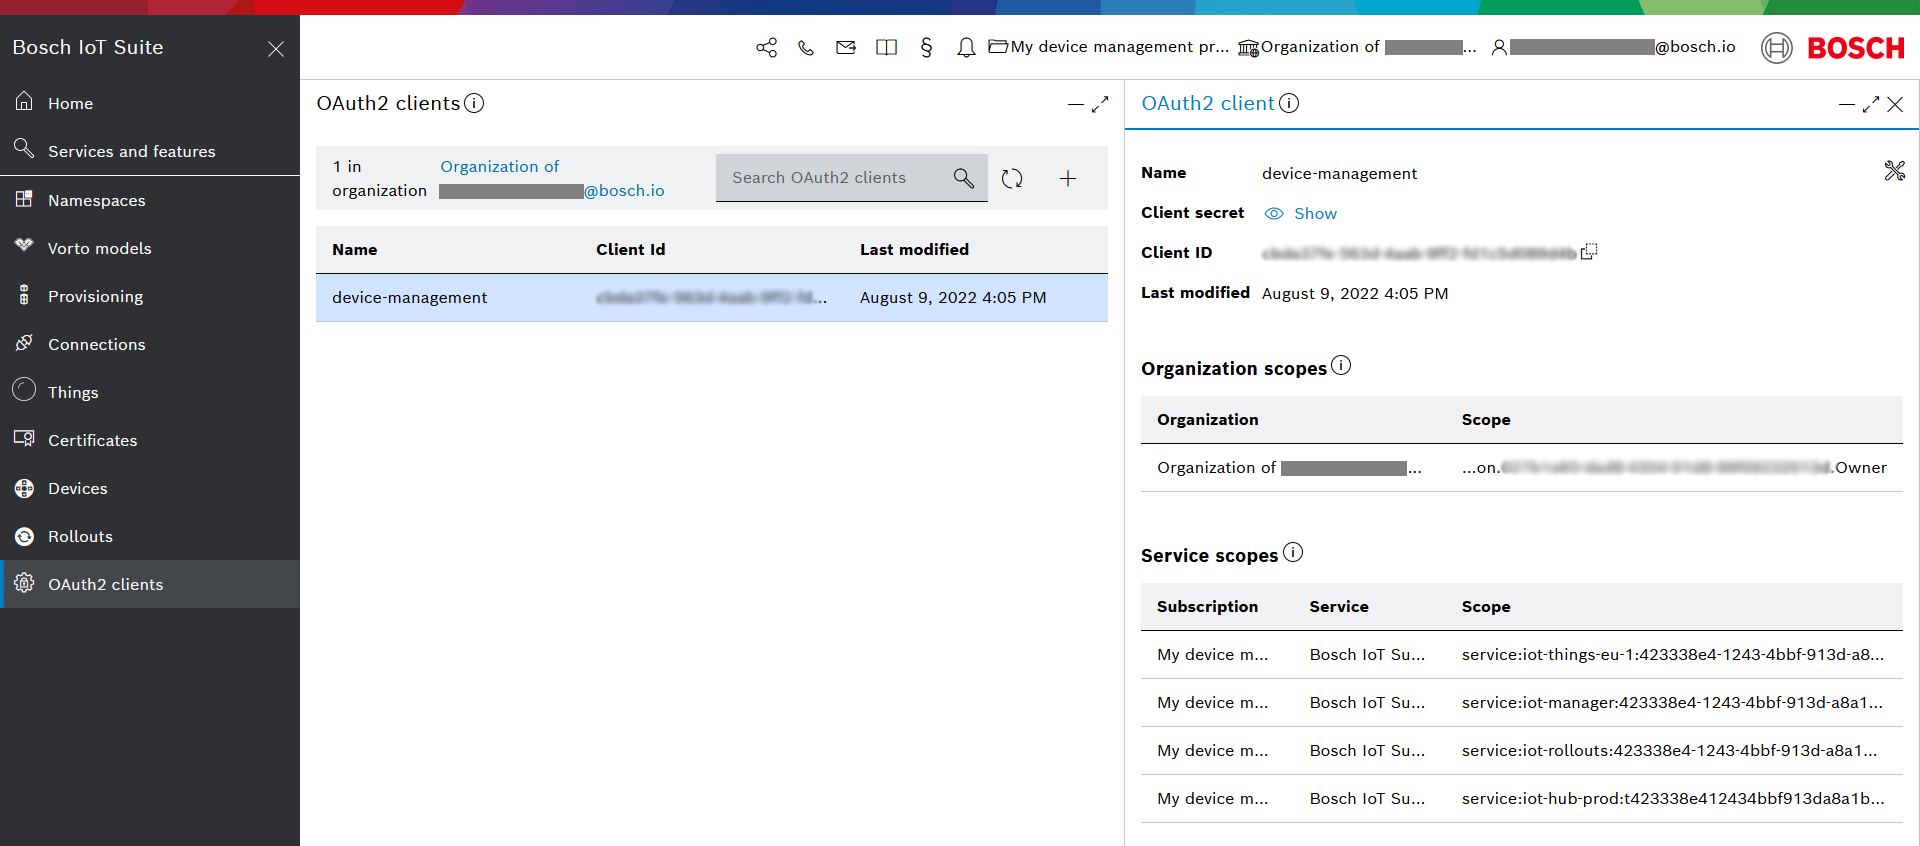
Moving forward, whenever you need a token, this client can create a new one.
Create a token (JWT)
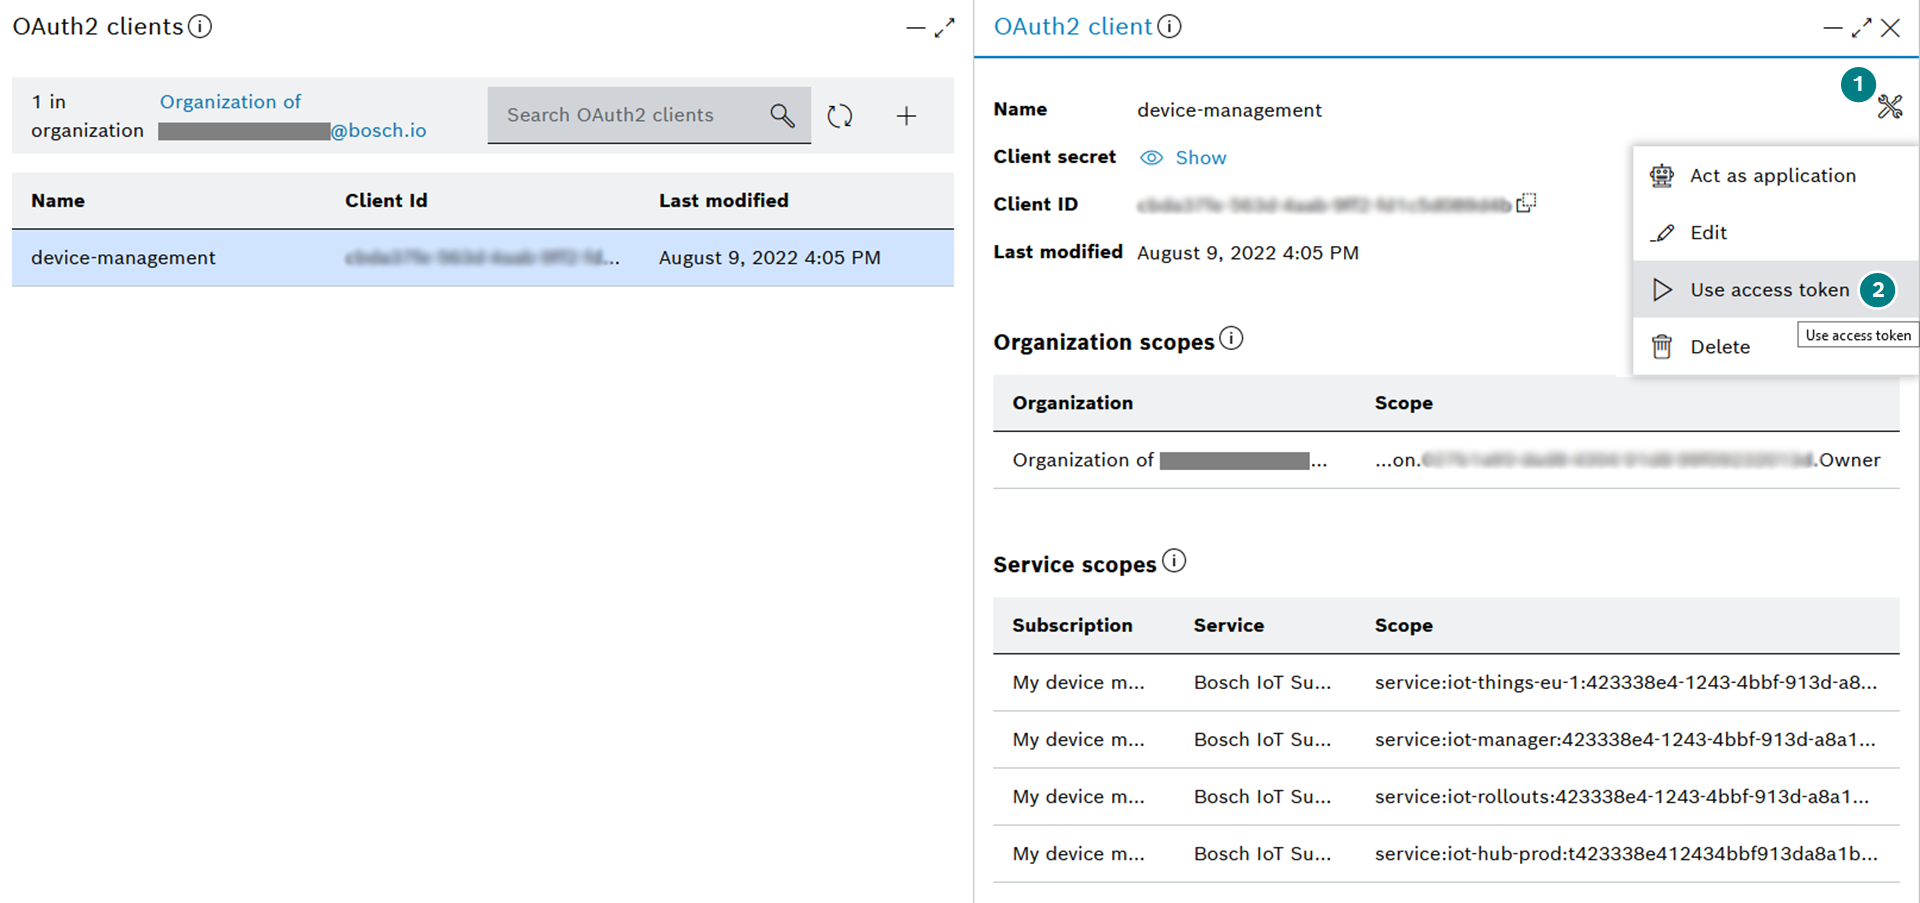
Select the Open context menu button of this particular client.
Click Use access token - this will generate a token (JWT) which is valid for 720 minutes.
In the Use access token blade that opens up from the right you can copy an access token created with your new client from Test access token.
Keep in mind that this token is intended for testing purposes and will expire after 720 minutes.
You may need to Refresh the page after a few seconds to see your OAuth 2 client details.
Moving forward, whenever you need a token, this client can create a new one.
Use the HTTP API docs
Your entry point into our interactive API documentation is Bosch IoT Suite - Device Provisioning.
Request
Authorize
Open the Authorization dialog.

Paste your Bearer token into the Value field.
Confirm with Authorize.
Close the dialog.
Use the provisioning resource.
POST /{service-instance-id}/devicesClick Try it out and all entry fields become editable.
Set the service-instance-id.
If you have not stored your credentials at the end of the step Getting started with a simple device,
open a new tab and navigate to the Subscriptions UI feature of the Bosch IoT Suite UI, select your subscription, open its Binding credentials,
copy the value of your Service Instance ID and switch back to the API docs to enter it in the respective field.Set the authScope to deviceManagementSubscription.
Edit the content for the body.
Set the minimal request body.The "id" value needs to be defined by you.
Replace the first part of the ID with your namespace.
In case you have not defined a namespace yet, you will need to do it now. See Get a namespace.
Our example uses a namespace called "example.dm".The "hub" entries : For your credentials you can set the password in plain text here, as we use HTTPS.
It will be stored on the backend in hashed form.
The "thing" entry could theoretically remain empty (an empty "POST" thing is supported and would generate an empty thing and its default policy).
{"id":"example.dm:hello-world-device-02","hub": {"device": { },"credentials": {"type":"hashed-password","secrets": [{"password":"your-secret-in-plain-text-will-be-hashed-automatically"}]}},"things": {"thing": {"attributes": {"manufacturer":"My awesome company"}}}}
Click Execute to submit the request.
Response
Verify that the request was successful Code 201.
Download the result as JSON for further requests.
A successful response would look like the following snippet.
Result
Upon success, you have created the following entities:
A device in the context of Bosch IoT Hub, associated with credentials. Find details at Device data model.
An empty digital twin in thing notation. For further details read Things and Features.
The digital twin is associated with a default policy, which will store information about who is allowed to interact with the thing. See also Policy examples.