Add a policy entry via the Bosch IoT Suite UI
Prerequisites
You have provisioned a device.
You are authorized to change the device policy. This happens automatically after provisioning.
You have created an OAuth2 client.
Goal
Authorize your application with read permissions on the thing and all its sub-entities (e.g. attributes, features) by using an OAuth2 client. For that, extend the policy of the device.
Prepare the required OAuth2 client information
To fulfill the steps in the next sections, you will need some information about your OAuth2 client, as it will be entered as a subject of the new policy entry.
Open OAuth2 clients from the left navigation and check the details view of your OAuth2 client.
Copy the Client ID value.
Copy the Service scopes prefix value, displayed in the Scope column in the bottom right view, i.e. the part before the colon, e.g. service.

Navigate to the policy of your device
Open Devices from the left navigation and select your relevant device from the list.
In the Device details view on the right, select the Policy blade.
Click the + icon in the Entries field to add a new policy entry.

Add a new policy entry
In the Label field, enter a label of your choice which will be a unique identifier of this policy entry e.g. MY APPLICATION.
Click the + icon in the Subjects field to add a new subject.
A subject is a user or a technical client who is granted or revoked permissions (e.g. read or write) on specific resources.
In our case this will be the OAuth2 client.
In the Issuer (prefix) field, select custom.
In the Custom issuer field, enter the prefix of the client scope which you copied earlier, e.g. service.
In the ID field, paste the Client ID of your OAuth2 client.
In the Type field, enter a type of your choice, for information purposes only.
When ready, click OK.

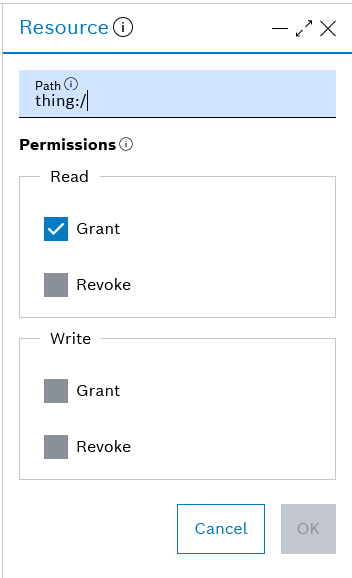
Then, select the + icon in the Resources field to add a resource.
In this example the entities for which read permission should be granted are the thing itself and all its sub-entities.In the Path field, enter the path thing:/
Check the Grant checkbox of the Read permission.
Click OK.
When ready, click Save to save your new policy entry.
Test your work
At this point, you are ready to test whether the application which uses the respective OAuth2 client can read the thing, as well as all its attributes and features.
For that, you can act as an application using the token of the OAuth2 client.
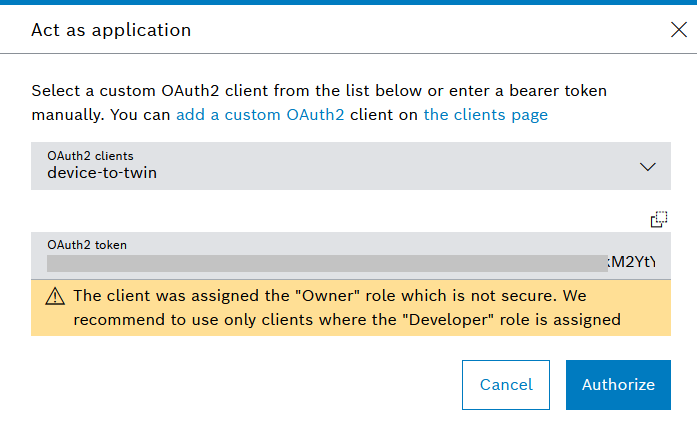
In the header bar, click the user icon and in the dialog that opens, click Act as application.

On the next dialog, select the OAuth2 client from the dropdown.
This will automatically generate an OAuth2 token, which you can copy by clicking the icon on the top right of the respective field.As an alternative, you can select a Custom token from the dropdown and enter a bearer token manually. For convenience, you can add your custom OAuth2 clients through the OAuth2 clients UI feature available in the left navigation. Then you will be able to select them from the dropdown as well.
When ready, click Authorize.
With that, you are now acting as an application and the user icon will change to show that the authorization of the user is temporarily overridden by an OAuth2 client.
You can always Change token or Stop the act as application mode with the respective buttons in the user dialog.
If you now open again Devices from the left navigation, you should see the respective device, along with all its attributes and features.
Since you have assigned read permissions only, you should not be able to change the device. To check that, try adding an attribute - this should fail as such an action requires write permissions.
Further, you shouldn't be able to see the policy of the thing, because you did not assign read permission to the policy:/ subject.
When you are ready with the testing, you may return to the context of your logged in user.