Step 1 - Register your demo device with the cloud service
The content of this text-based tutorial is also available as a series of videos on our Bosch IO YouTube channel.
|
For steps 1 to 4 watch: |
|
|
Before the virtual device can upload its data into the Bosch IoT Suite, you will need to register it.
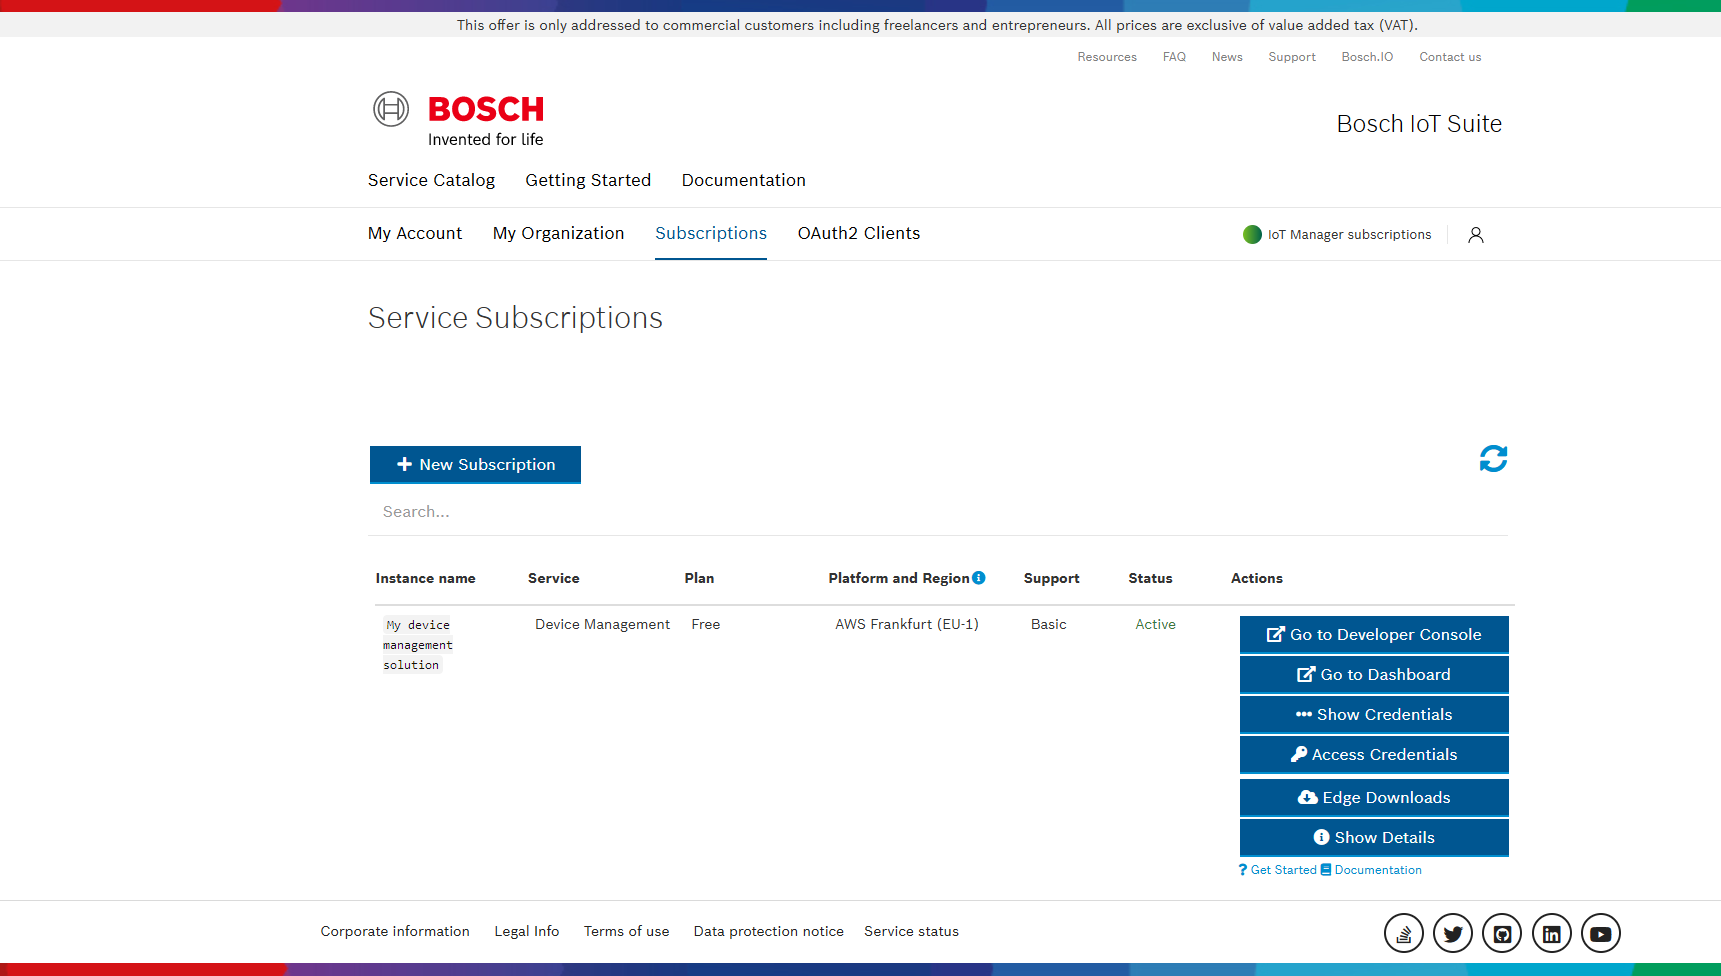
Subscribe to a service instance
We assume you have already a valid subscription to Bosch IoT Device Management, otherwise please get yourself a free instance.
If you need help with subscribing, read our guide or watch our video tutorial on how to subscribe on our YouTube channel.
Navigate to the Bosch IoT Suite Console
Let us assume, you start your journey at the list of subscriptions https://accounts.bosch-iot-suite.com/subscriptions/
Click Go to Developer Console.
In case this is a new subscription, create a namespace. The namespace is required to register devices and digital twins with a unique ID.
Find help at Register a namespace.
Provisioning
Click Provisioning in the left sidebar.
The Settings view will guide you with the required input for provisioning:From the first drop-down, choose Use Vorto information model.
In the new view you will see all Vorto models available.
Select the row of the model VirtualDemoDevice (version 2.0.0).If you want to use another Vorto information model, located in a private repository, see Configure access to a private Vorto repository first.
Set thing/device ID: First, select a namespace.
Enter a unique name.
The full identifier that our service will register is "your.namespace:your-device-name".Provide credentials for your device authentication.
Username and password are pre-selected.Enter a password in plain text.
Confirm with Next.
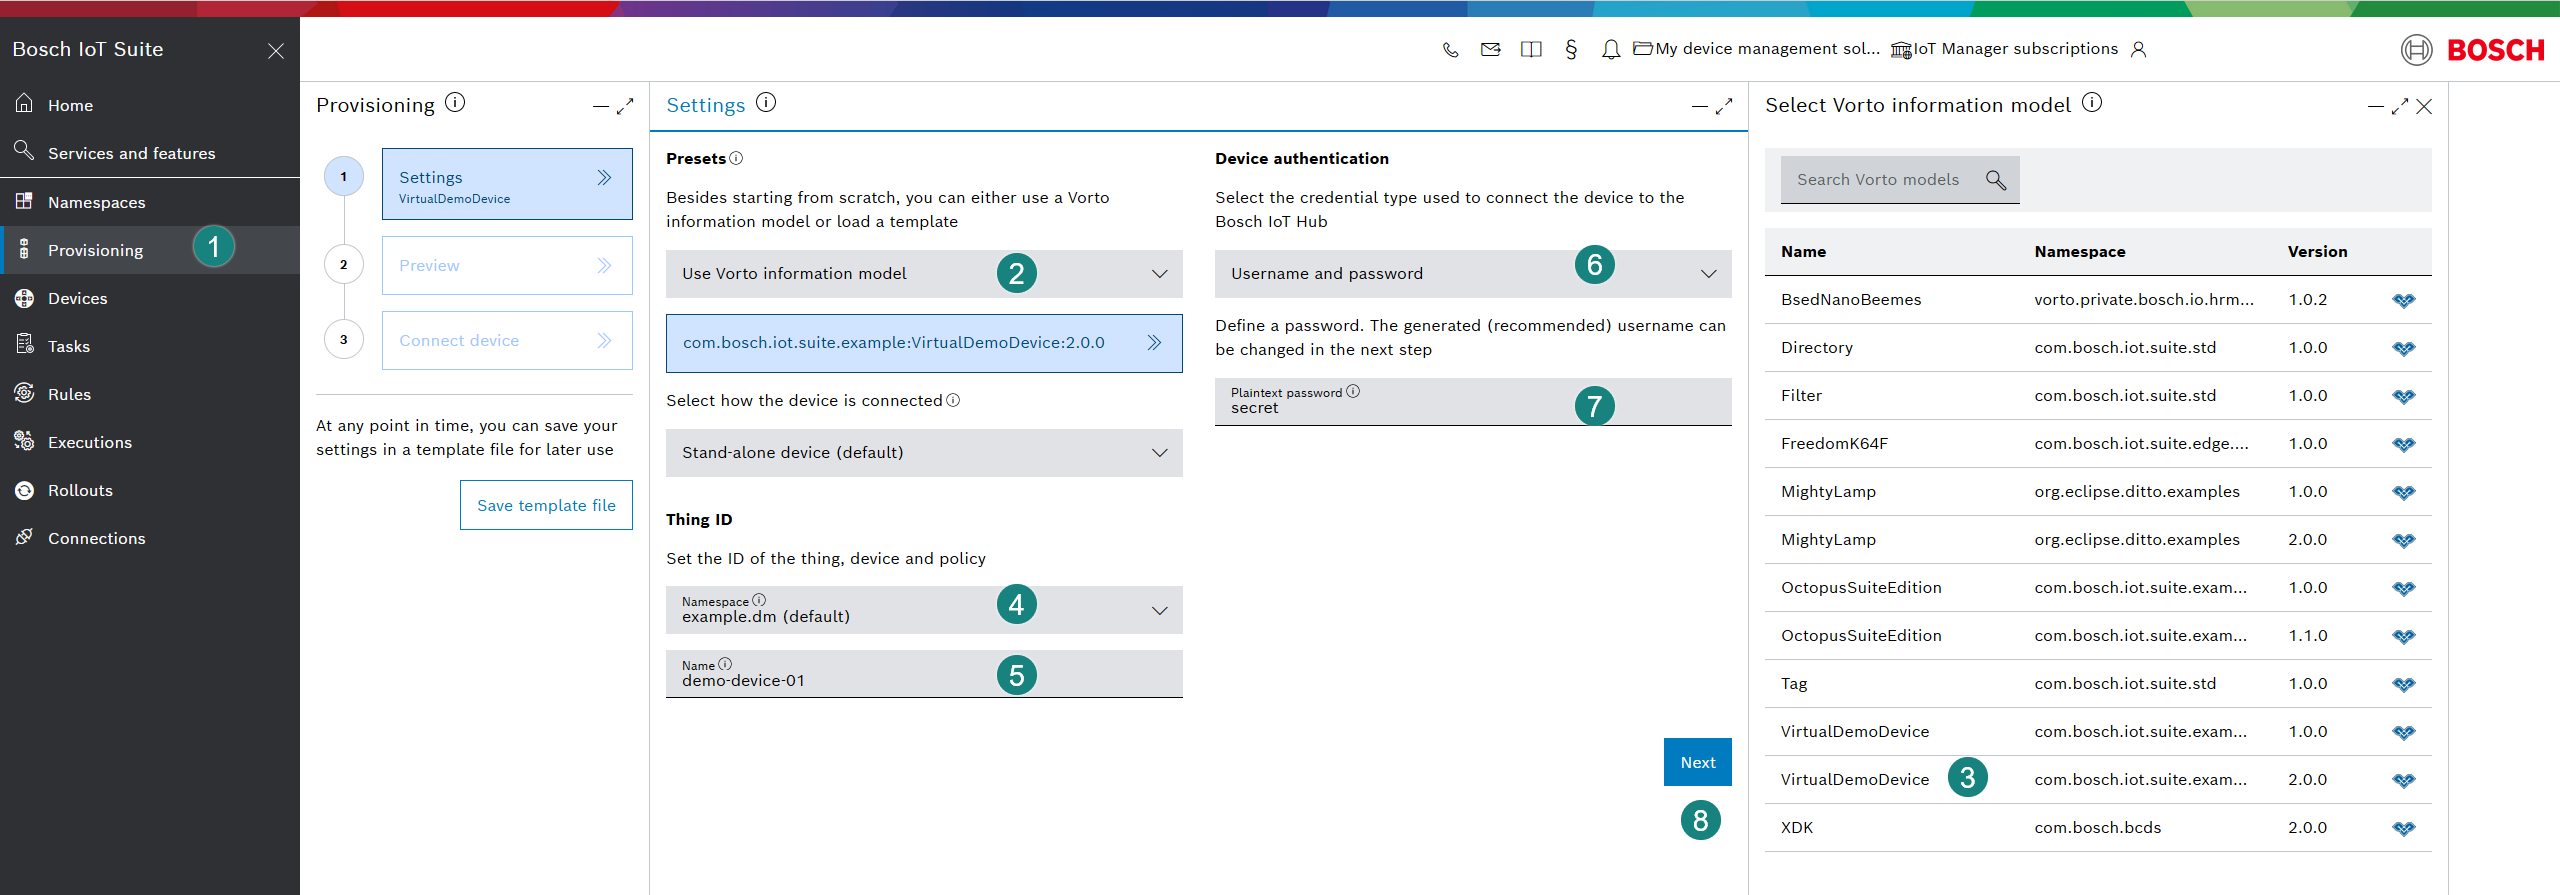
As you might need other options when you will later provision a different type of device, keep in mind that each info (i) icon on the user interface will provide further help instructions to guide you into the right direction.
The preview will indicate green markers if all entry values are valid.
In case something went wrong, you can inspect the Request body.
Proceed with Send request
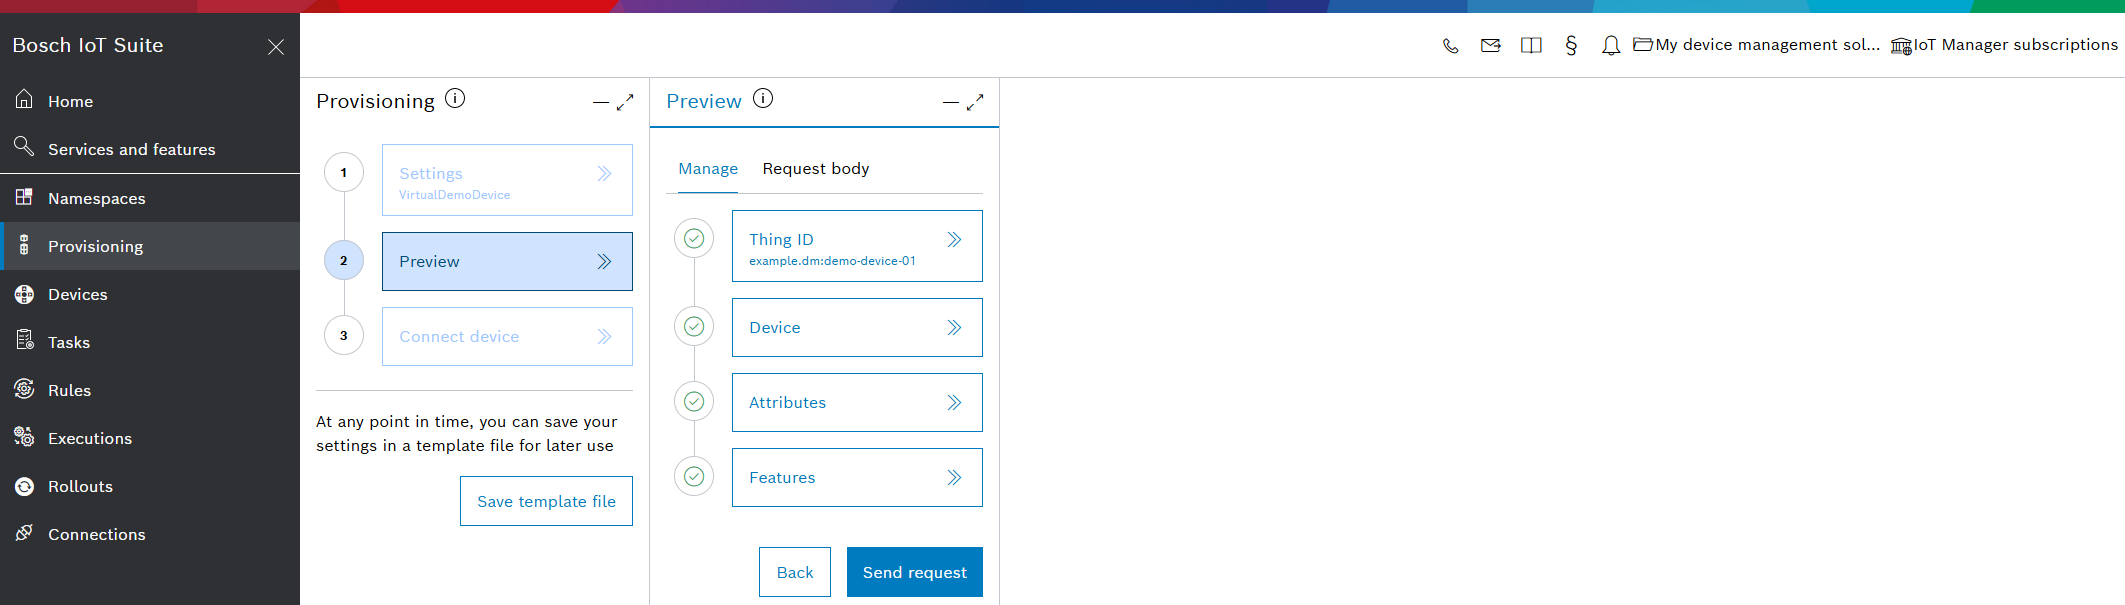
The Request body shows the thing in JSON notation. There, you can also see the prefilled features based on the Vorto model that was selected.
The Connect device view will indicate your successful request:
Further it presents useful links for setting up the device;
Remember the password or store it safely, as you will never see it again in plain text in the console;
The Go to device button will open the device details in the Devices section.

Summary - What is happening behind the scenes
Upon success, Bosch IoT Suite has registered the demo device and its credentials and a corresponding digital twin has been created with a default policy.
Manage your device
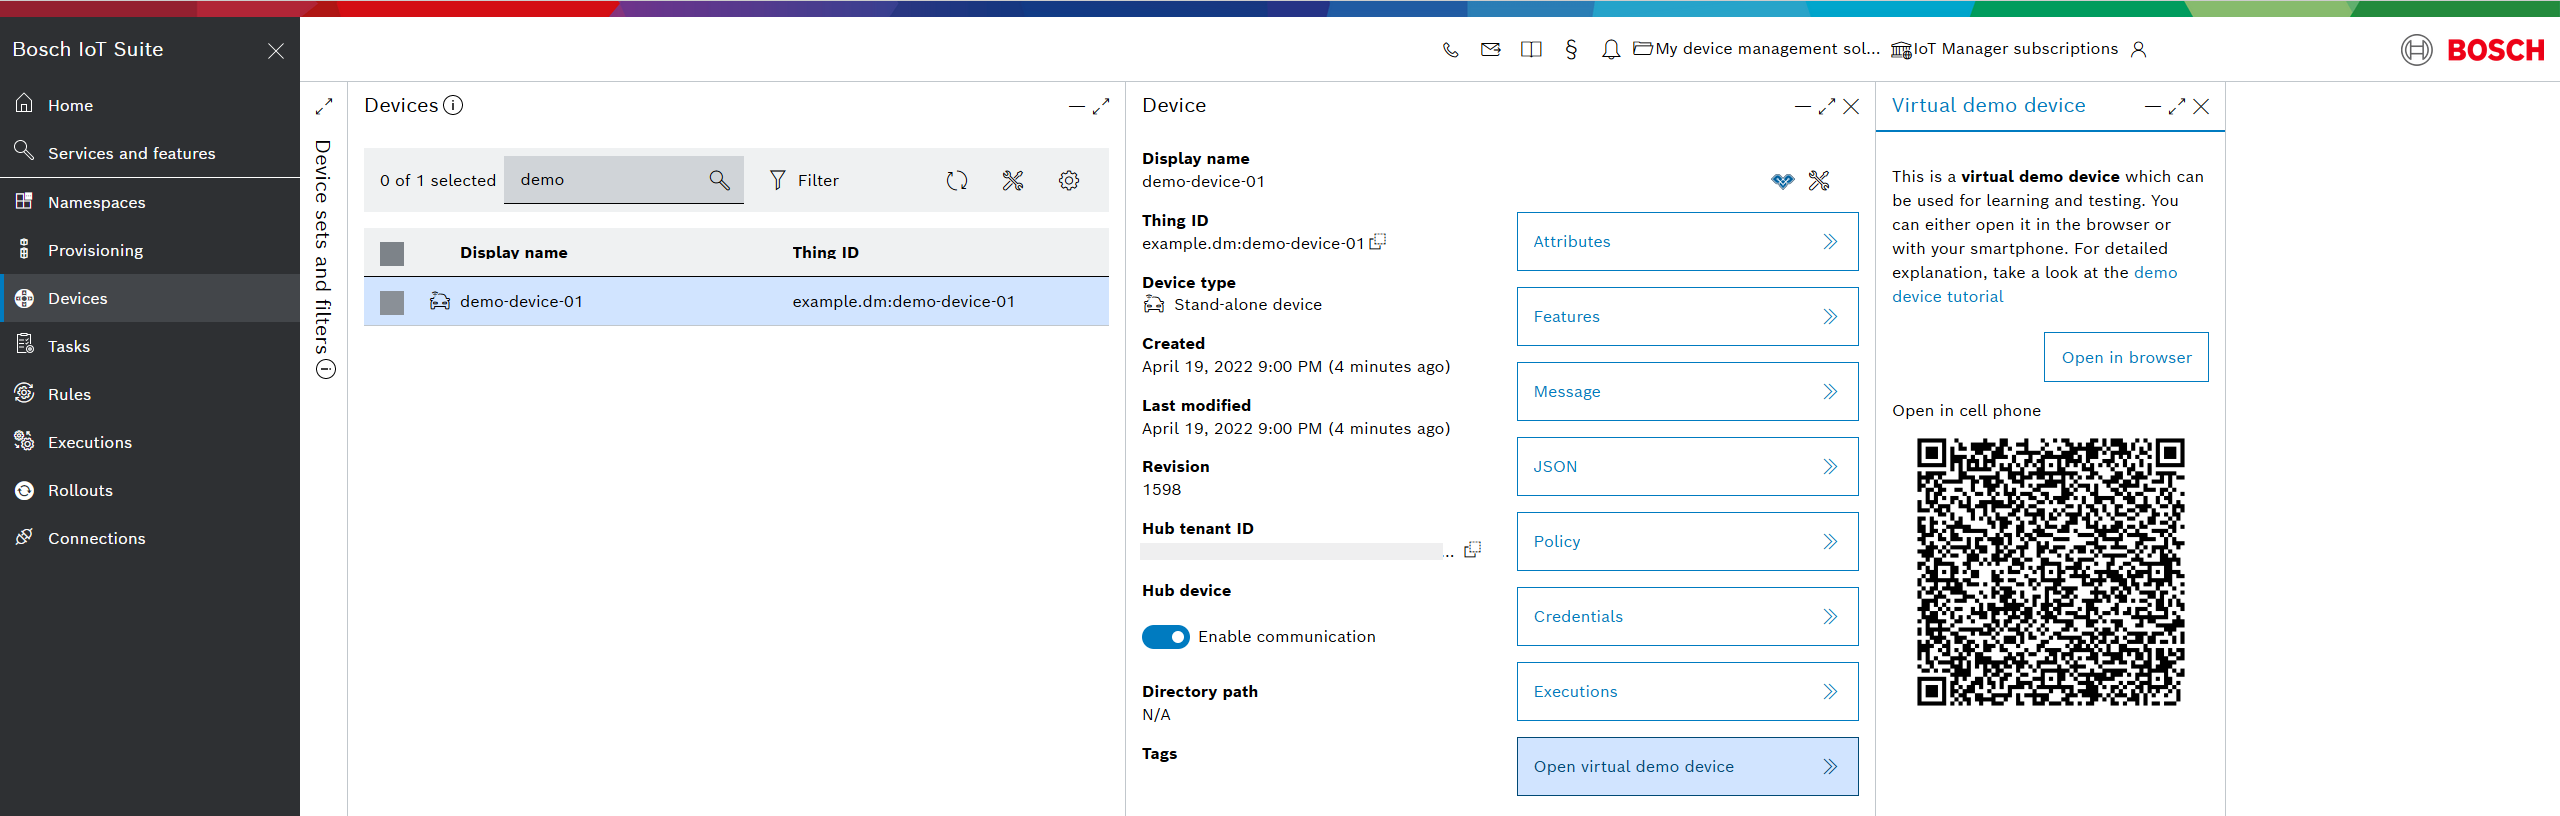
Open virtual demo device
Click the last section in the device's detail view. This opens a new column on the right side.
This view is not a standard feature for all things generated via the Vorto model, but only available for this demo device.
It allows to simulate the device in a Web browser or on your cell phone.
In case you prefer to open it in browser e.g. to easier share your screen with a customer, support, etc.: use a completely other browser or at least a private tab to show that the device is potentially in a complete other network.
The demo device and the Bosch IoT Suite UI will not share the same session nor the same authentication to our cloud service in the backend.
Instead,
the demo device simulates the hardware.
and the UI shows the device values, like your custom monitoring application could do.