Add a policy entry via developer console
Prerequisites
You have already provisioned a device via developer console.
You are empowered to change the specific policy. This is already the case after provisioning.
You have already created an OAuth2 client.
Goal
Given you have decided to empower your application using an OAuth2 client to have read permission on the thing and ALL sub-entities (e.g. attributes, features). The policy "my.namespace:octo-01" should be extended.
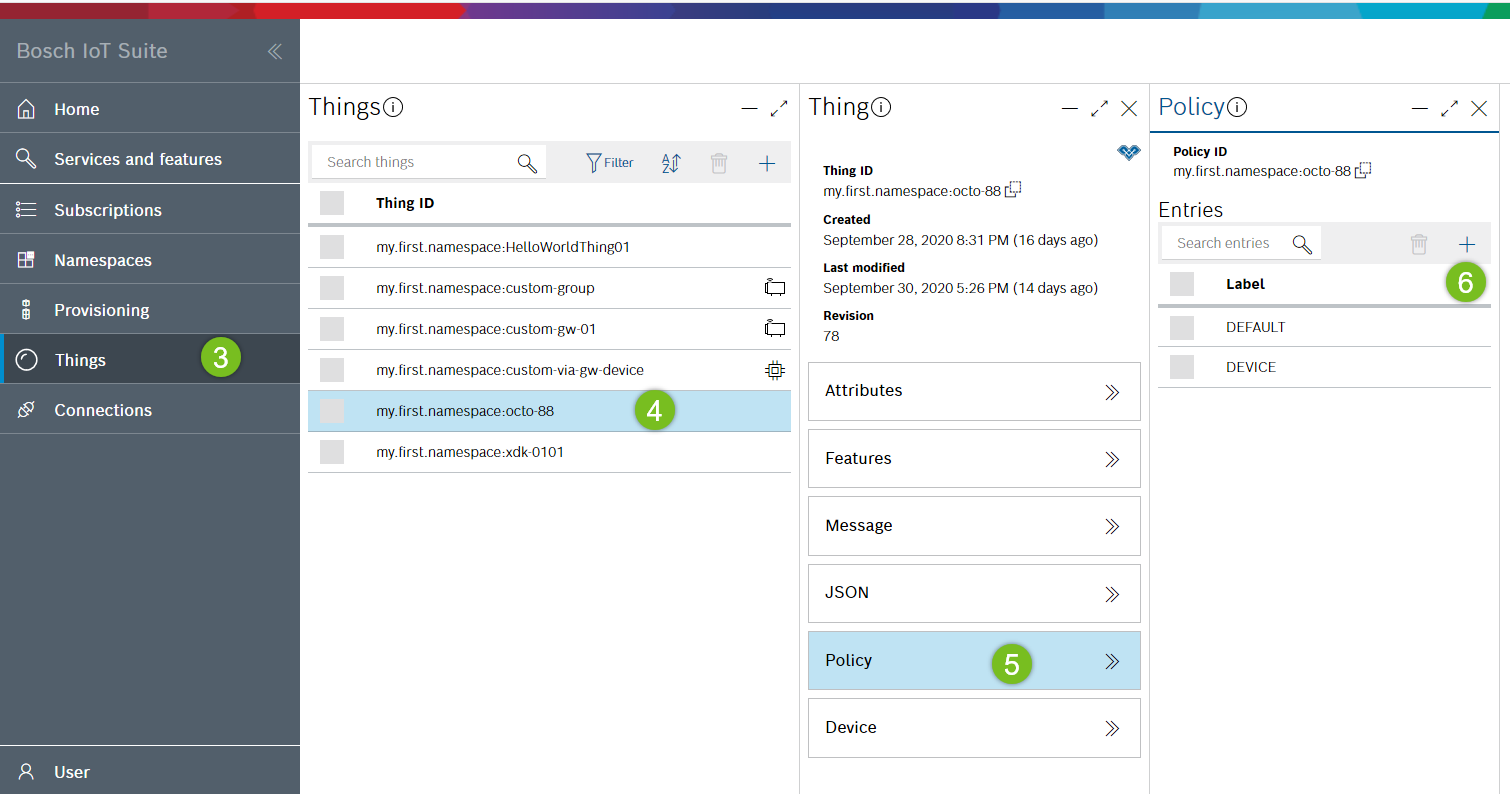
Navigate to the policy view of the developer console
Navigate to the Bosch IoT Suite portal https://accounts.bosch-iot-suite.com/subscriptions/.
Click Go to Developer Console for your subscribed instance.
Navigate to the Things section (left sidebar of the developer console).
Click the row of the thing "my.namespace:octo-01" whose policy of the same ID should be edited.
Click Policy.
Click + in the Policy view.
Add a new policy entry
Enter a label: e.g. MY_APPLICATION.
Add a subject - in this example, this is an OAuth2 client with a specific client scope that will be used by your application for authentication:
In the Suite portal , open the details view of your OAuth2 client and navigate to the listed client scopes having the format <prefix>:< ID >. Both values are used below.
Click + in the Subjects section and select Other in the context menu.
Select the issuer custom.
Enter the custom issuer: service . This is the prefix of your OAuth2 client scope.
Enter an ID - this is the ID of your OAuth2 client scope: e.g. iot-things-eu-1:xxx_things/full-access .
Enter a type: e.g. suite-auth.
Click OK.

Add a resource - in this example the entities for which read permission should be granted are the thing itself and all its sub-entities:
Click + in the Resources section.
Enter the path thing:/
Check the Grant checkbox of the Read permission.
Click OK.

Click Save.
Test your work
Now, let's test whether the application using the specific OAuth2 client can read the thing (and all its attributes and features).
For this purpose, you can operate the developer console in the mode "act as application" where the Bearer token of the specific OAuth2 client is used:
Navigate to the User section (left sidebar of the developer console).
Click Act as application.
Follow the link to your OAuth2 clients in the Suite portal.
Use the OAuth2 client from above and copy its token to the clipboard.
Paste the copied OAuth2 token into the related field of the developer console.
Click Authorize.
Now, you should see the thing with the assigned policy in the Things view. Also all its attributes or features should be visible.
However, as in Add policy entry > step 3d you have assigned read permission only, it should not be possible to change the thing. Thus, try adding an attribute, which should fail, as such an action requires write permission.
Further, you shouldn't be able to see a policy of the thing, because you did not assign read permission to the policy:/ subject.
The user icon in the left sidebar of the developer console is now colored, to indicate that the authorization of the user is temporarily "overridden" by an OAuth2 client.
As soon as you are done with testing, you might want to return to the context of your logged in user.
Navigate to the User section (left sidebar of the developer console).
Click Stop.
Henceforth, an application identifying with the specific OAuth2 client can read the thing, and all its attributes and features.